SAML
SAML profile allows administrators to create profiles with predefined or custom attributes as per requirements.
Creating a SAML Profile
-
Log in to the Safous admin console using admin credentials.
-
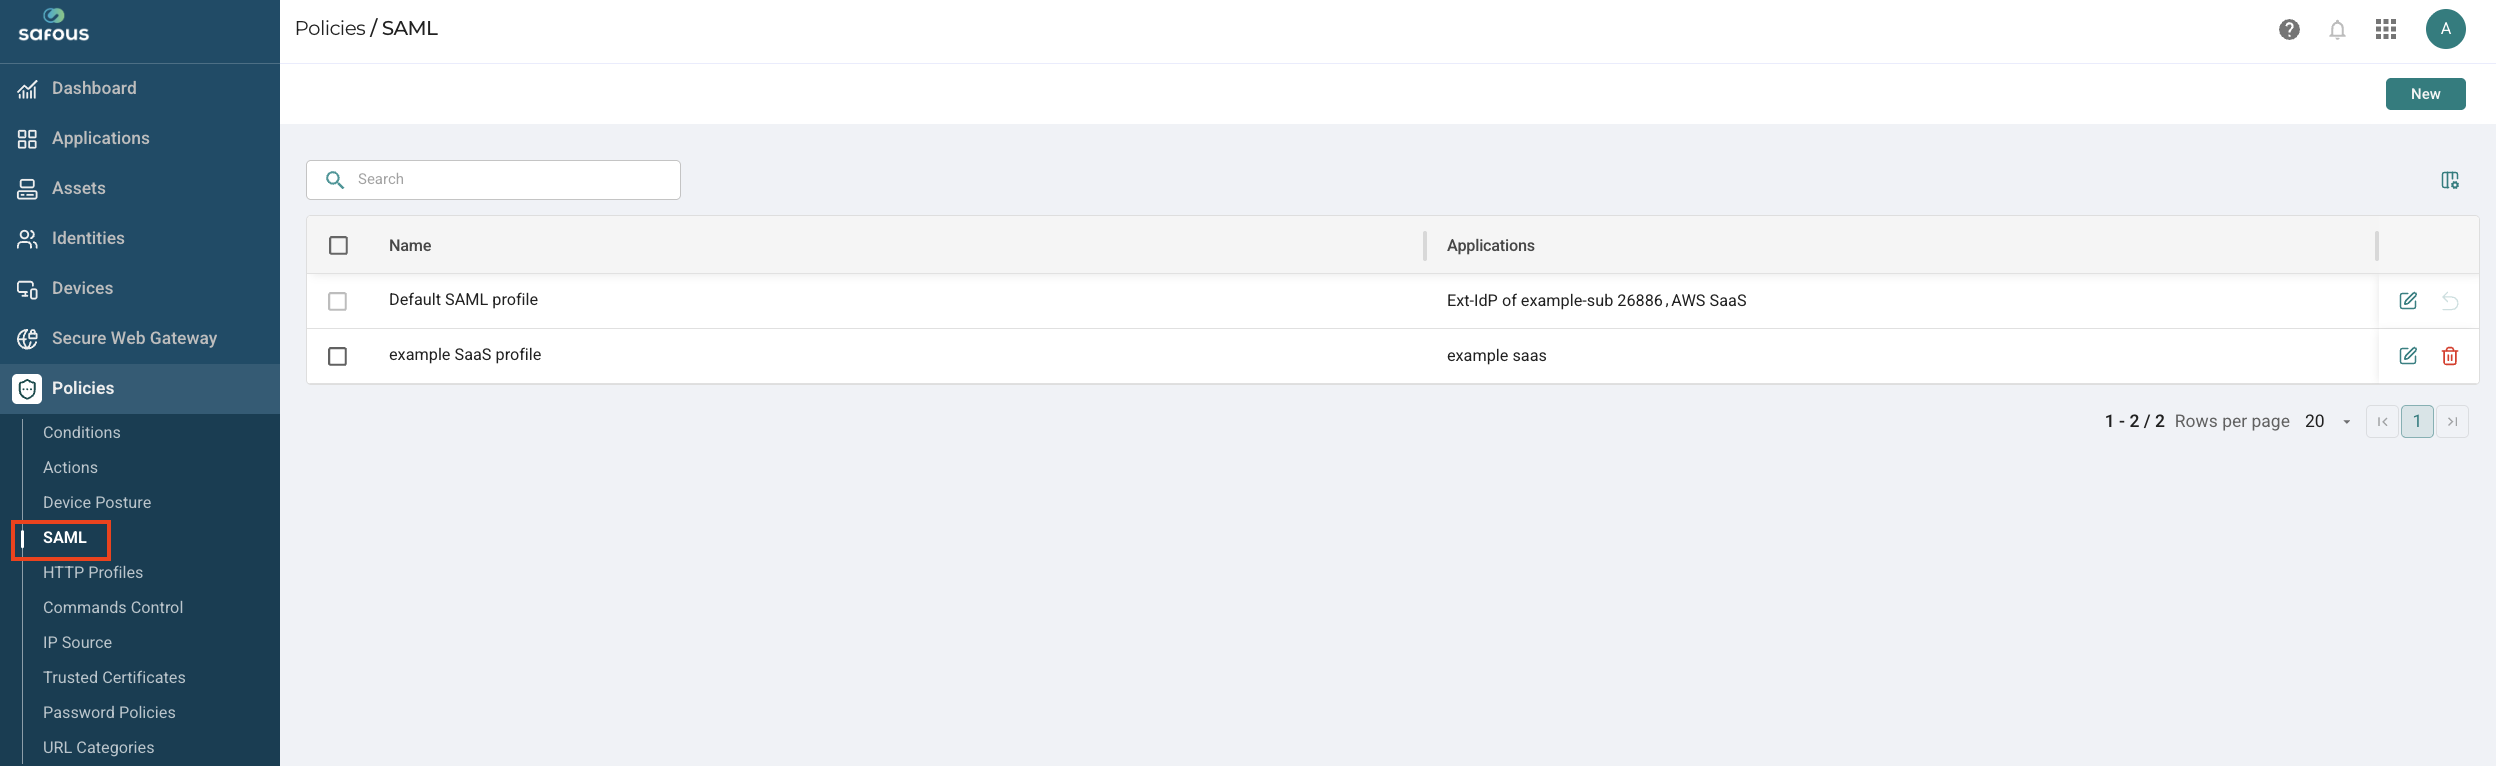
Navigate to the Policies > SAML page.
-
Click New to create a new SAML Profile.
-
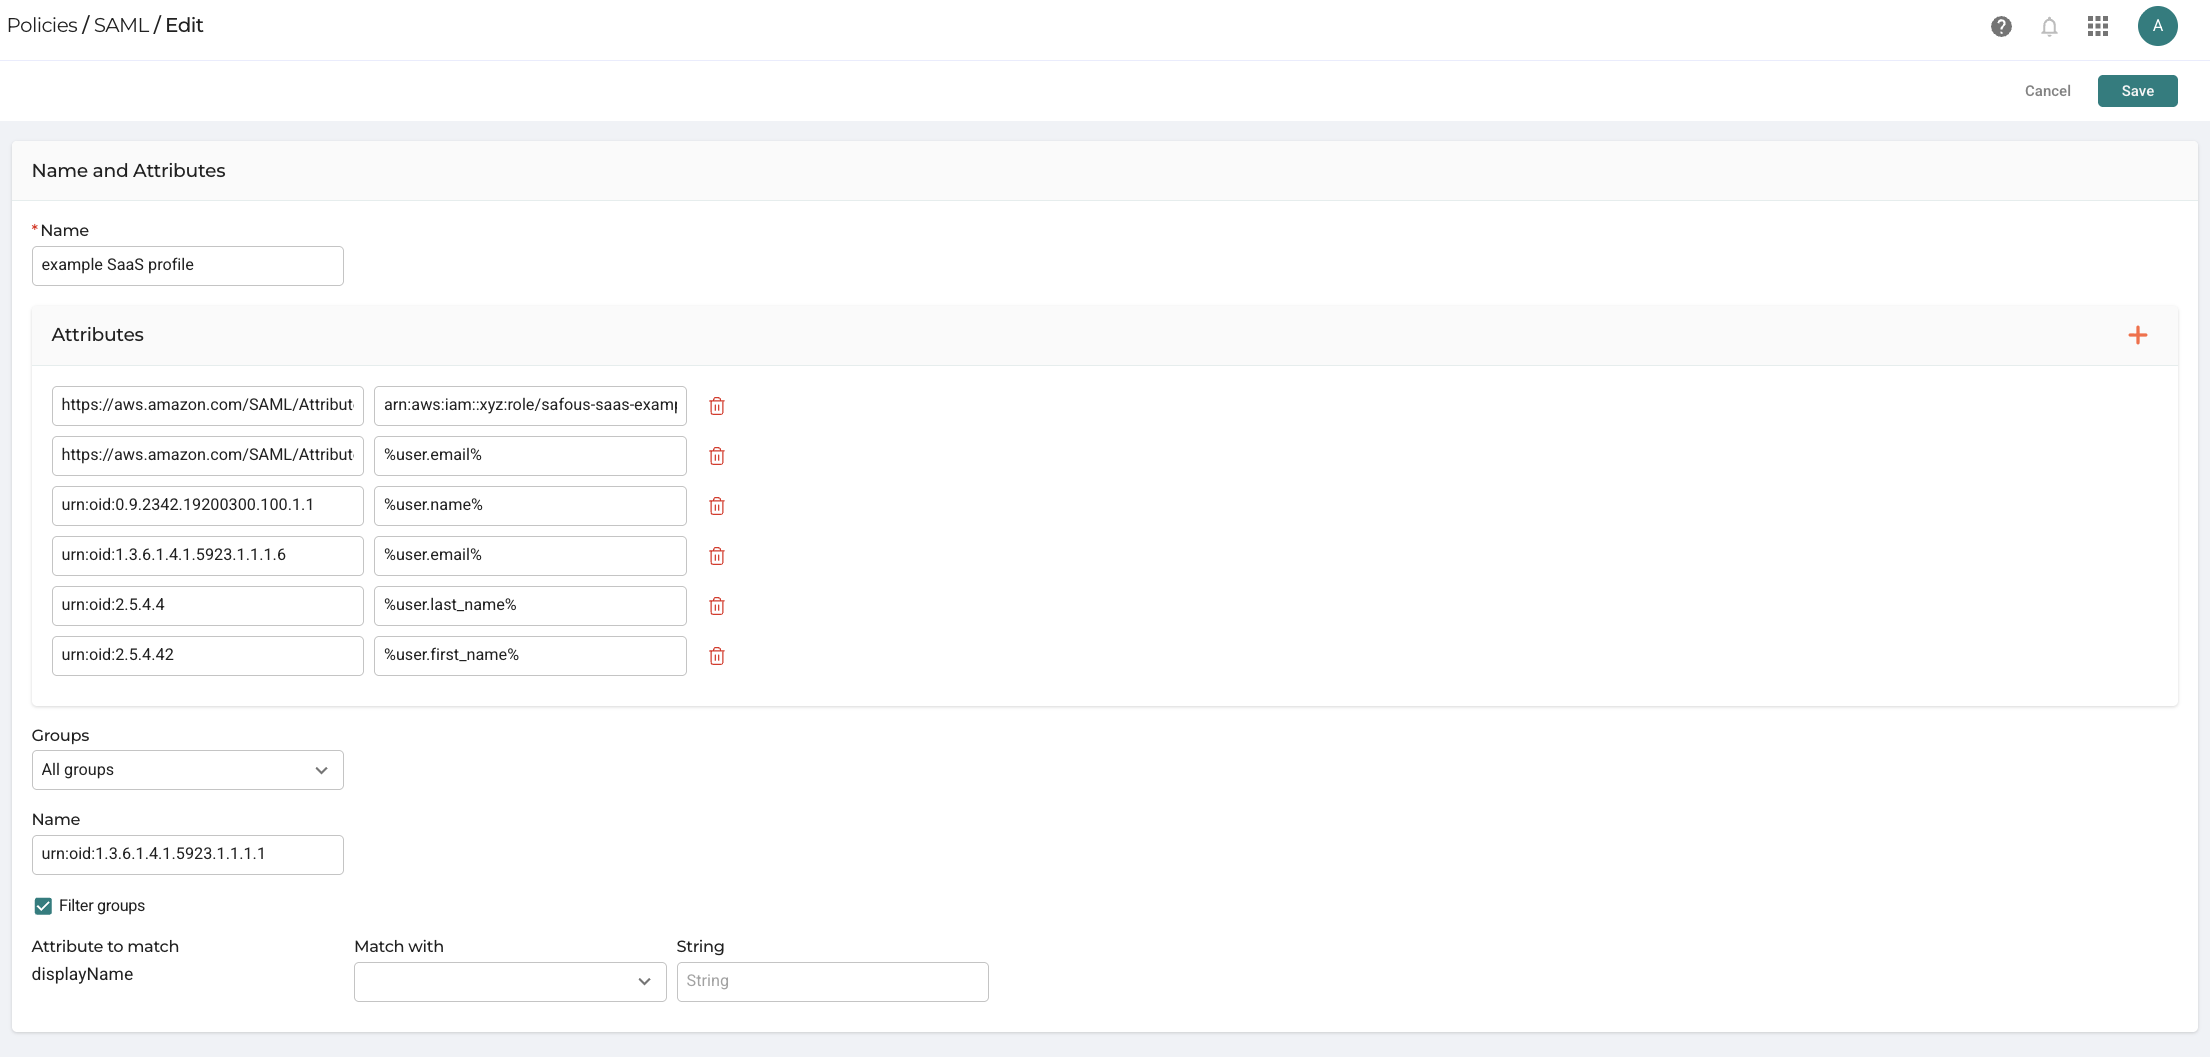
In the new window, enter the following information:
-
SAML Profile Name: Enter a descriptive name for the SAML Profile.
-
Attributes: Enter the list of SAML attributes you want to send in the SAML assertion. The attribute must be defined with key-value pair.
-
Key: The identifier of the attribute. Can be a well-known OID or a custom name as per requirements of the SP.
-
Value: The value of the attribute. Can be set to static value or dynamic value based on the user's information. See the User Attribute Reference section for more details.
-
-
Groups: Send the list of groups the user belonged to as a SAML attribute. If user is not part of any group, this attribute will be omitted in the SAML assertion.
-
None: No group will be sent in this attribute. This will essentially omit this attribute from being sent in the SAML assetion.
-
All groups: Send the list of all groups the user belonged to. This includes groups that are not assigned to this application.
-
Groups assigned to the application: Send only the groups that are assigned to the application. Groups that the user belongs to but are not assigned to this application will not be sent.
-
-
Name: The identifier of group attribute. Can be kept as is with the well-known OID or you can enter a custom name for the group attribute.
-
Filter Groups: Dynamically filter the list of group to be sent in the SAML assertion based on the group name. Can be filtered with string that contains the group name, suffix, or prefix.
-
Click Create to save the new SAML Profile.
-
-
Applying the SAML Profile to an Application
The SAML profile must be associated with an application to federate users based on the defined SAML Profile.
-
Navigate to the Applications page.
-
Create a SaaS application or edit an existing one to apply the SAML profile.
-
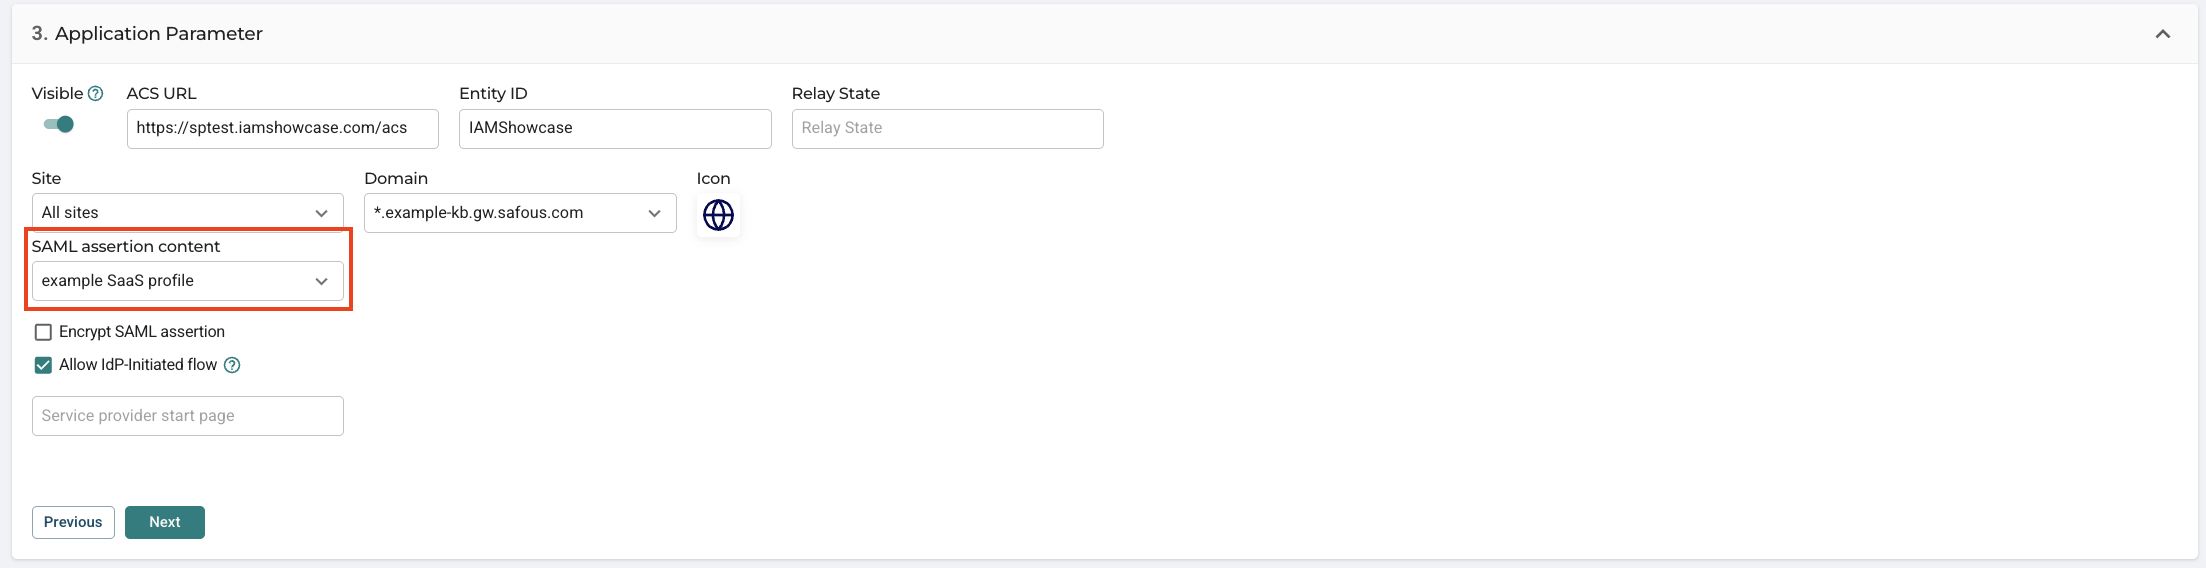
Scroll down to the Application Parameter section of the application.
-
Click the SAML Assertion Content drop-down menu, and select the SAML profile you created.
-
Save the application.
By following these steps, you can create a SAML Profile, set SAML attributes based on that profile, and enforce those attributes on a SaaS application, ensuring that the correct SAML attributes are sent as per the SP's requirements.
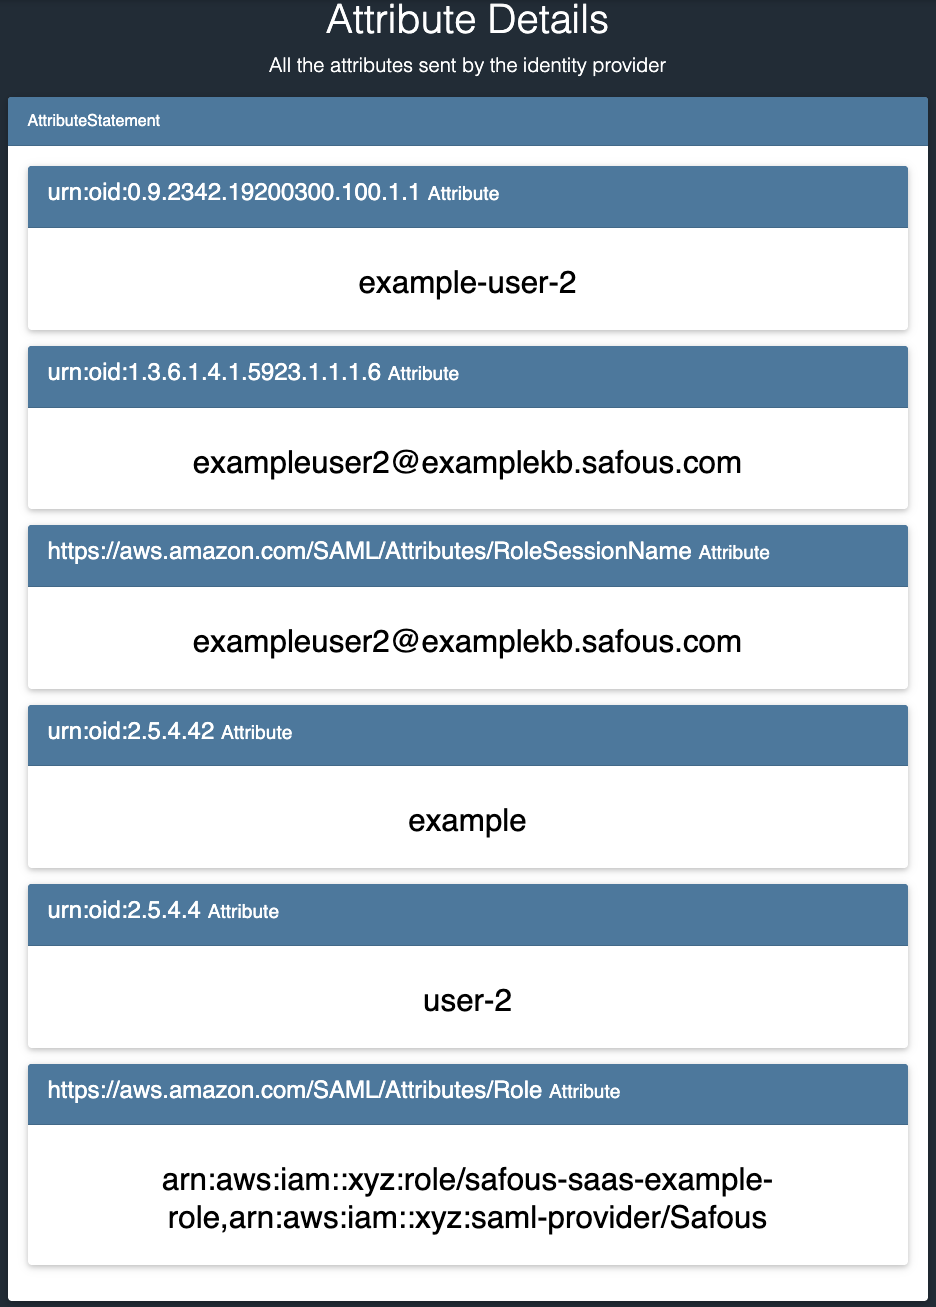
Example SAML Assertion Result
User Attribute Reference
You can dynamically set the value for a SAML attribute based on the user's information. This can be done by specifying the user's attribute with this syntax:
%user.attribute%
The list of available attribute are listed below:
- User name:
%user.name% - Email:
%user.email% - Phone number:
%user.phone_number% - First name:
%user.fist_name% - Last name:
%user.last_name%
If the value of an attribute for that user is not defined, the attribute won't be sent in the SAML assertion.
For example, even if you have specified the phone number attribute to be sent, but a certain user's phone number is not defined, then the phone number attribute is omitted from the SAML assertion of that user.