Add group
This article serves to guide you on how to add a new Group.
-
Navigate to Settings > ZTNA > Accounts > Groups.
-
Click the "New Group" button to create a new account group. You will see this page:
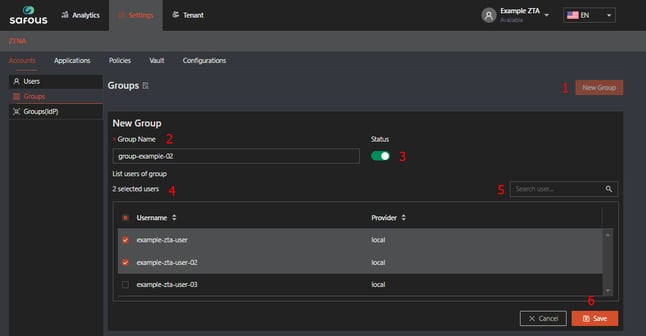
Explanation of the page:
- Button for creating a new group.
- Group name: This is a required field and must be unique among other groups.
- Status: This is an optional toggle option. By default, it will be enabled (green).
- List Users of Group: This is required. You just need to check/tick the list in the box provided on the left side.
- Search Box: This is for searching for a specific user, which is very helpful if you already have a lot of users.
- Save Button: Use this to submit the new group.
-
If all information is correct, click the "Save" button. A pop-up notification indicating that the group has been successfully added will be shown.
