Remote Assistance
Background
Remote Assistance is the ability to securely connect to a user’s device to provide real-time support, troubleshooting, and guidance. Organizations can resolve technical issues faster and minimize downtime by allowing authorized support personnel to remotely view or control user devices when assistance is required.
The Remote Assistance feature improves operational efficiency by enabling IT teams to diagnose problems, perform maintenance, and guide users without requiring physical access to the device. Once Remote Assistance is enabled, Administrators can select which users can provide remote assistance and manage how remote sessions are approved.
Prerequisites
-
The Remote Assistance feature is functional only when the Safous ZTA agent is installed and running on the user's device, as indicated by the icon in their system tray.

-
The current Remote Assistance feature only supports remote sessions for Windows devices.
Basic Steps
Configuring Remote Assistance includes these three steps:
- Enabling the Settings for Remote Assistance on the Global Settings Screen.
- Configuring the Remote Assistance screen to setting the Assistants and Recipients.
- Starting a Remote Assistance session.
All these steps are described below:
Enabling Remote Assistance Feature
Before configuring remote assistance, you must enable the remote assistance feature in the admin console first. By default, the remote assistance feature is disabled.
To enable the Remote Assistance feature, follow these steps:
-
Access the Global Settings (Admin console > Configuration > Global Settings) screen. In the “Global” section, find option Enable remote assistance.
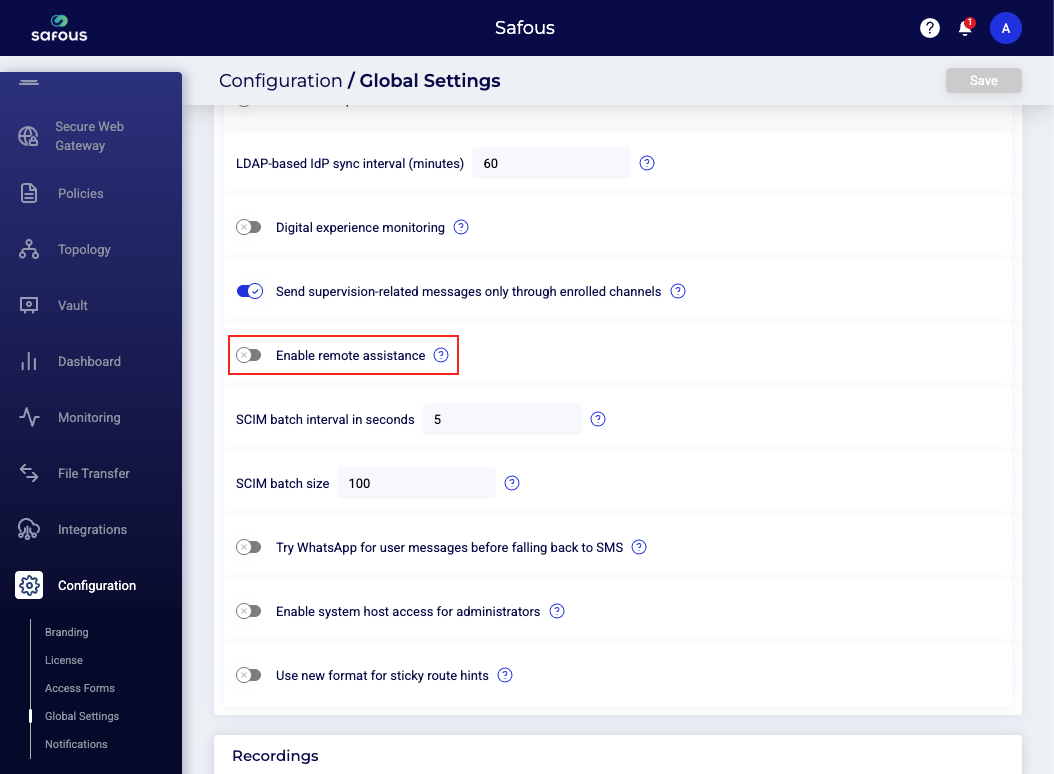 note
noteYou can search specific settings using search bar on the top right in Global Settings screen.
-
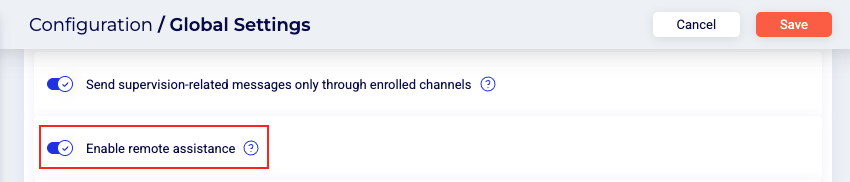
To enable remote assistance, toggle the “Enable remote assistance feature” button to on.
-
Once done, click Save button on the top right of the screen.
-
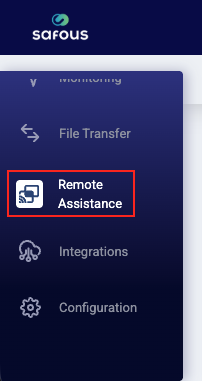
After enabling Remote Assistance feature, a new “Remote Assistance” menu appears in the Admin Console sidebar.
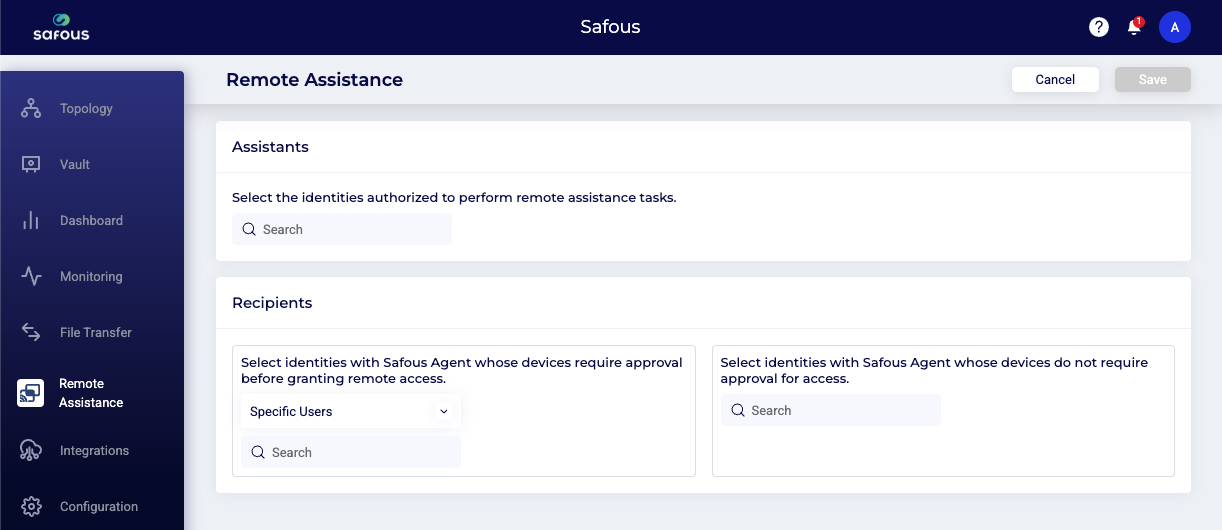
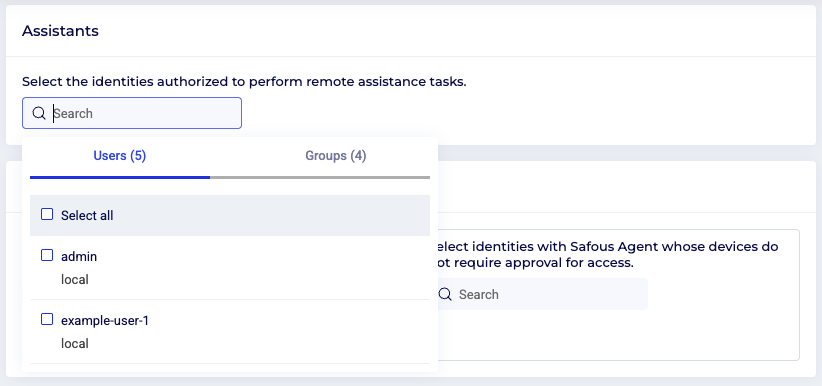
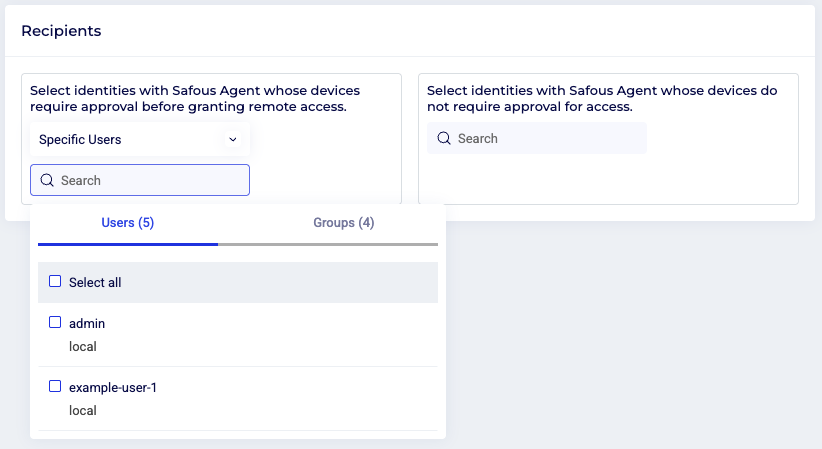
Configuring Remote Assistance, Assistants and Recipients
To configure the Remote Assistance feature, Administrators only need to define which users are assigned as Assistants (users who can provide remote support) and Recipients (users who can be assisted remotely”). Administrators can assign as many users as needed. Assignments can be configured for specific or multiple users, specific or multiple groups, or a combination of both.
To configure the Remote Assistance Assistants and Recipients, follow these steps:
-
Navigate to the Remote Assistance screen (Admin console > Remote Assistance).
-
In the Assistants section, click on the search field. Then, select the user or group in the dialog box that will be allowed as a assistants.
-
In the Recipients section, click the search field and select the user or group that will be allowed as a recipient.
There are two different columns. The left column is for users or groups that require approval, and the right column is for users or groups that do not require approval. In the Remote Assistance feature, approval is requested from recipients before assistants can remotely access their devices.
-
Once done, click Save button on the top right of the screen.
Starting a Remote Assistance session
The following steps explain how an Assistant and a Recipient request, approve, and start a Remote Assistance session using Safous Remote Assistance feature.
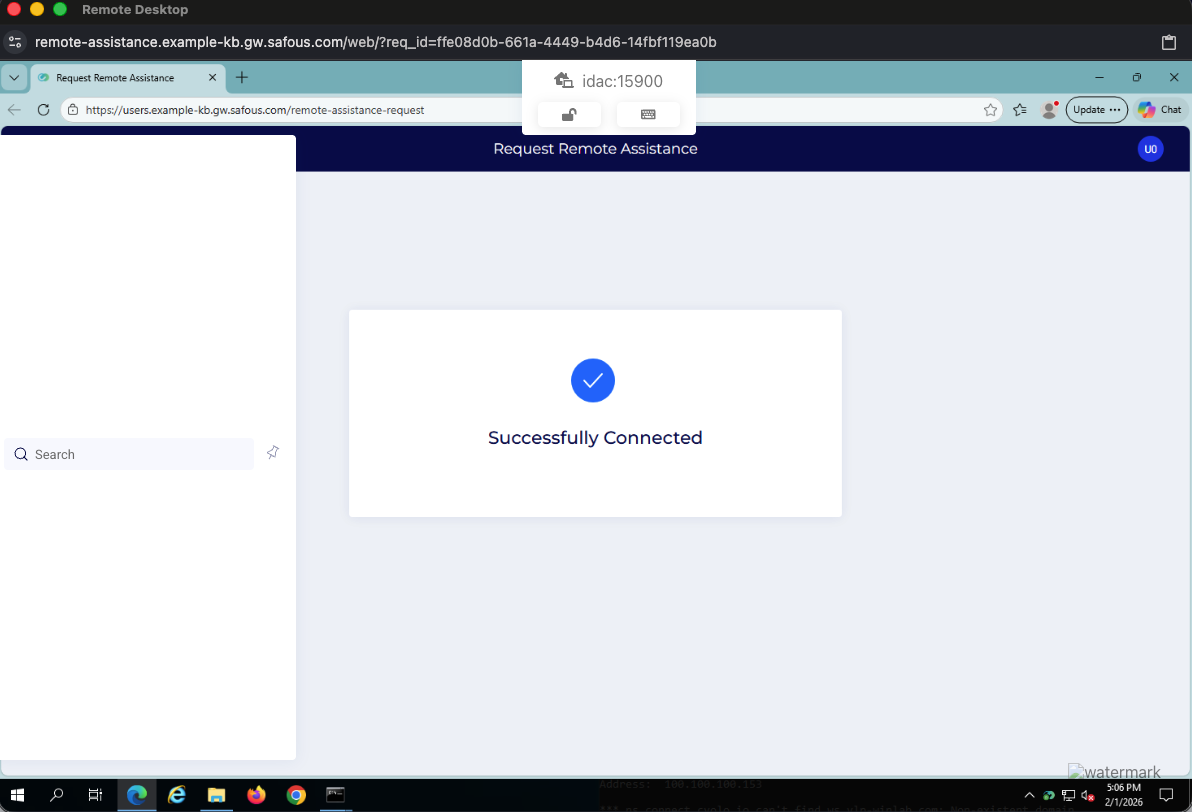
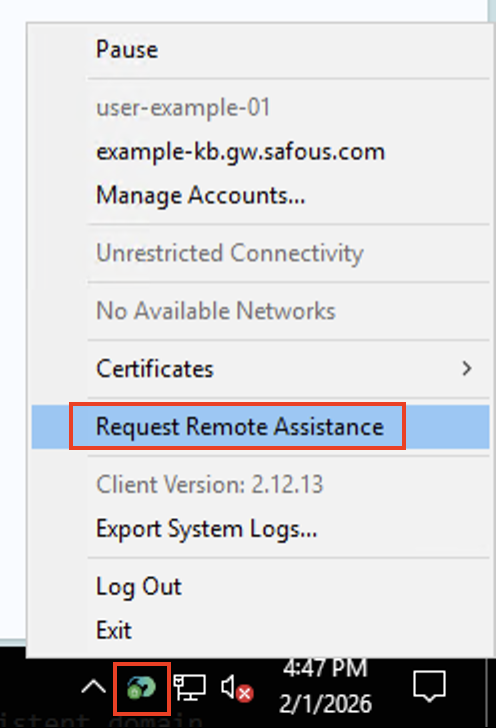
Step 1: Request Remote Assistance (Recipient)
-
Sign in to App Gateway using the agent. For agent installation and connection steps, refer to the related article here.
-
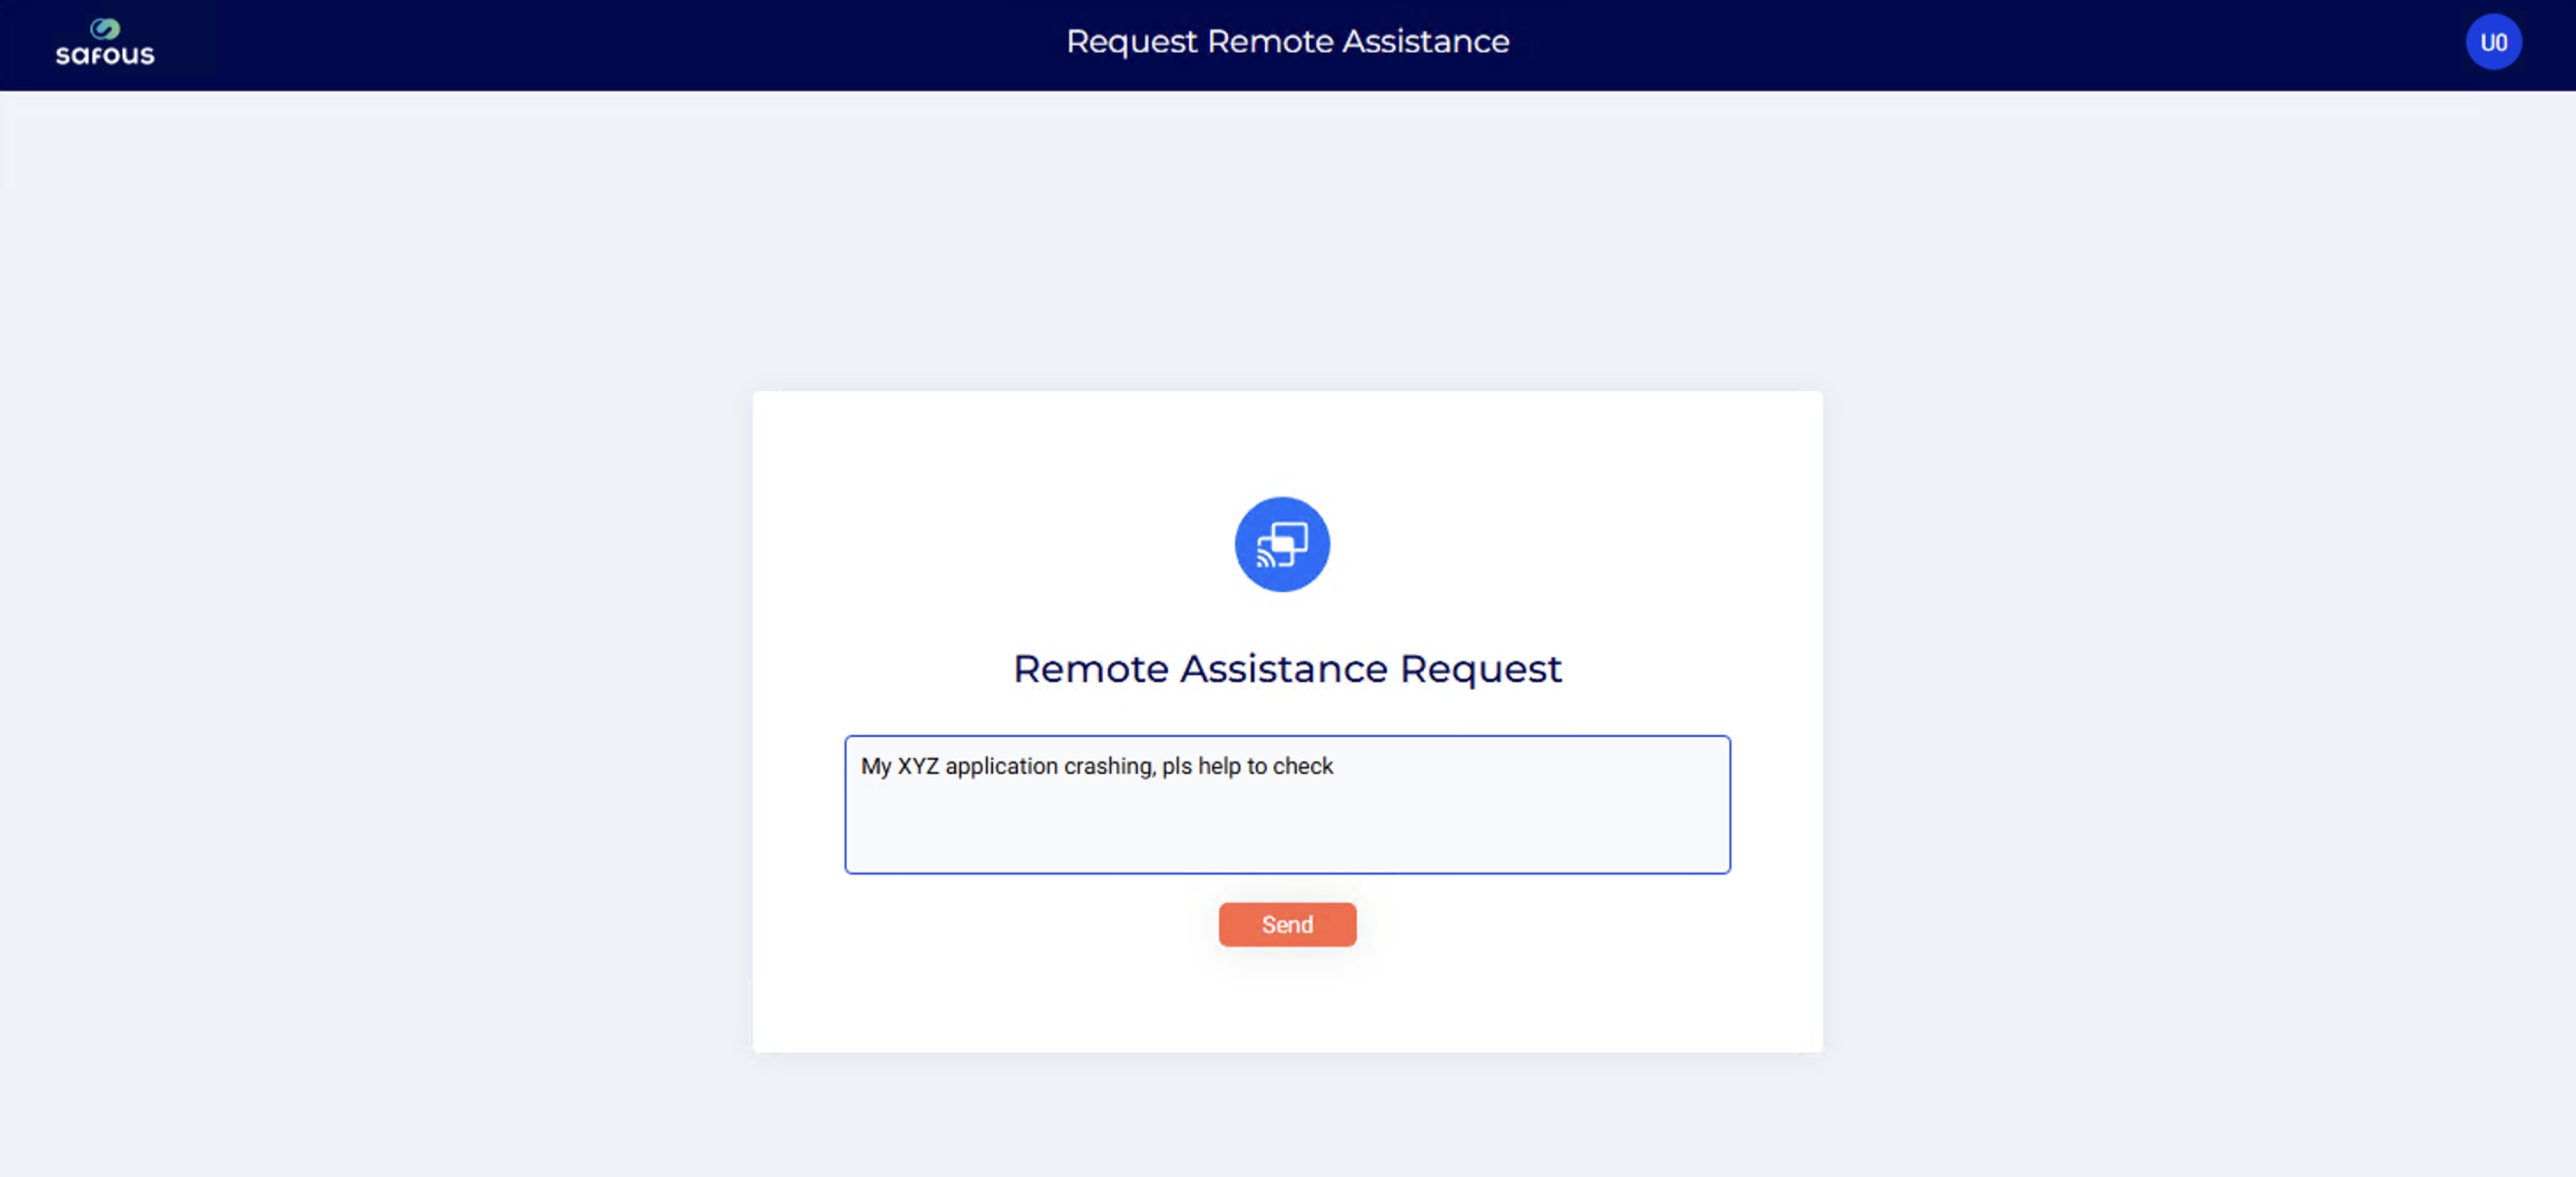
Right-click the agent icon in the system tray (notification area) and select Request Remote Assistance.
-
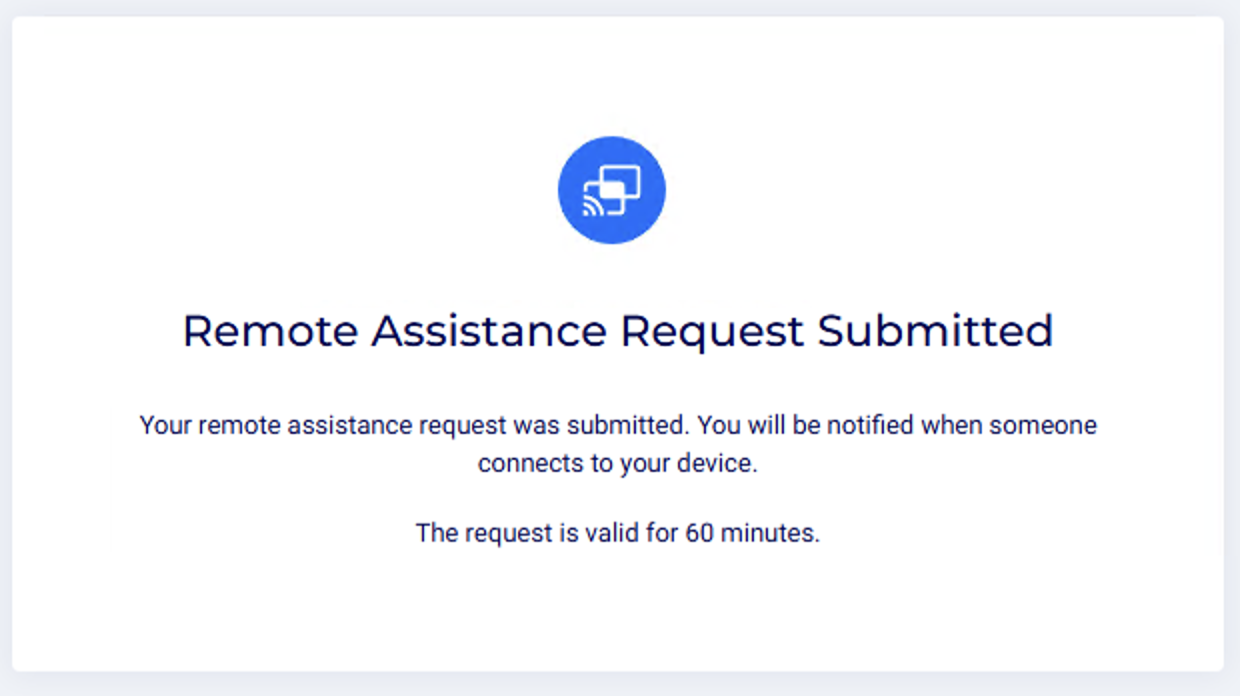
The User Portal page opens automatically on the recipient’s device. Set a custom message if you want, then click Send to submit the request.
Step 2: Open the Request (Assistant)
-
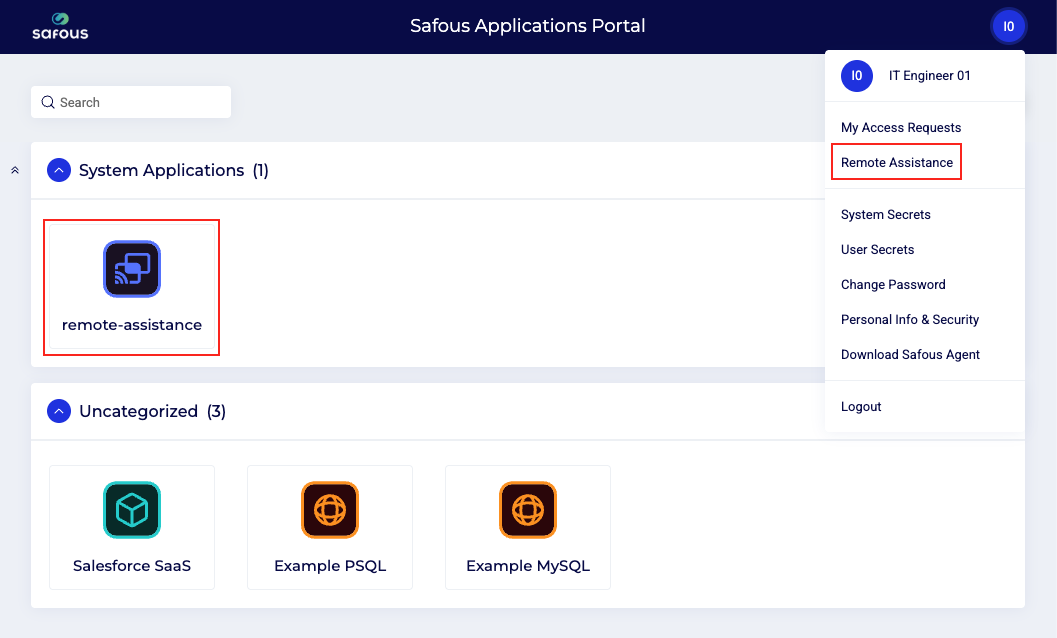
Sign in to the App Gateway User Portal.
-
Open the Remote Assistance application. This application is visible only to users assigned as Assistants.
-
The list of submitted Remote Assistance requests is displayed.
-
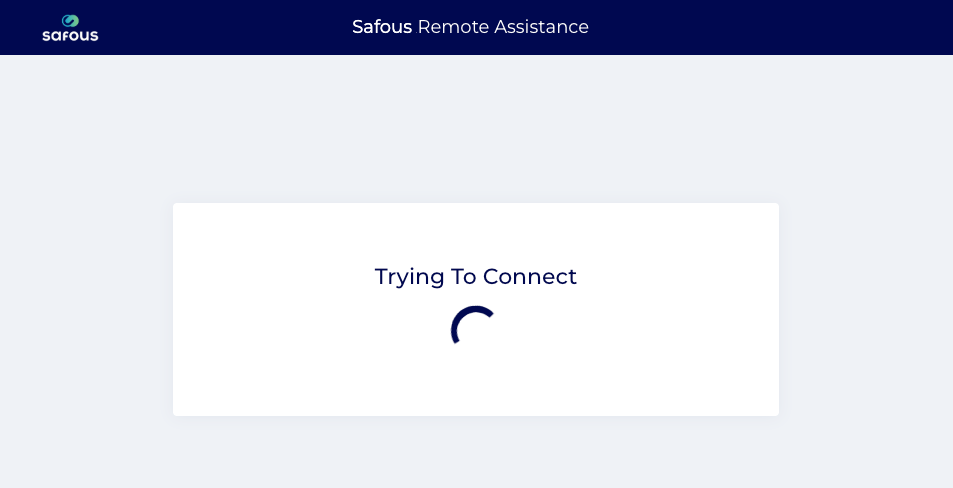
Click Connect to start the session, or Delete to deny the request.

-
A new browser window opens and waits for Recipient approval.
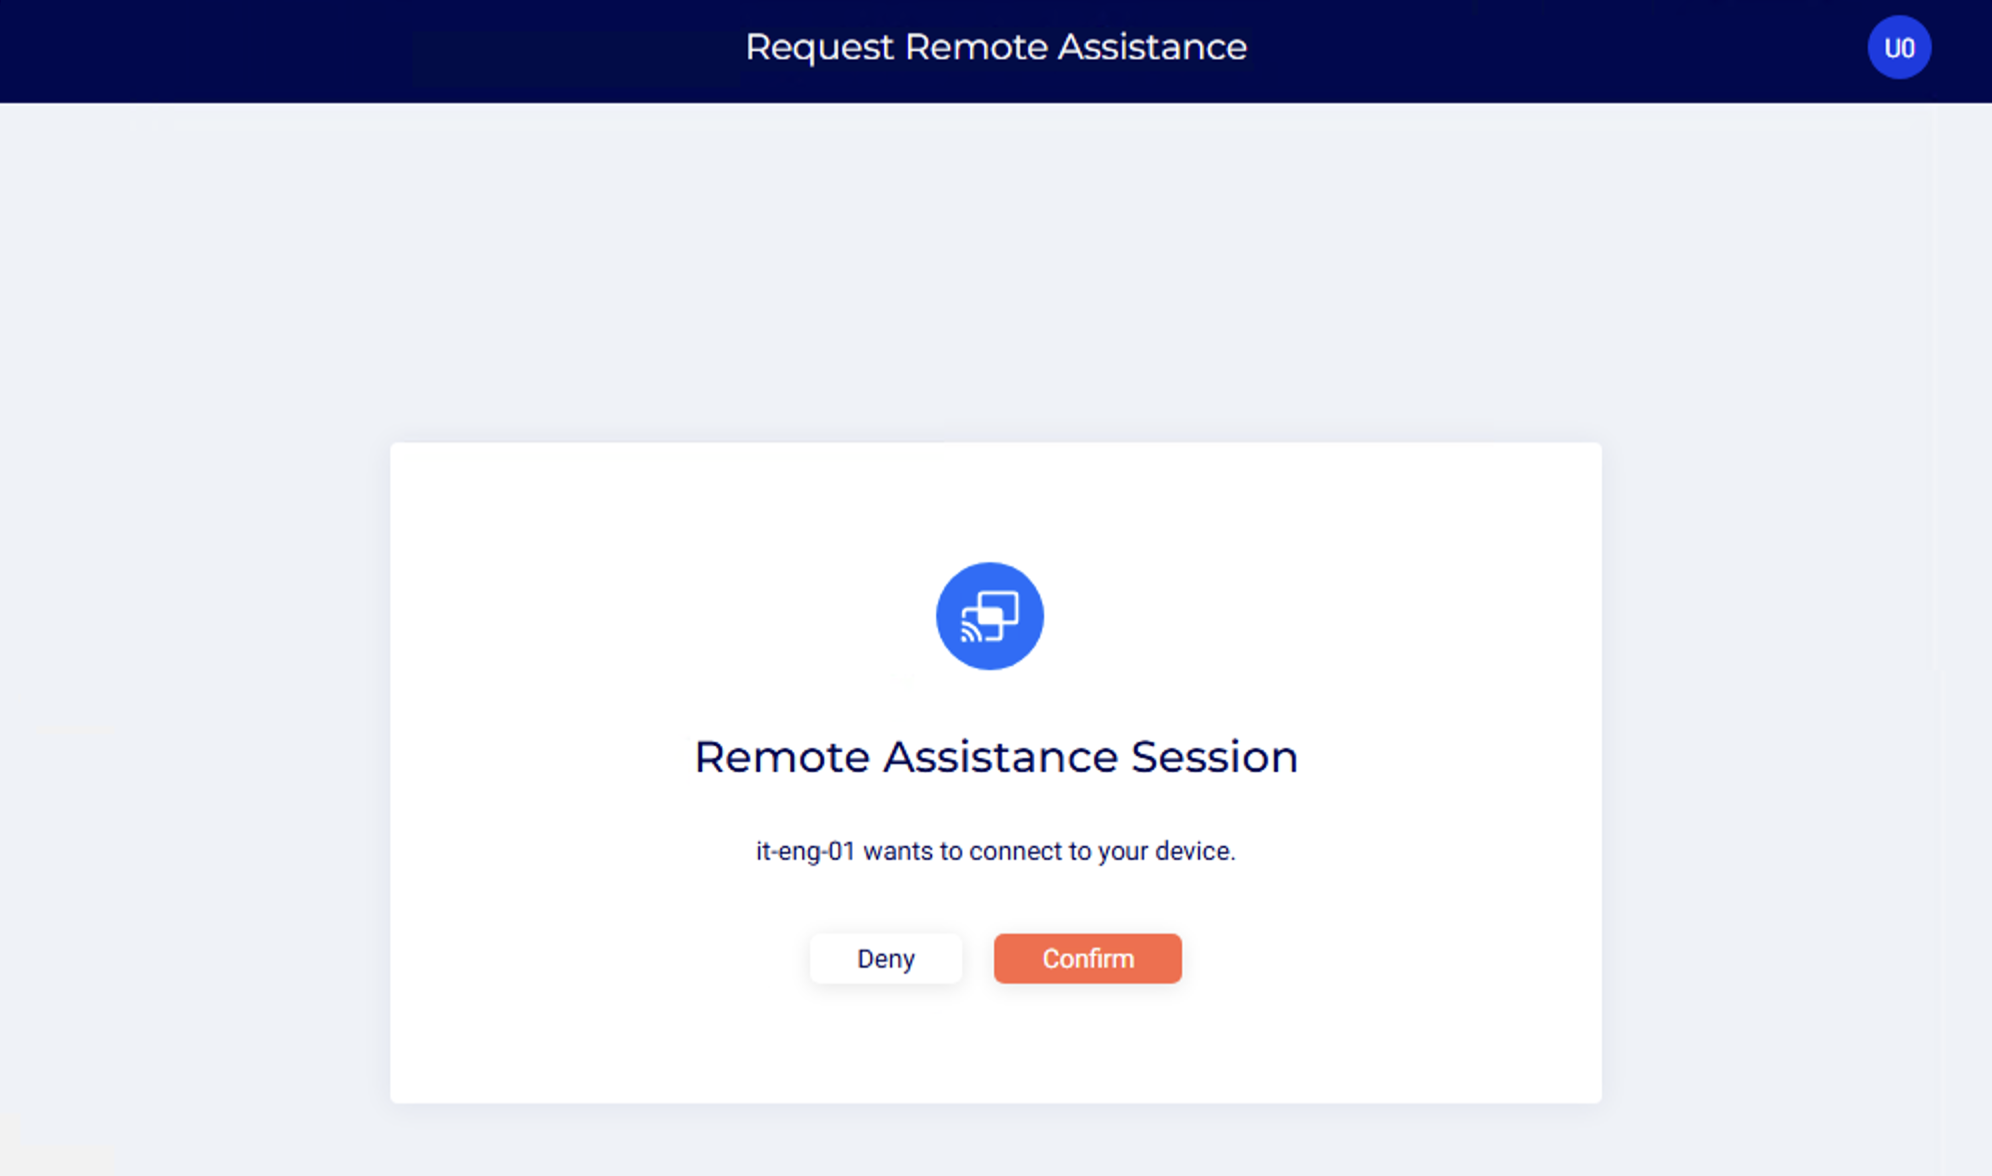
Step 3: Approve the Session (Recipient)
-
On the previously opened User Portal page, review the Assistant’s username requesting access.
-
Click Confirm to approve the remote session. A confirmation prompt may also appears in the **system tray (notification area) **. Click Confirm if prompted.
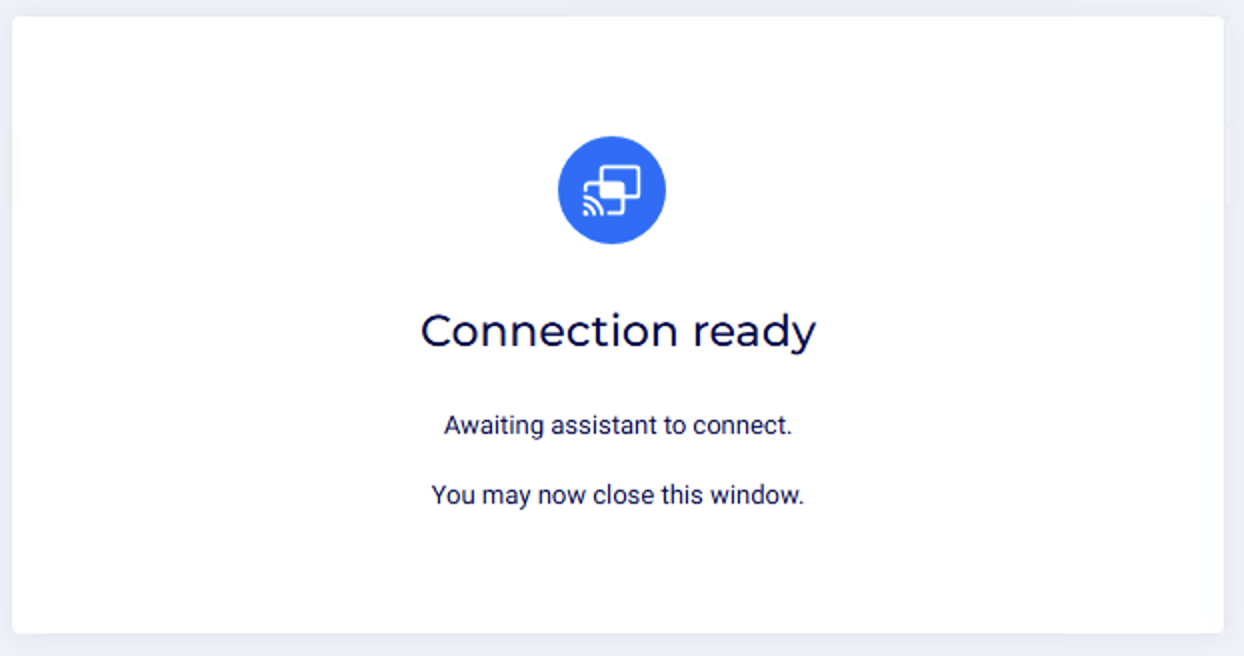
Step 4: Start the Remote Session (Assistant)
-
Once the Recipient approves the request, the browser window shows a Connection Ready message.
-
Click Connect to start the remote session