Sub-Tenants
A sub-tenant is a feature that enables the management of multiple tenant entities under a single primary tenant. This functionality is particularly advantageous for administrators responsible for overseeing and managing several tenant environments.
Creating a sub-tenant in Safous involves adding an independent tenant under a primary tenant. This allows for better organization and management within larger organizations or for multiple clients.
Prerequisites
-
More than one tenant.
-
Admin console access for both parent and sub-tenants.
-
API Keys of the created sub-tenant.
Configuration
Create API Key on the Sub-Tenant
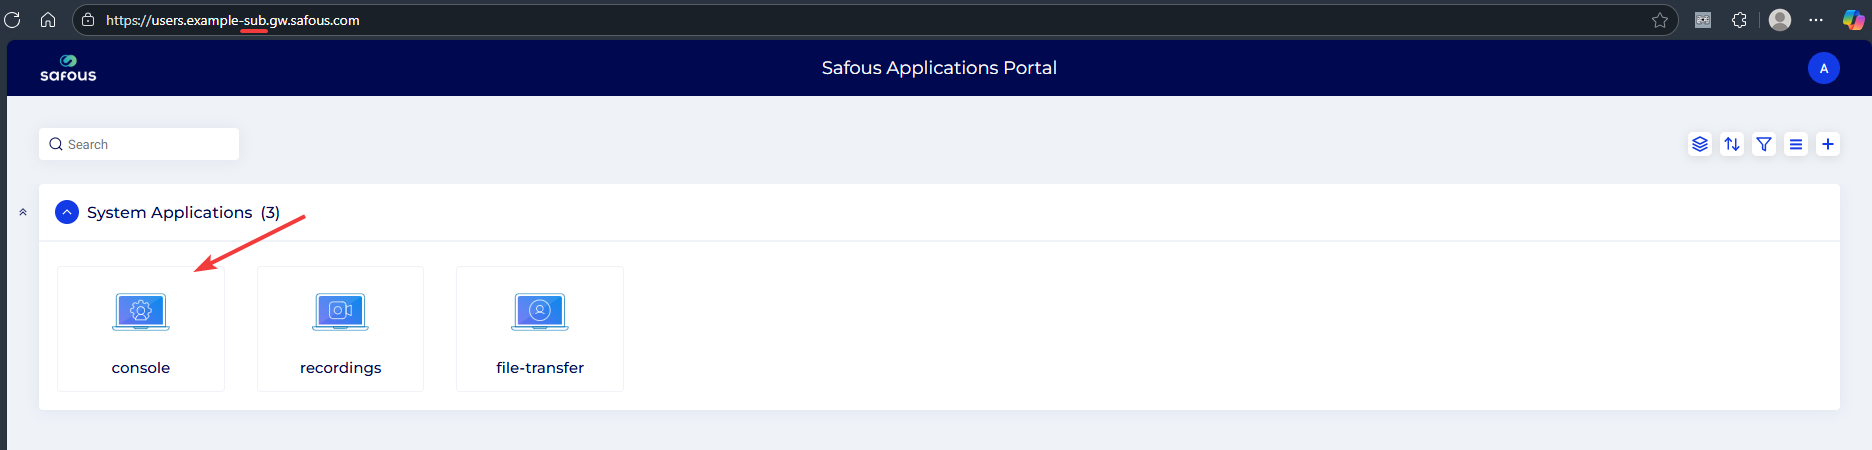
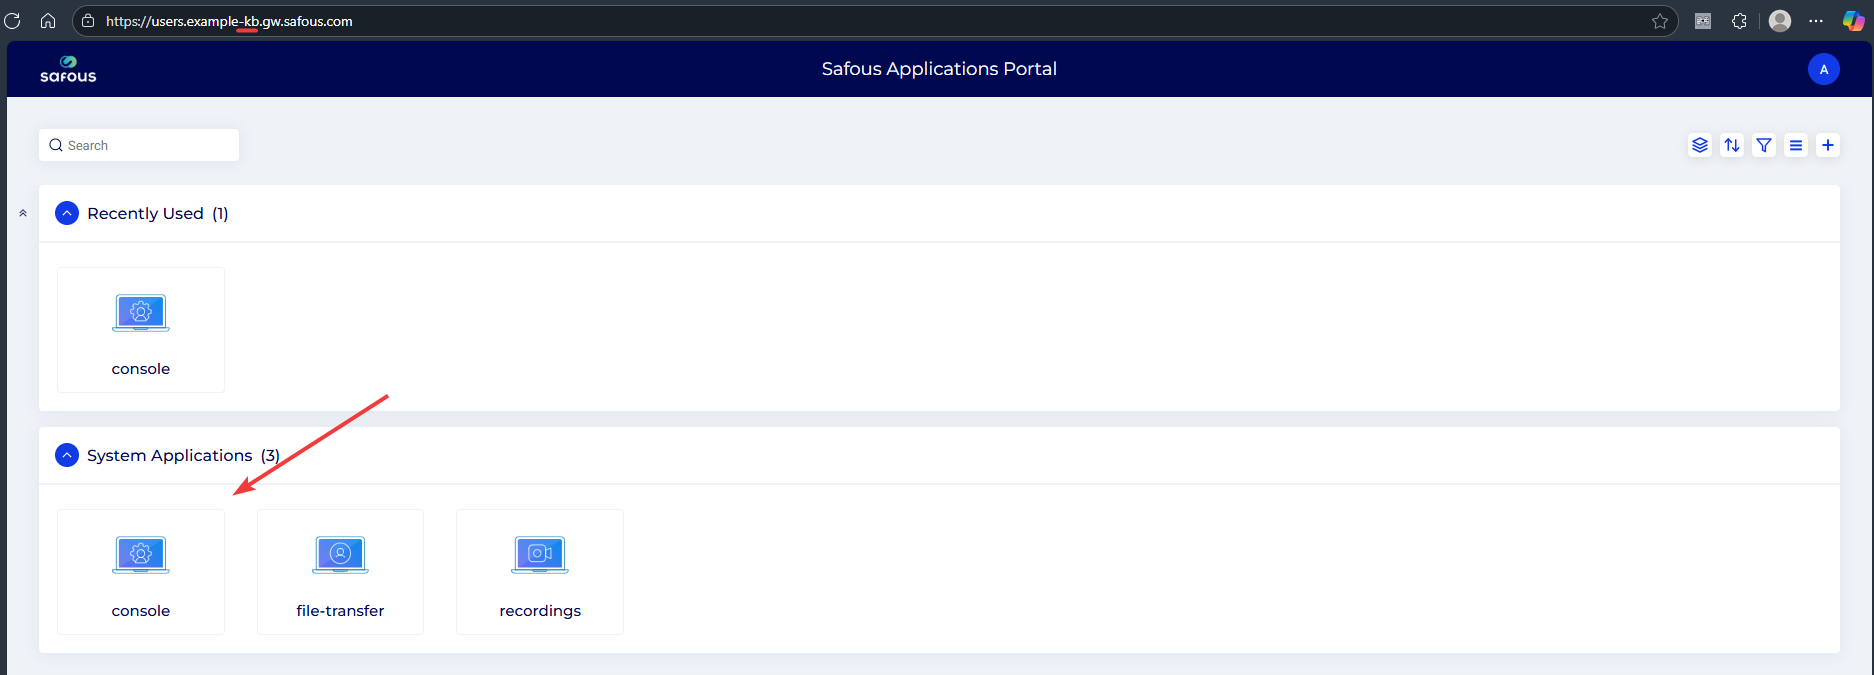
- Log in to the sub-tenant application portal and click console.
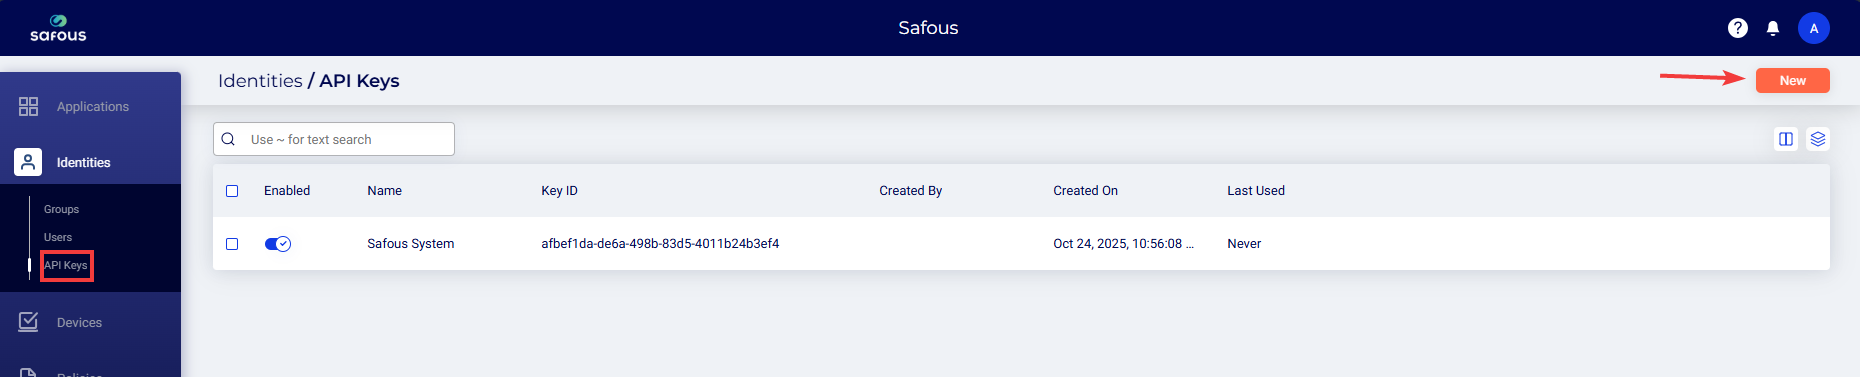
- Navigate to the Identities > API Keys page and click New.
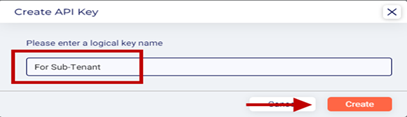
- Enter a name for the key and click Create.
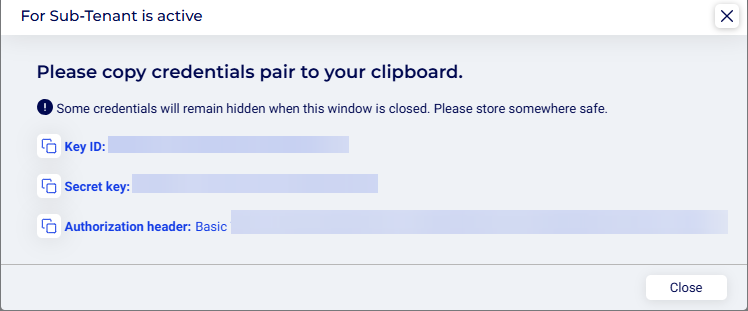
- Copy the Key-ID, Secret key, and Authorization header and store them. The keys will not be visible once this window is closed.
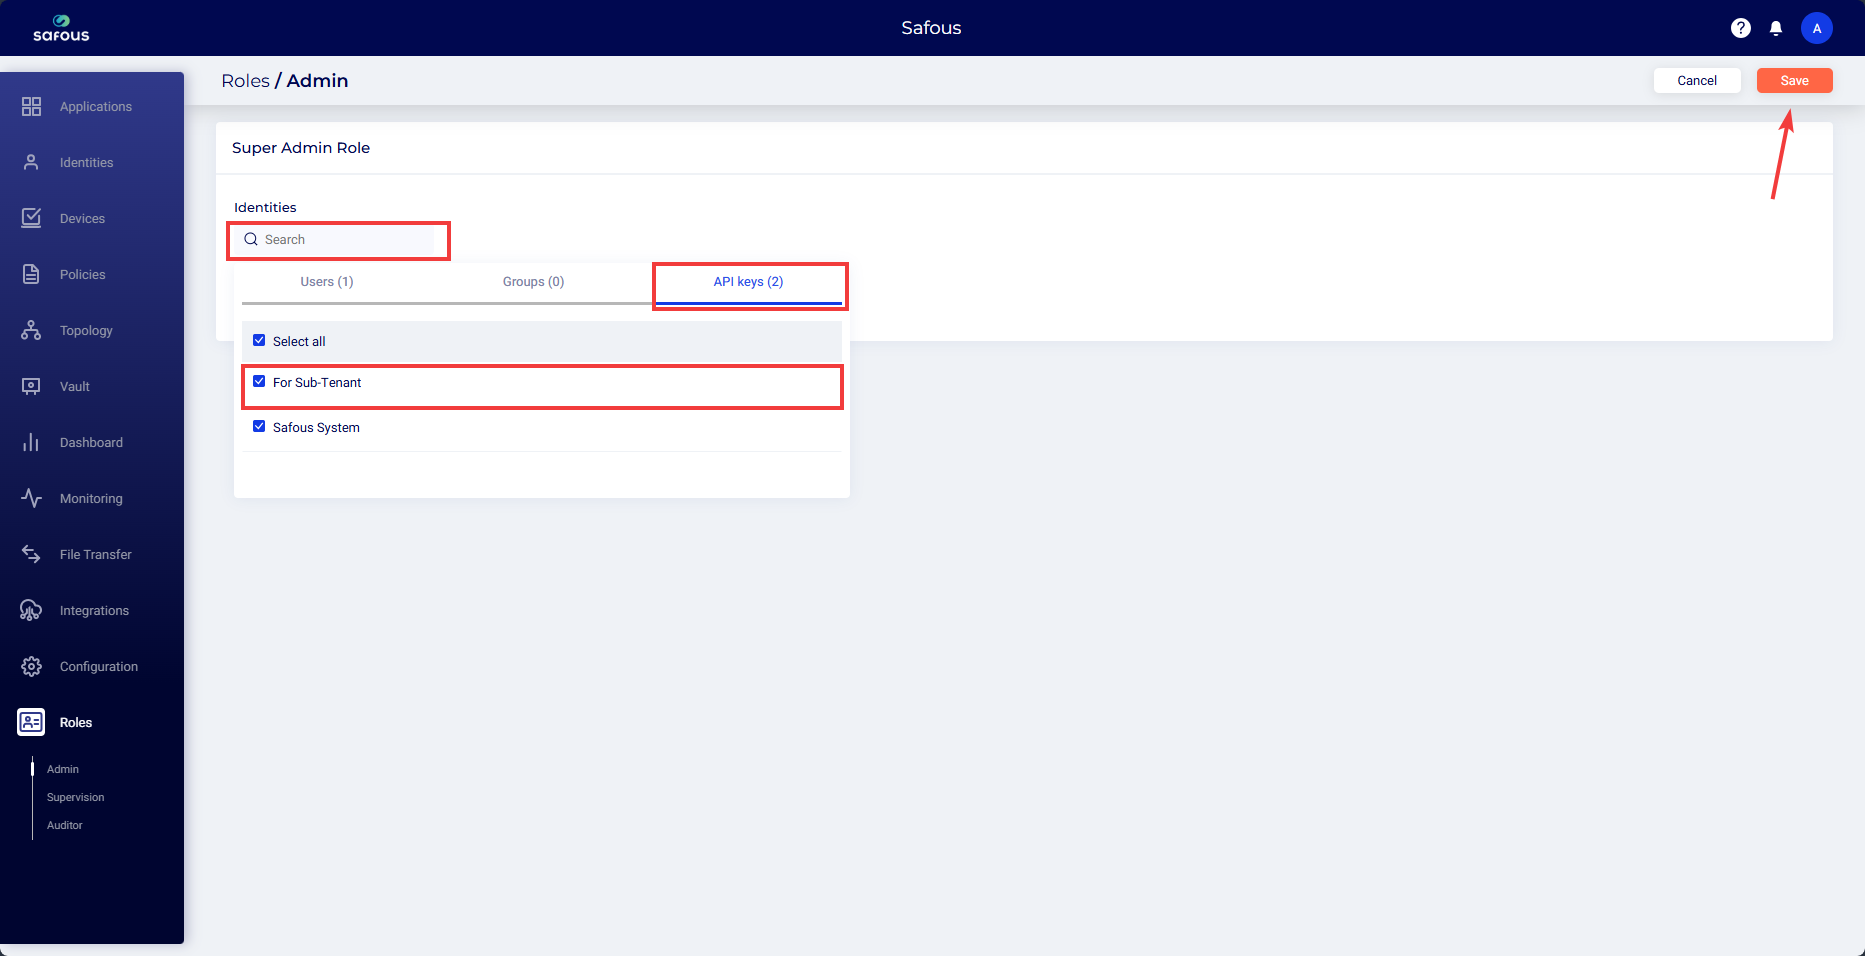
Set Super Admin Role for the API Key
-
Go to the Roles -> Admin page.
-
Click the Edit icon alongside the Super Admin role.
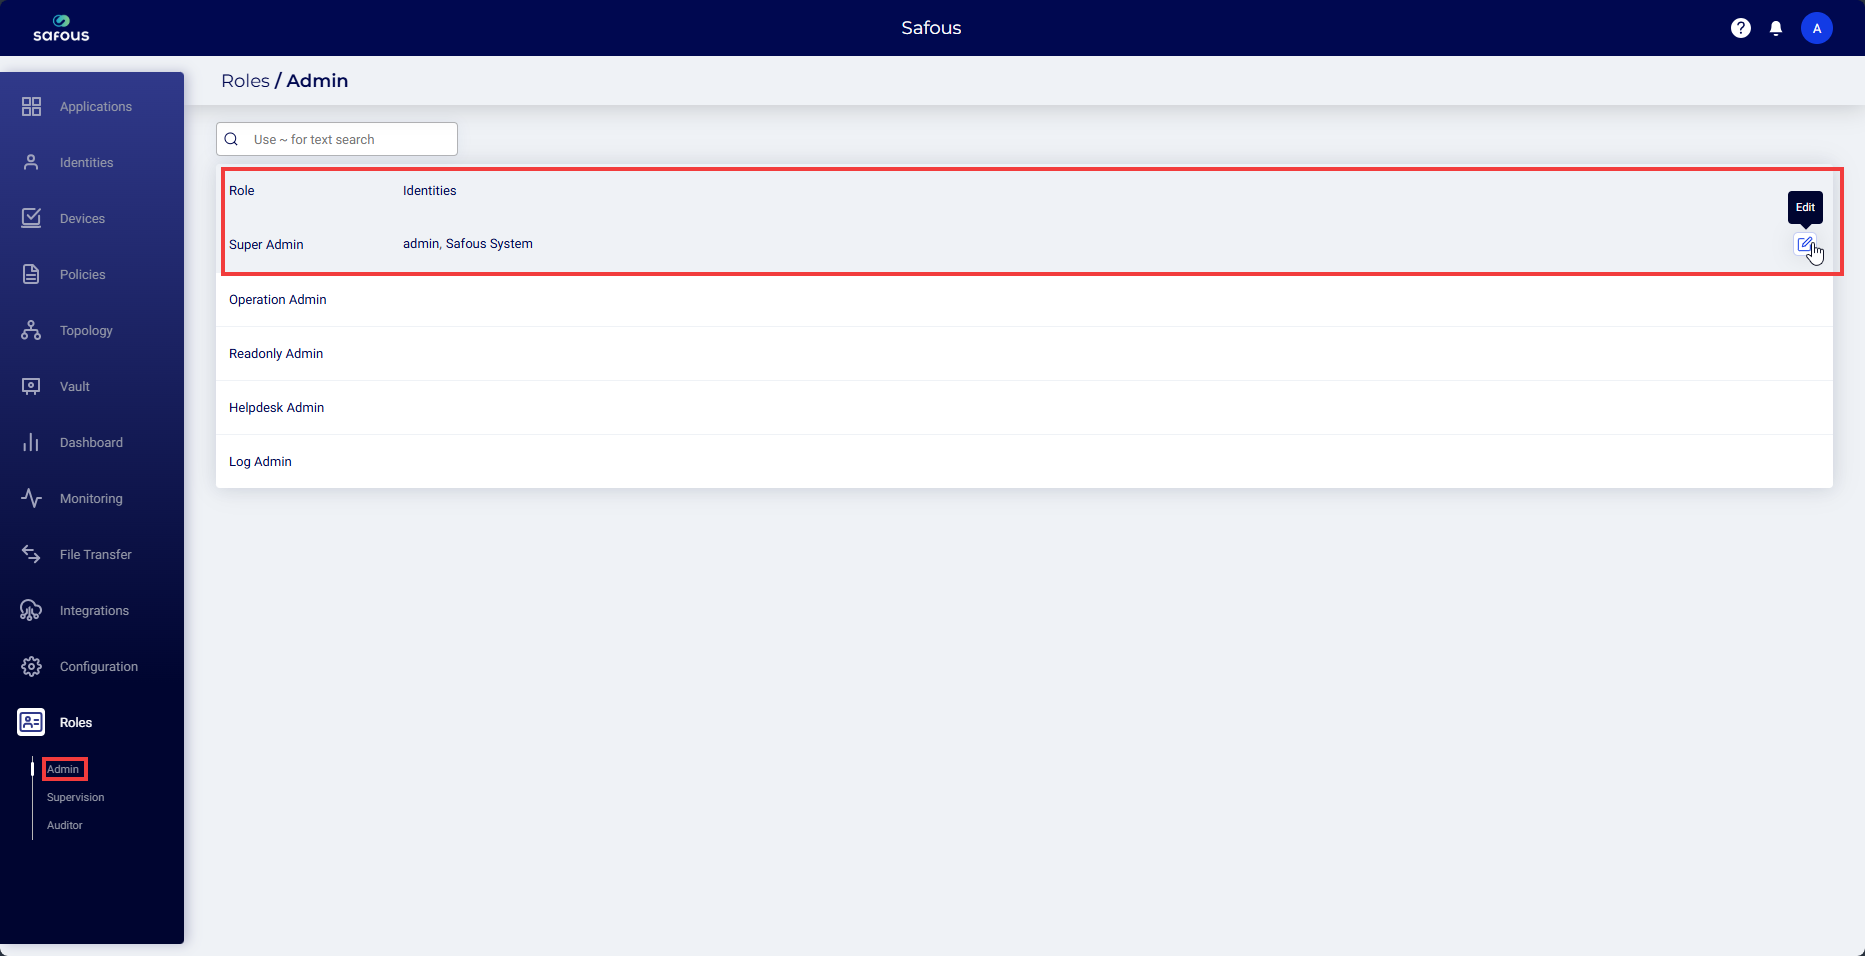
- Assign the Super Admin role to the new API key.
- Save your changes.
Configure Sub-tenant on the Parent Tenant
- Log in to the parent tenant admin portal and click the console icon.
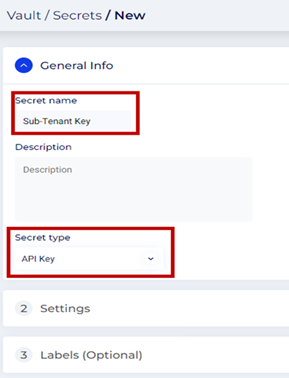
- Navigate to the Vaults > Secrets page and click New.
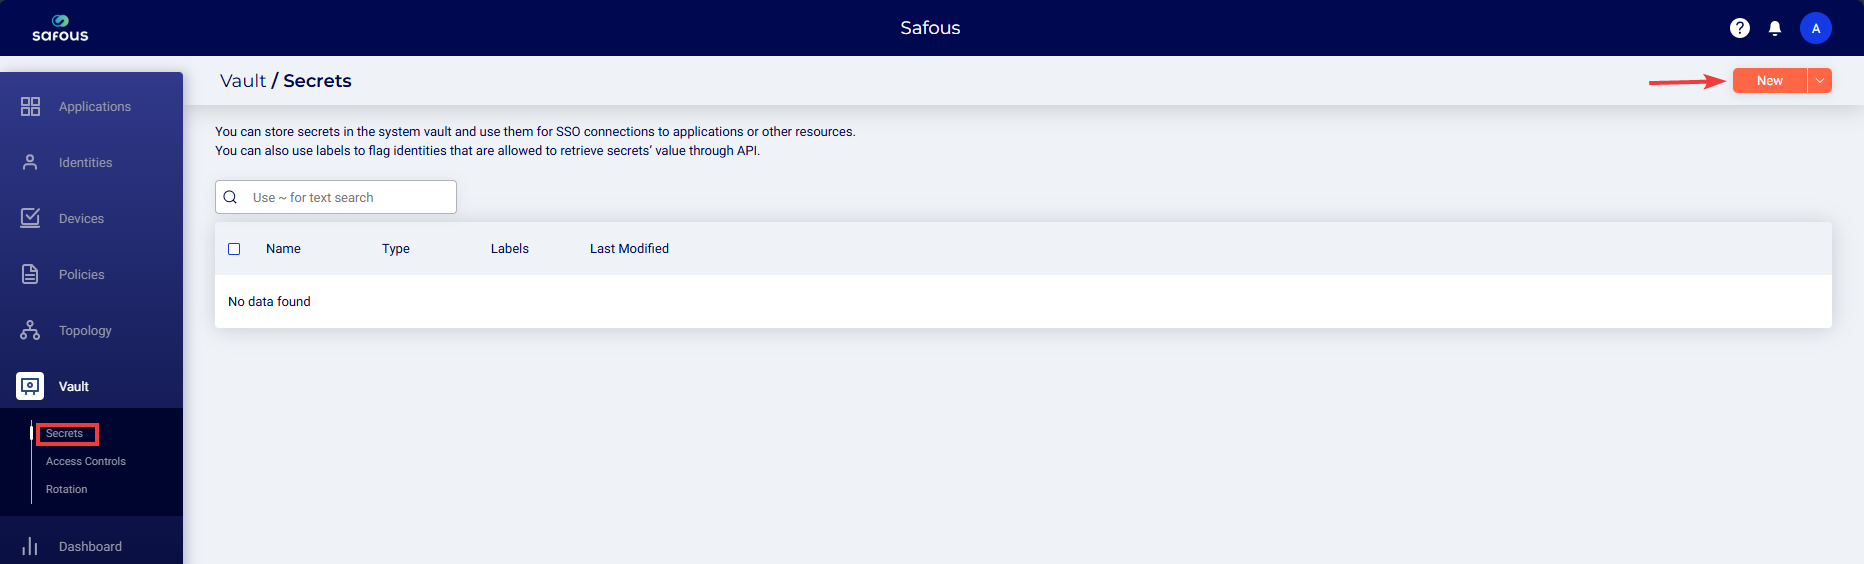
- Enter a name for the secret in the Secret Name field.
- Set Secret type to API Key.
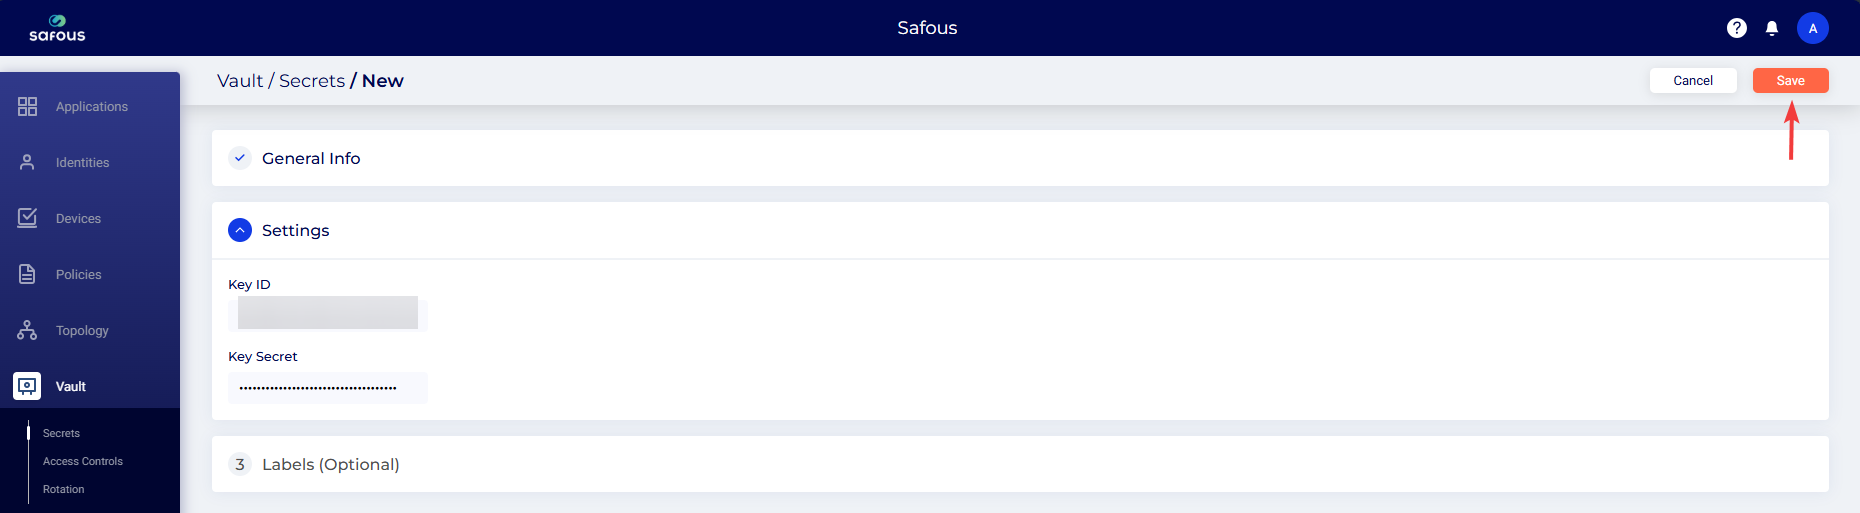
- In the Settings section, enter the KEY ID and Secret Key that you saved.
- Click Save.
- Optionally, under Labels, you can either create a new label or select an existing one.
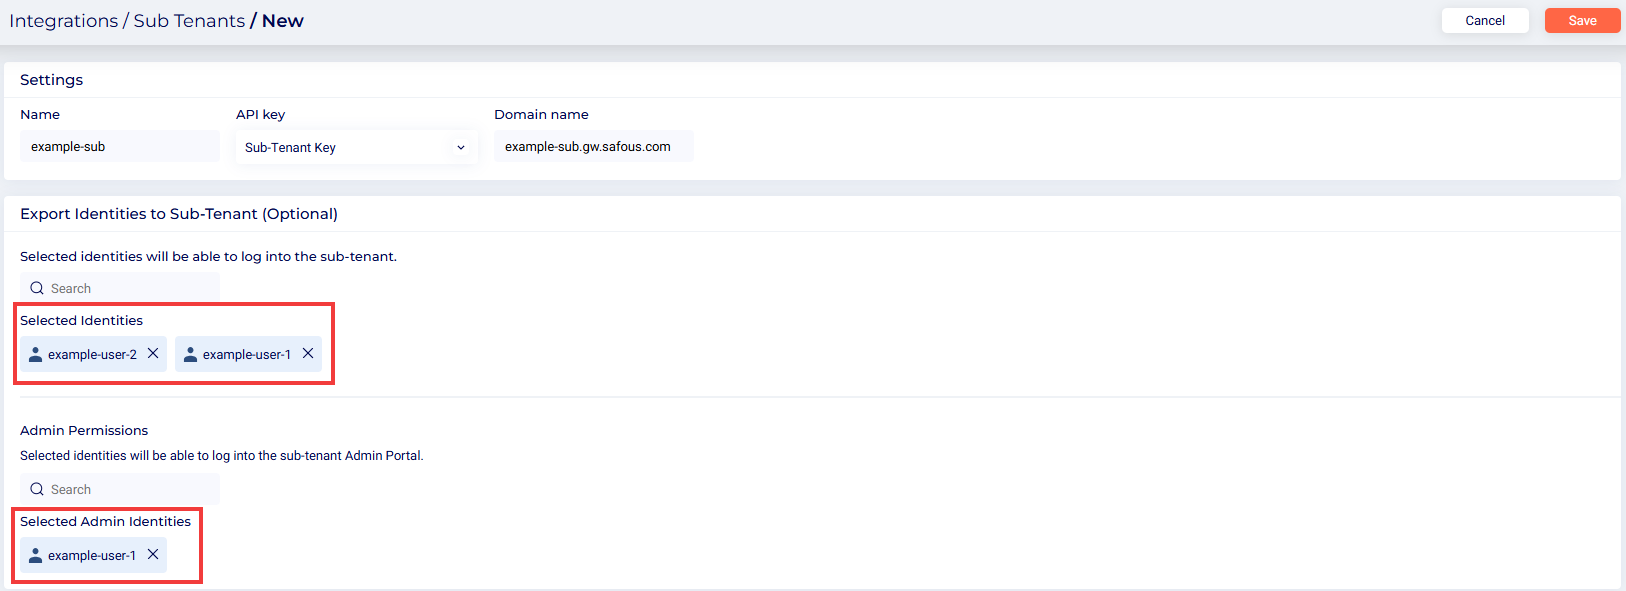
Create Sub-Tenant
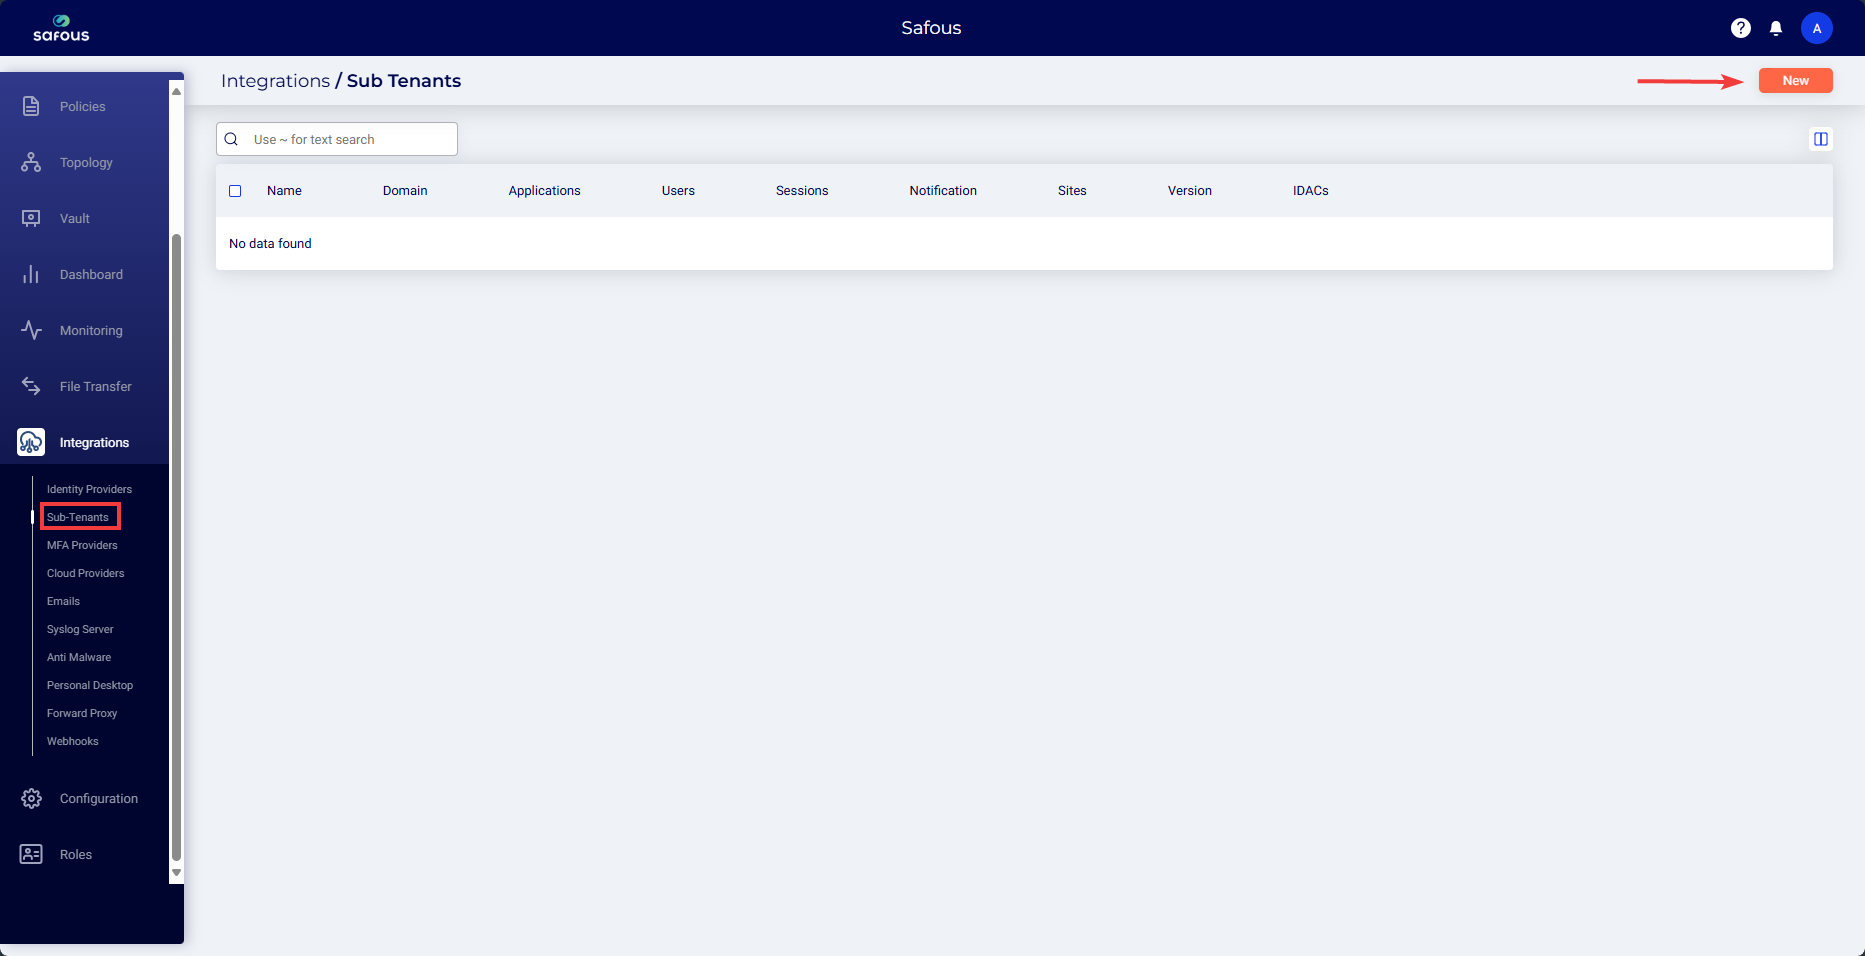
- Navigate to the Integrations > Sub Tenants page and click New.
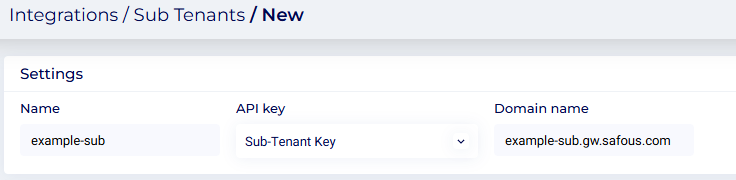
- Enter a unique name for the sub-tenant in the Setting > Name field.
- Click the API Key drop-down menu and select the API key stored in the vault for the sub-tenant.
- In the Domain name field, enter the domain name of the sub-tenant.
- Select the users or groups you want to grant access to applications on your sub-tenant.
- You can also assign admin privileges to selected users for the sub-tenant.
- Click Save to save the configuration.
Verify Sub-Tenant Configuration
After configuration, you will see the sub-tenant page displaying the following information:

To verify the successful integration of the sub-tenant, check for the following:
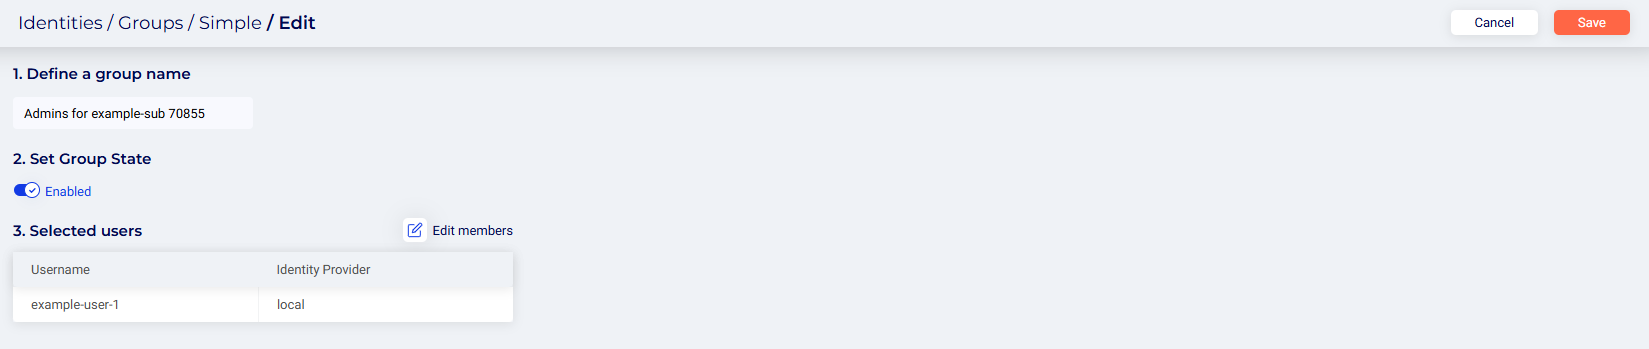
- On the parent tenant, a new Safous group is created and the selected users are assigned to it.
- On the parent tenant, a SaaS application is created and the new Safous group and selected groups are assigned to it.

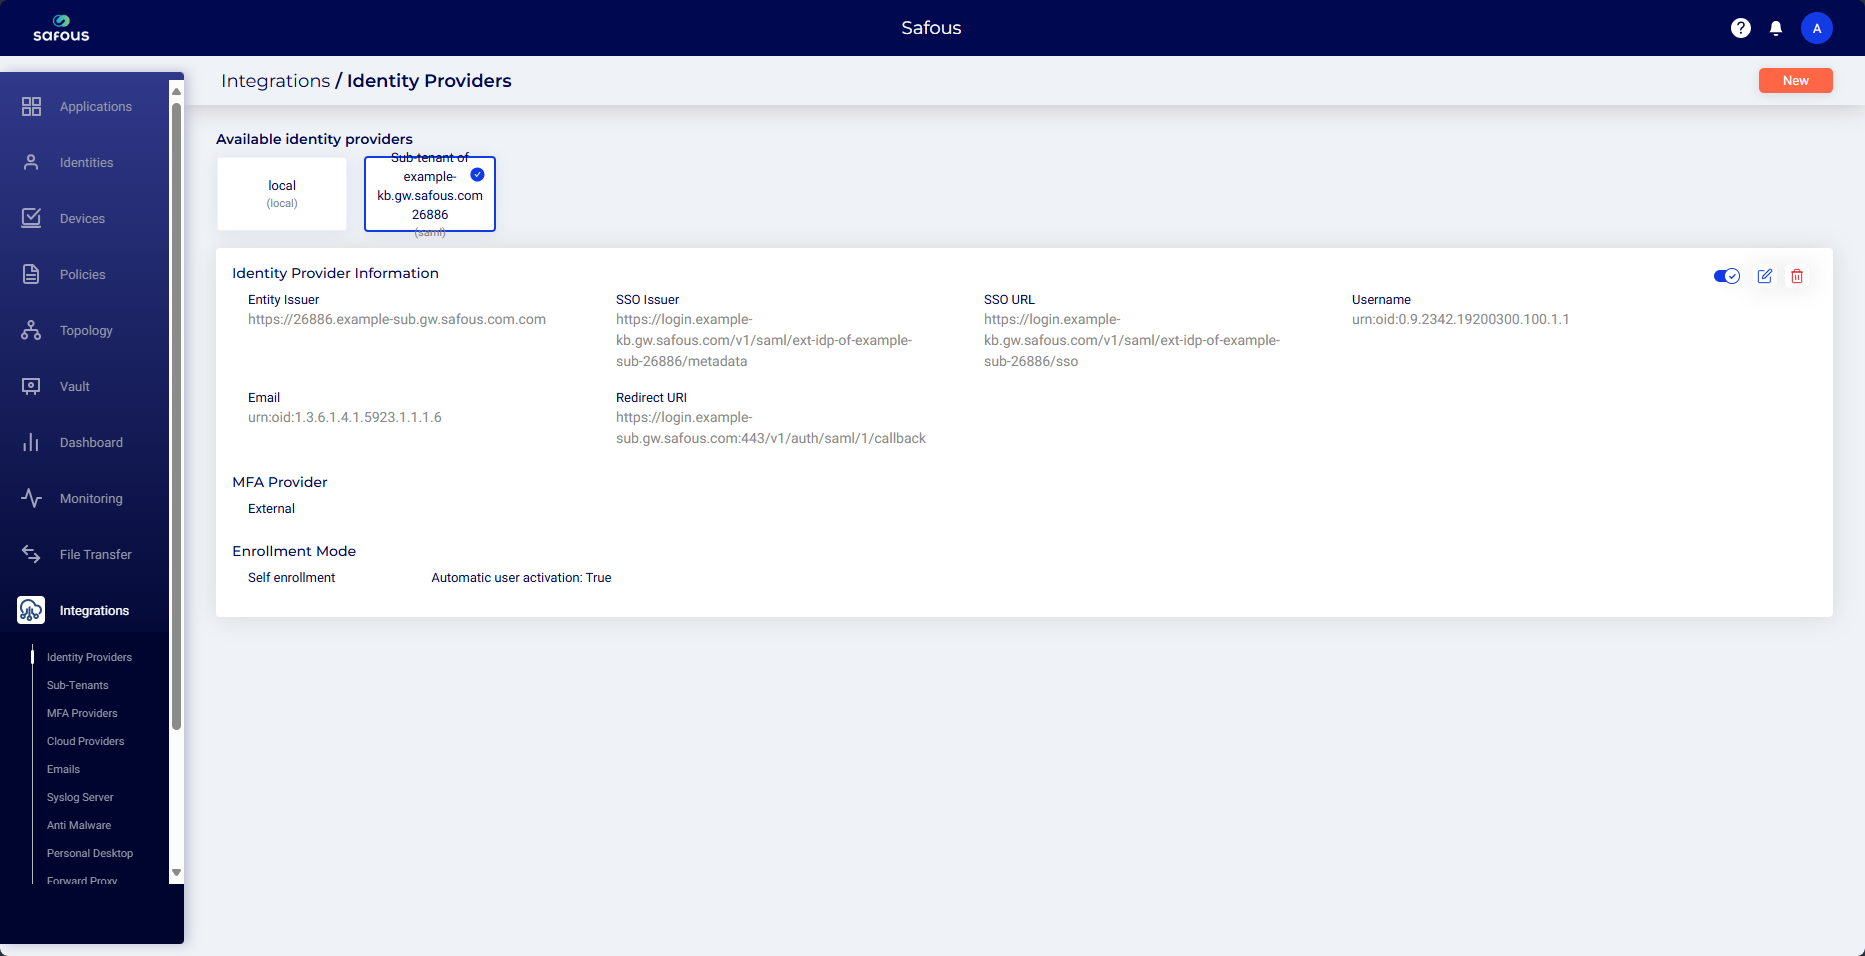
- On the sub-tenant, an external IdP is created along with the dynamic groups, and an admin role is assigned to these groups.
Naming Conventions
- SaaS Application: The name format is "Ext IdP of [sub-tenant domain name] [6-digit random number]".
- IdP Integration on Sub-tenant: The name format is "Sub-tenant of [parent tenant's domain name] [6-digit random number]".
- Administrators Group on Parent Tenant: The name format is "Admins for [sub-tenant domain name]".
- Dynamic Groups on Sub-tenant: The name format is "Exported groups [group name selected on the parent tenant]".