Actions
Actions is a new menu in App Gateway version 5 onwards that allows you to configure the actions users can perform when accessing the application. If you are a former Safous ZTA user from version 4, this is essentially the same configuration as the "Configuration" field in Policy.
Actions makes it easier for administrators to configure specific capabilities and then bind them to applications. Actions has different types of configuration on each application or protocol type: HTTP, HTTPS, RDP, SSH, VNC, TELNET, SMB, Network, SaaS, and Link.
Accessing Actions
- Navigate to Settings > ZTNA > Policies > Actions
- List of Actions shown with below details

(1) "New Action" button, to add your Action configuration and use it in Application
(2) Name of the existing Action
(3) Description of the existing Action
(4) Enabled Actions of each Action entry
(5) "+" button, to expand the information of that specific Action
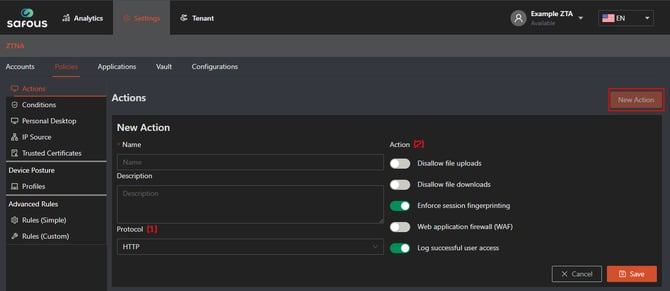
Creating New Action
-
Click "New Action" button, it will expand multiple forms to be filled out for new action
-
When filling out the form, please follow these rules:
-
Name is a required field and must be unique compared to other action names.
-
Description is a field where you enter the additional description for your configured action.
-
Protocol (1) is a type of application protocol that you want to configure. This field will reflect the configurable option in Action field (2).
-
Action (2) is a specific application or protocol configuration for the action capabilities that the user granted when accessing the application. Below are the details of the action that the administrator can configure:
Action Remarks Supported Protocols Allow audio input Use local mic in remote session. RDP Allow camera Use local camera in remote session. RDP Allow clipboard Enables copy-paste between local and remote sessions. RDP, VNC, SSH, Telnet Allow COM redirection Access local COM ports. RDP Allow device redirection Access local devices (e.g., USB). RDP Allow drive redirection Access local drives from the remote session. RDP Allow printer redirection Use local printers remotely. RDP Allow port forwarding Redirect local ports to remote ports securely. SSH Allow smart card redirection Use smart cards in remote session. RDP Allow x11 forwarding Run GUI apps remotely and display locally. SSH Anti-malware scan Scans uploaded/downloaded files (requires integration). SMB Disallow file uploads Prevents users from uploading files. SMB Disallow file downloads Prevents users from downloading files. SMB Enforce session fingerprinting Ties a session to a specific device fingerprint (OS, model, etc.) to prevent unauthorized access from other devices. HTTP, HTTPS, RDP, SSH, VNC, Telnet, SMB, SaaS Enhanced logging Adds detailed logs for SMB sessions. SMB Log all IP and port pairs accessed during the session Record the accessed IP and port pairs to be shown on the Activity Log. HTTP, HTTPS, Network Log successful user access Logs every successful login attempt. HTTP, HTTPS, RDP, SSH, VNC, Telnet, SMB, Network, SaaS, Link Native session access token will be valid for (minutes) Sets how long the token is valid (default: 30 minutes). RDP, SSH Record session Records the entire remote session for auditing. RDP, SSH, VNC, Telnet Supervisors can join the application's active sessions Allows supervisors to monitor or assist live sessions. RDP, SSH, VNC, Telnet Use multiple monitors (not supported in Linux) Extend session across multiple screens (not supported on Linux). RDP Web application firewall (WAF) Report: Logs vulnerabilities; Block: Actively blocks threats based on HTTP Profiles. HTTP, HTTPS
-
3. Click "Save" after finish configure condition based on your usage.
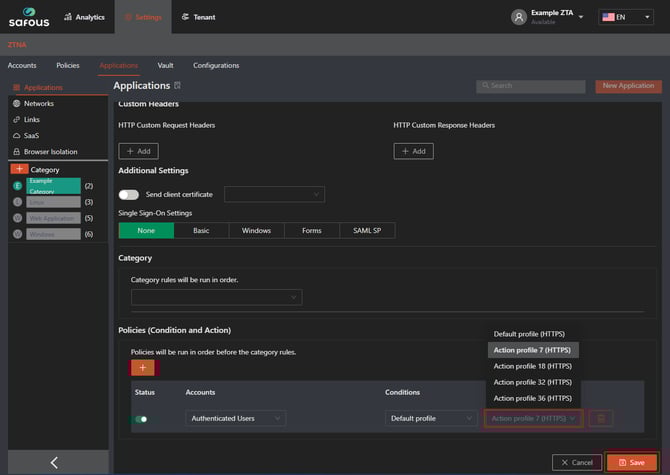
Applying the Action to Application
In order for the action configuration to work, Administrators must enable the feature in the Application. Follow these steps:
- In the Admin Portal, go to the Application page (Settings > ZTNA > Applications) and select the application where the action should be applied. You can either create a new application or edit an existing one.
- On the New Application screen, navigate to the Policies (Condition and Action) field, as shown in the screenshot below. This is where you can enable the action by connecting it to the application. It will then be used every time a user wants to access the application. Then, click Save.
Modify or Delete Existing Action
- Click plus sign (+) button on existing action, which will expand the information of that specific condition

- Click Edit to modify, or Delete to delete the action.