Applications
Edit/Delete an Application or Category
To edit or delete an application or category, hover your mouse over it and click the Edit or Delete button.
-
Click the hyperlinked name of the application.
-
Click the Edit button on the right and the Delete button in the top right corner.
Delete Multiple Applications/Categories
-
Enable the checkbox alongside the applications to be deleted.
-
Click the Delete button in the top right corner.
Enable/Disable Applications/Categories
-
Enable or disable the toggle button alongside the application to be enabled or disabled.
-
Click the hyperlinked name of the application and enable or disable the toggle button in the top right corner of the page.
View by Application/Categories
- Click the second icon in the far right corner of the screen to view the page by Categories or Applications.
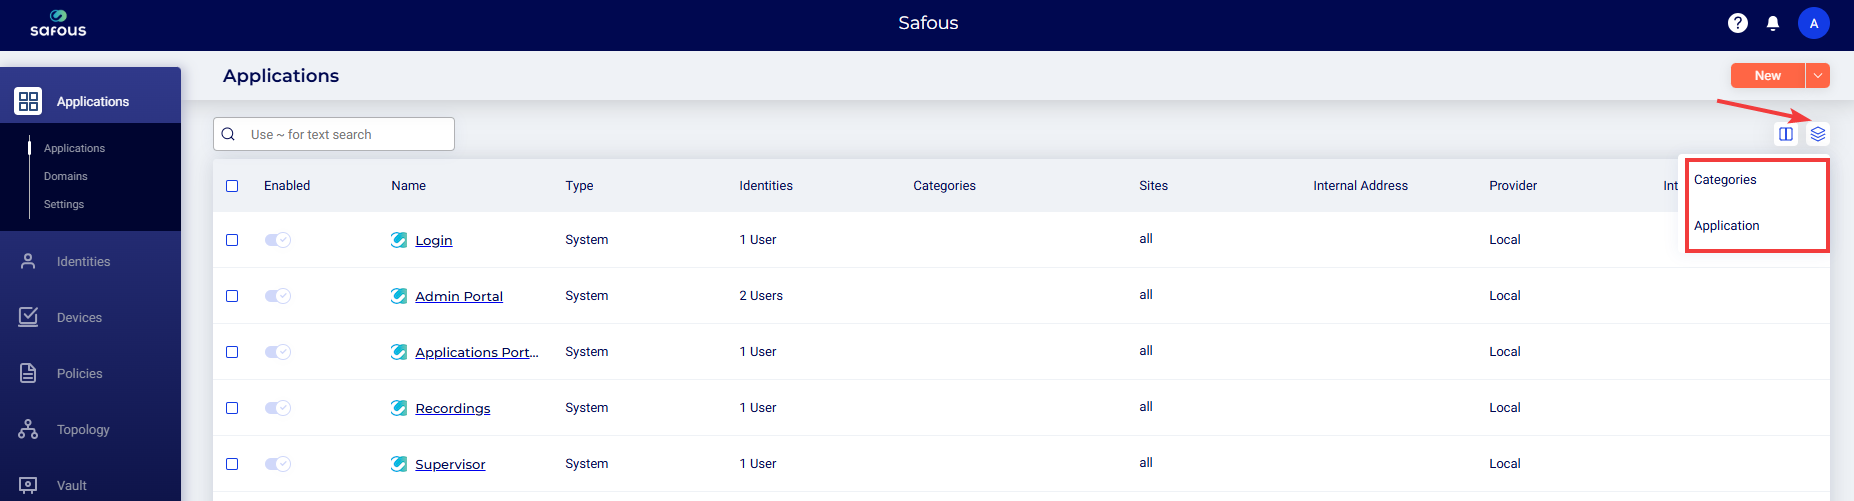
Manage Information Displayed
Click the first icon in the far right corner to show the drop-down list of column headers to select or deselect their display. The following headers are displayed by default:
-
Enabled
-
Name
-
Type
-
Identities
-
Categories
-
Sites
-
Internal Address
-
Provider
-
Internal Ports
The portal admins can choose to display the following not displayed by default:
-
Description
-
Visible
-
External URL
-
Domain
-
SSO
-
Creation Date
-
Last Modified By
Search - Click the Search bar to search for information on the page.
Sort - Click the up arrow / down arrow to sort the list by the column headers.
Filter - Click the Filter icon in the header row to filter by application name.
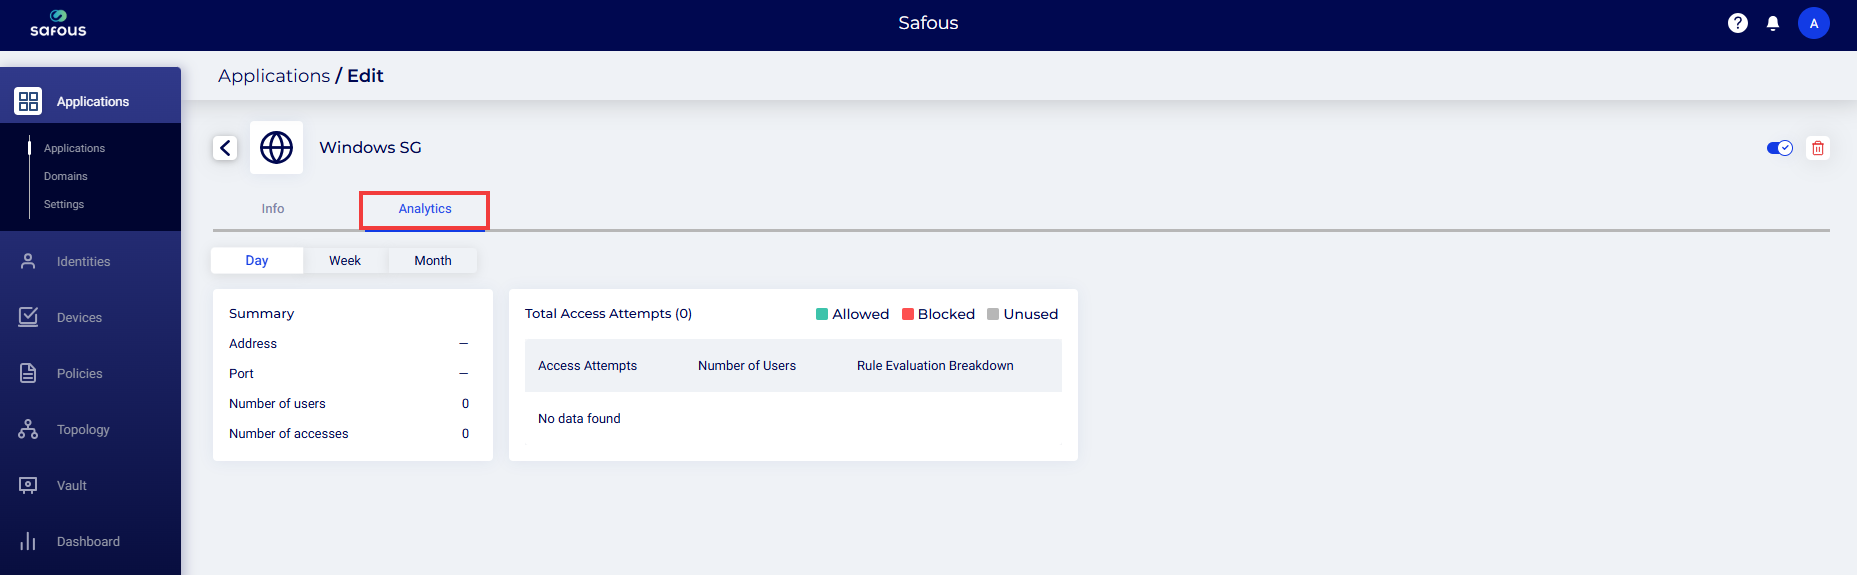
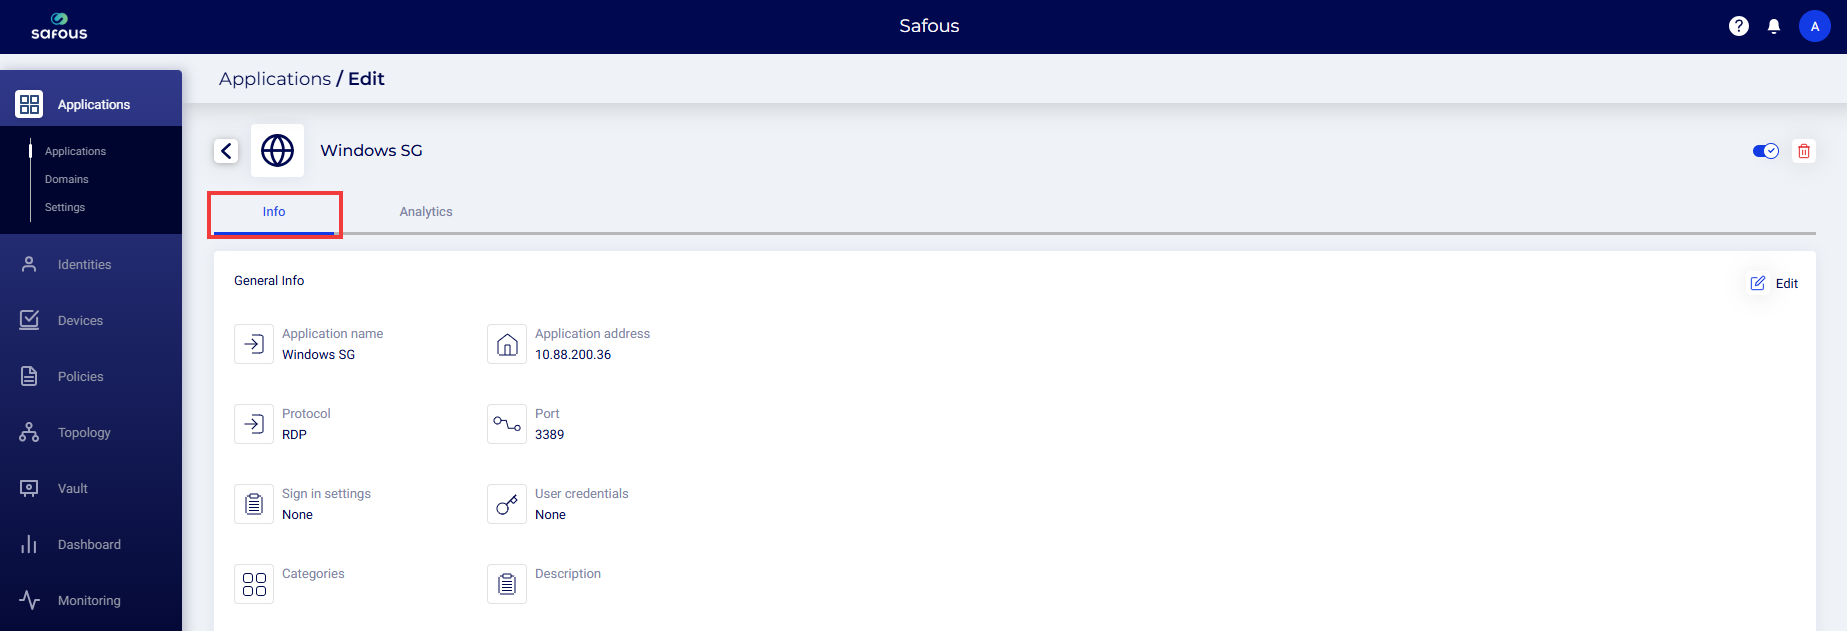
Info and Analytics - Click the hyperlinked name of an application to view the following:
General Info - The following information is displayed in the Info tab:
-
Application name
-
Cloud provider
-
Protocol
-
Port
-
Sign in settings
-
User credentials
-
Categories
-
Description
Analytics - The following information is displayed by day, week, and month:
-
Address
-
Port
-
Number of users
-
Number of accesses