Category
Categories serve two purposes:
- To manage access – Let Apps belonging to a category to be accessed by authorized identities specified in the policies attached to the category
- To group applications for display purposes – Apps belonging to a category will be shown in organized list
The best practice is to create categories set for access management by attaching policies to that category. Each application should belong to a single category, and the category name should reflect its functional description or location, without including authorization-related details (e.g., "Site1-RDP", "AWS-SSH", etc).
The list of Application categories can be viewed on Settings > ZTNA > Applications page
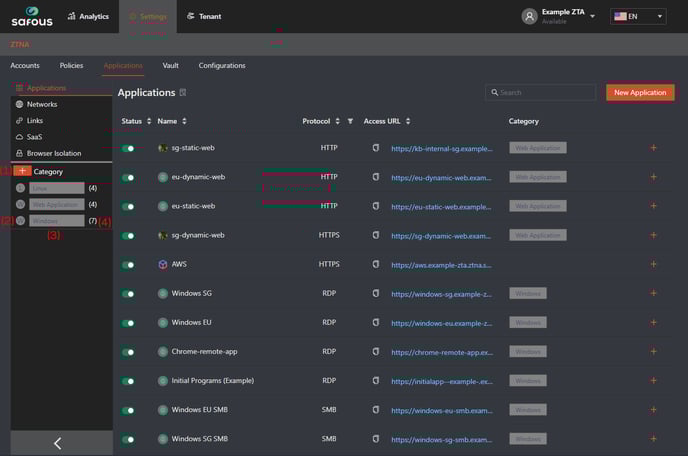
- New Category button: Create a new application category.
- Category Icon: Icon of the category. Displays the first character of the category's name.
- Category name: Shows the category name.
- Category number: Shows the total number of applications associated with the category.
You can click on a category name to view the list of applications belonging to that category
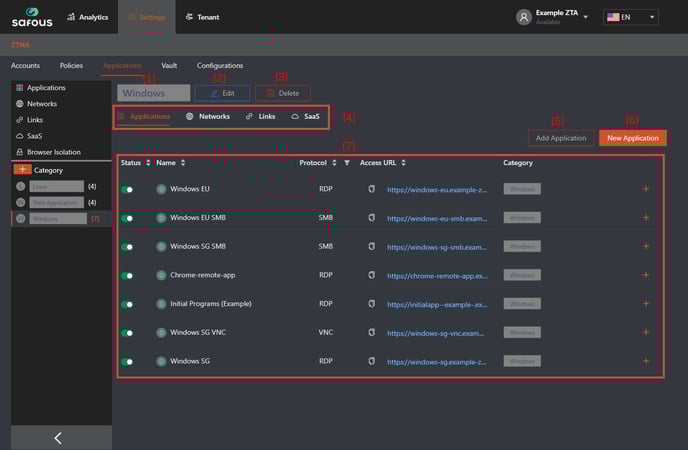
- Category Name: Name of the category
- Edit button: Allow modification of category's configuration and association with policies.
- Delete button: Delete the category.
- Application Types: Manage the visibility of applications under specific types associated with this category.
- Add Application/Network/Link/SaaS: Add applications to be placed under this category by selecting from the list of created applications (Application/Network/Link/Saas.)
- New Application/Network/Link/SaaS: Create new applications (Applications/Network/Link/Saas) directly from this page and have it placed under this category.
- List of Applications: List all the applications associated with this category based on the application types.