SSO to AWS Management Console by Assuming IAM Role
This article will guide you on how to configure user access to AWS Management console via Safous AppGW by assuming IAM role. Safous will act as the Identity Provider (IdP) while AWS acts as the Service Provider (SP).
Prerequisites
- Administrative access to AWS IAM via console
- App Gateway version >= 6.12
Configuration
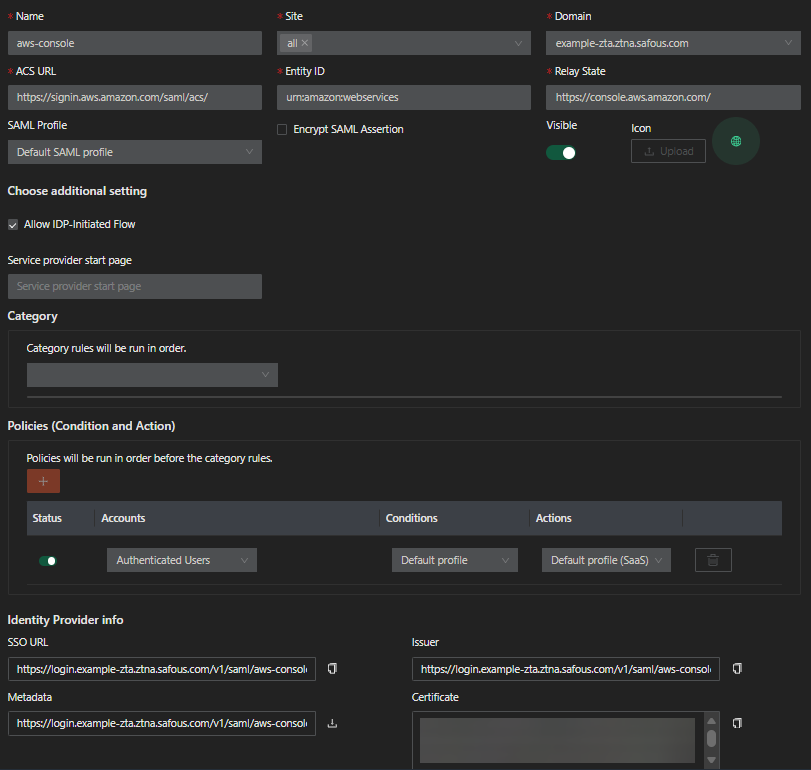
Create SaaS application
-
Login to Admin portal and go to Settings > ZTA > Applications > Applications > SaaS.
-
Click New SaaS button.
-
Enter the name for the SaaS application.
-
Choose the site.
-
Enter
https://signin.aws.amazon.com/saml/acs/. -
Enter
urn:amazon:webservices. -
Enter
https://console.aws.amazon.com/. -
Select Default SAML profile for now
-
Enable the Allow IDP-Initiated Flow toggle.
-
Toggle visible button to enabled
-
Configure the Categories and Policies to associate to the application.
-
Click Save.
-
Your newly created SaaS application should resemble the image below.
-
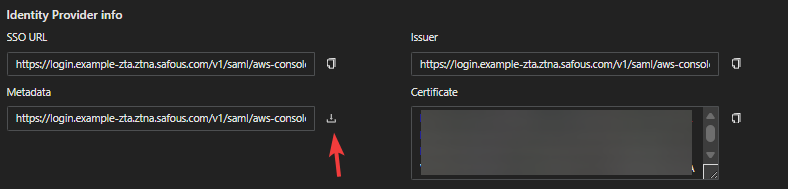
Download the Metadata file
-
Rename the file to give it .xml extention (e.g. metadata.xml)
Create Identity Provider in AWS IAM
-
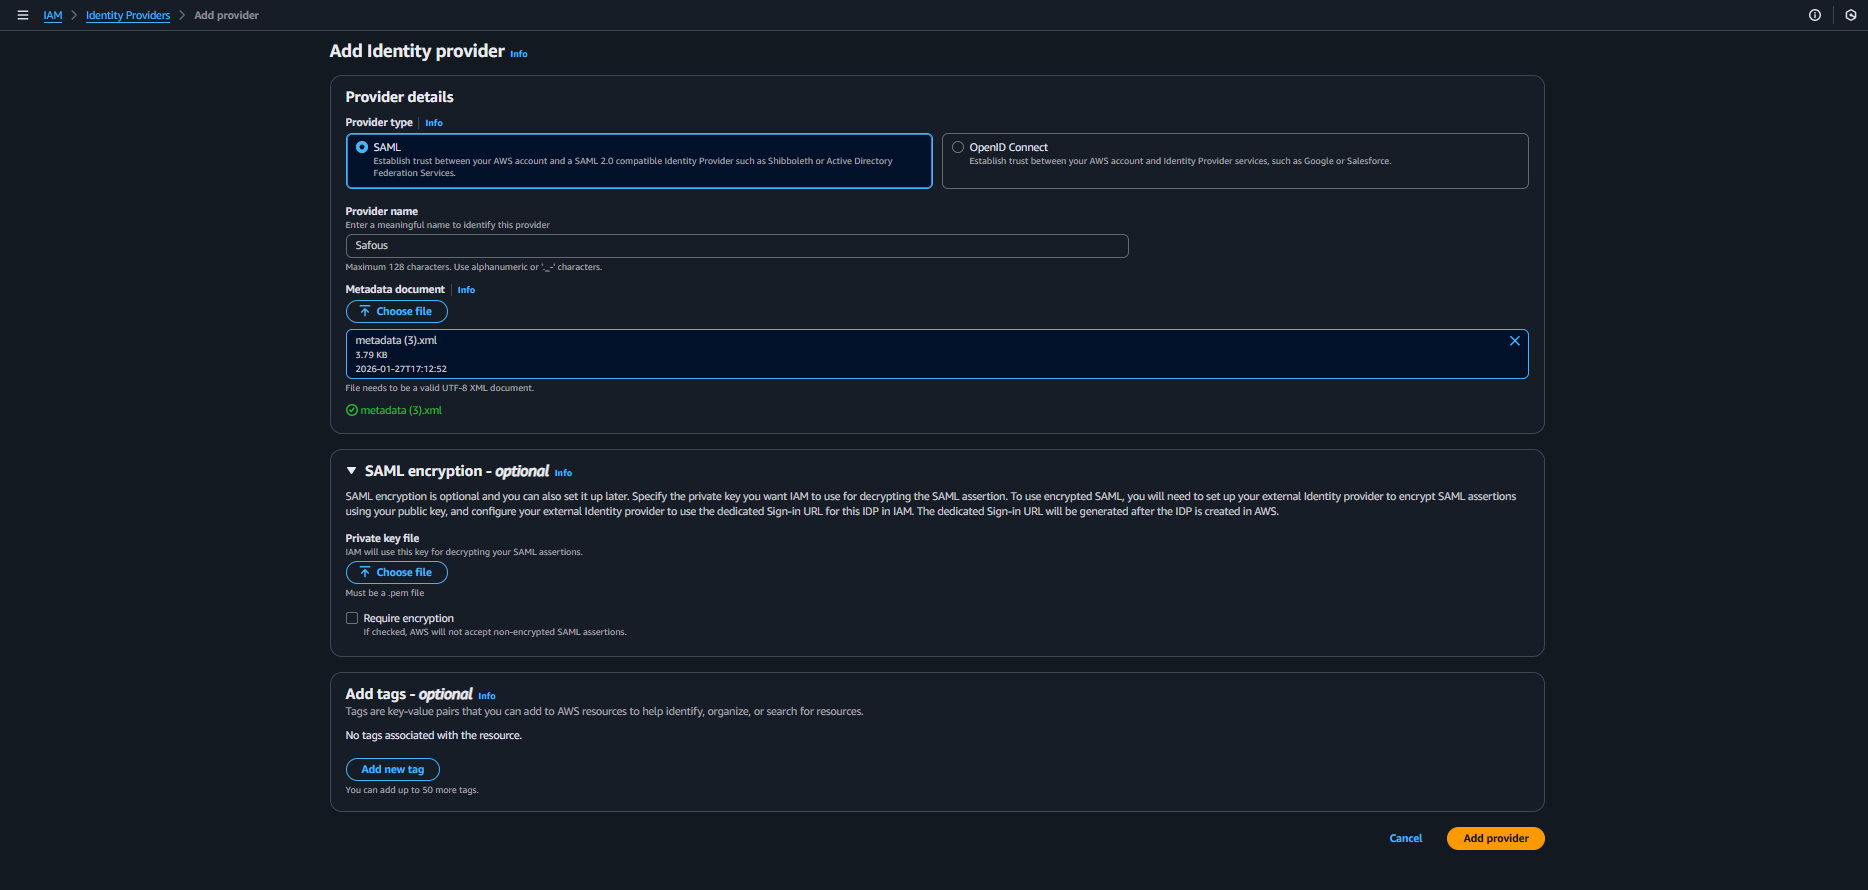
Login to AWS management console
-
Go to IAM > Access Management > Identity Providers
-
Click Add provider
-
Enter These details
Provider details
- Provider type: Select SAML
- Provider name: Give a suitable name for the IdP (e.g. Safous, AppGW, etc)
- Metadata document: Click Choose file and choose the previously downloaded metadata.xml file.
SAML encryption - optional
Should you want to enable SAML encryption, you need to use the private key which you previously generated from the pair of x509 cert and key.
- Private key file: Click choose file and select the private key file you generated. Note that the file must be in .pem format
- Require encryption: Should you check this option, AWS will not accept non-encrypted SAML assertions, making SAML encryption a must.
Add Tags - optional
Click Add new tag button should you want to assign tags to the Identity provider.
-
Click Add provider button.
-
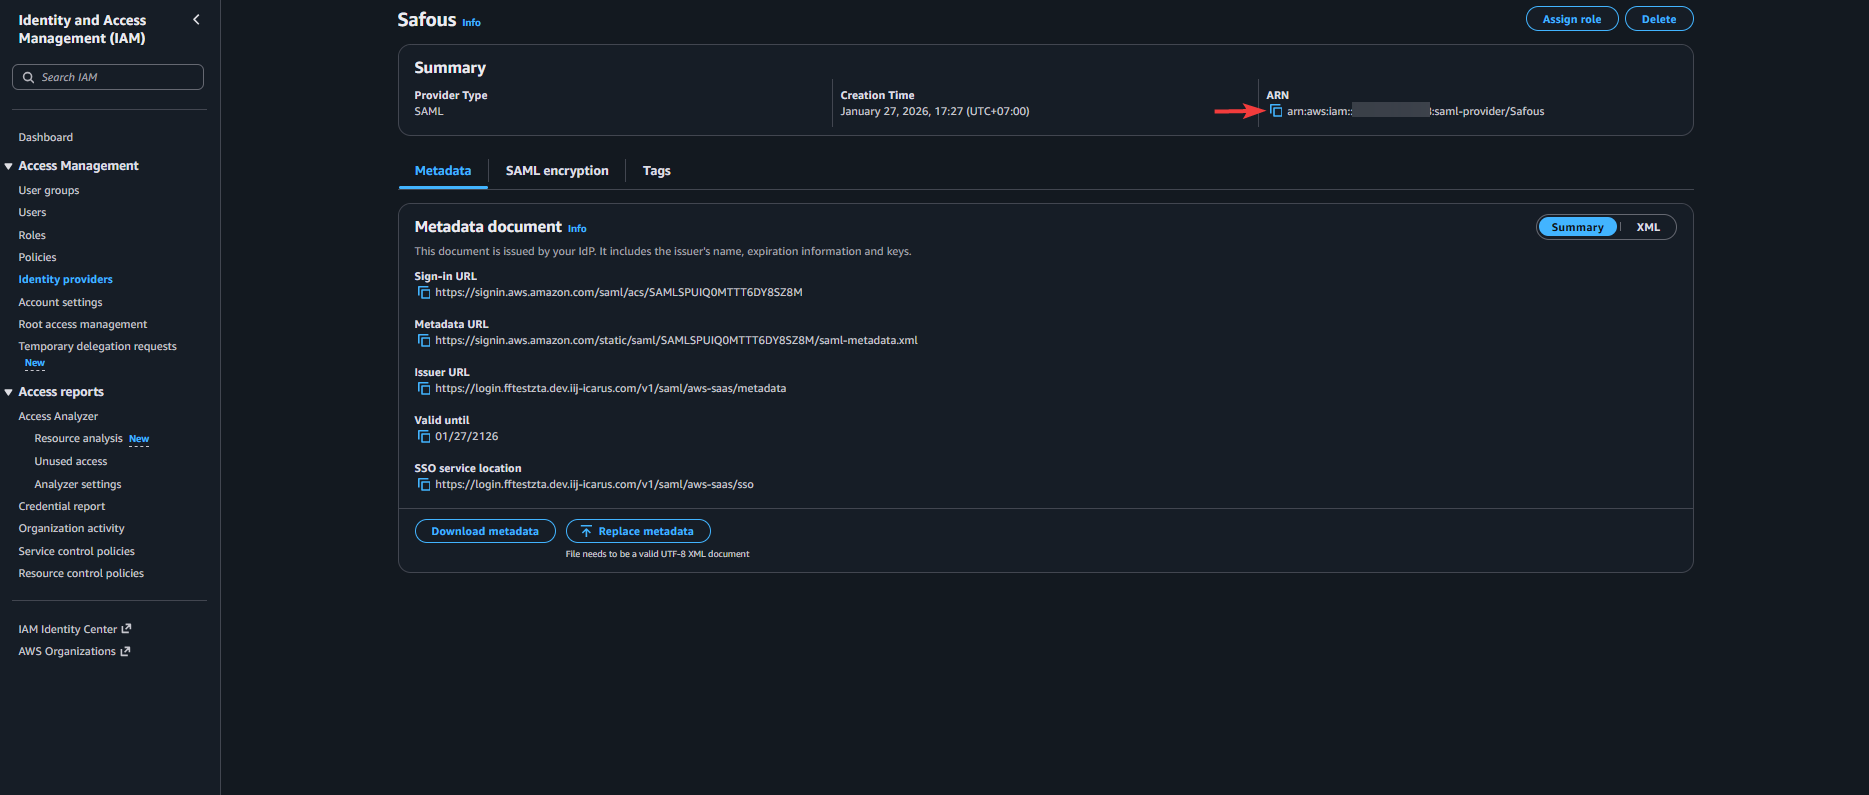
Click the newly added Identity Provider and copy its ARN.
Create IAM role to assume
-
Go to IAM > Access Management > Roles
-
Click Create role button
-
Refer to the instruction below:
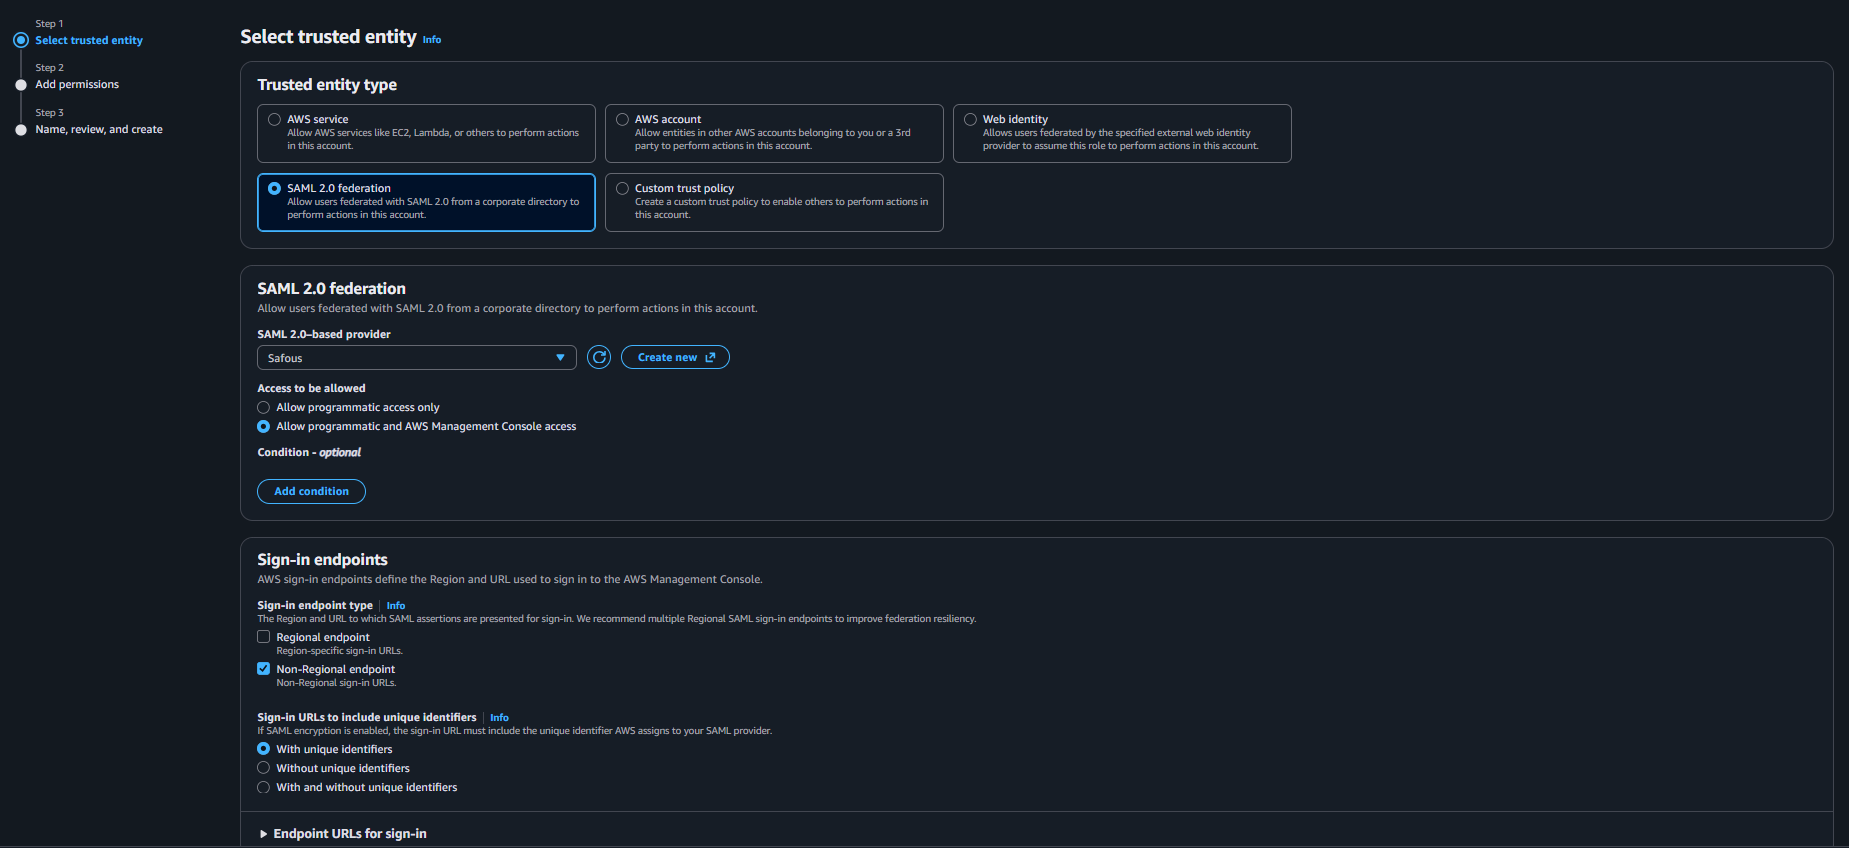
Step 1 - Select trusted entity
-
Trusted entity type: Select SAML 2.0 federation
-
SAML 2.0-based provider: Select the Identity provider you created
-
Access to be allowed: Select Allow programmatic and AWS Management Console access
-
Sign-in endpoints
- Sign-in endpoint type: Check Non-regional endpoint
- Sign-in URLs: Select "With unique identifiers"
-
Endpoint URLs for sign-in: Copy or take note of the attribute value for non-Regional endpoint. This will be used for the ACS URL in SaaS app.
Step 2 - Add permissions
This step lets you configure access permissions available to the users that later will assume this role. Select the policies you want to apply for this role. Minimum applicable policy to get access to the management console is "AWSManagementConsoleBasicUserAccess"
Step 3 - Name, review, and create
- Role name: Give a suitable name for the role
- Description (optional): Give a suitable description for the role
-
-
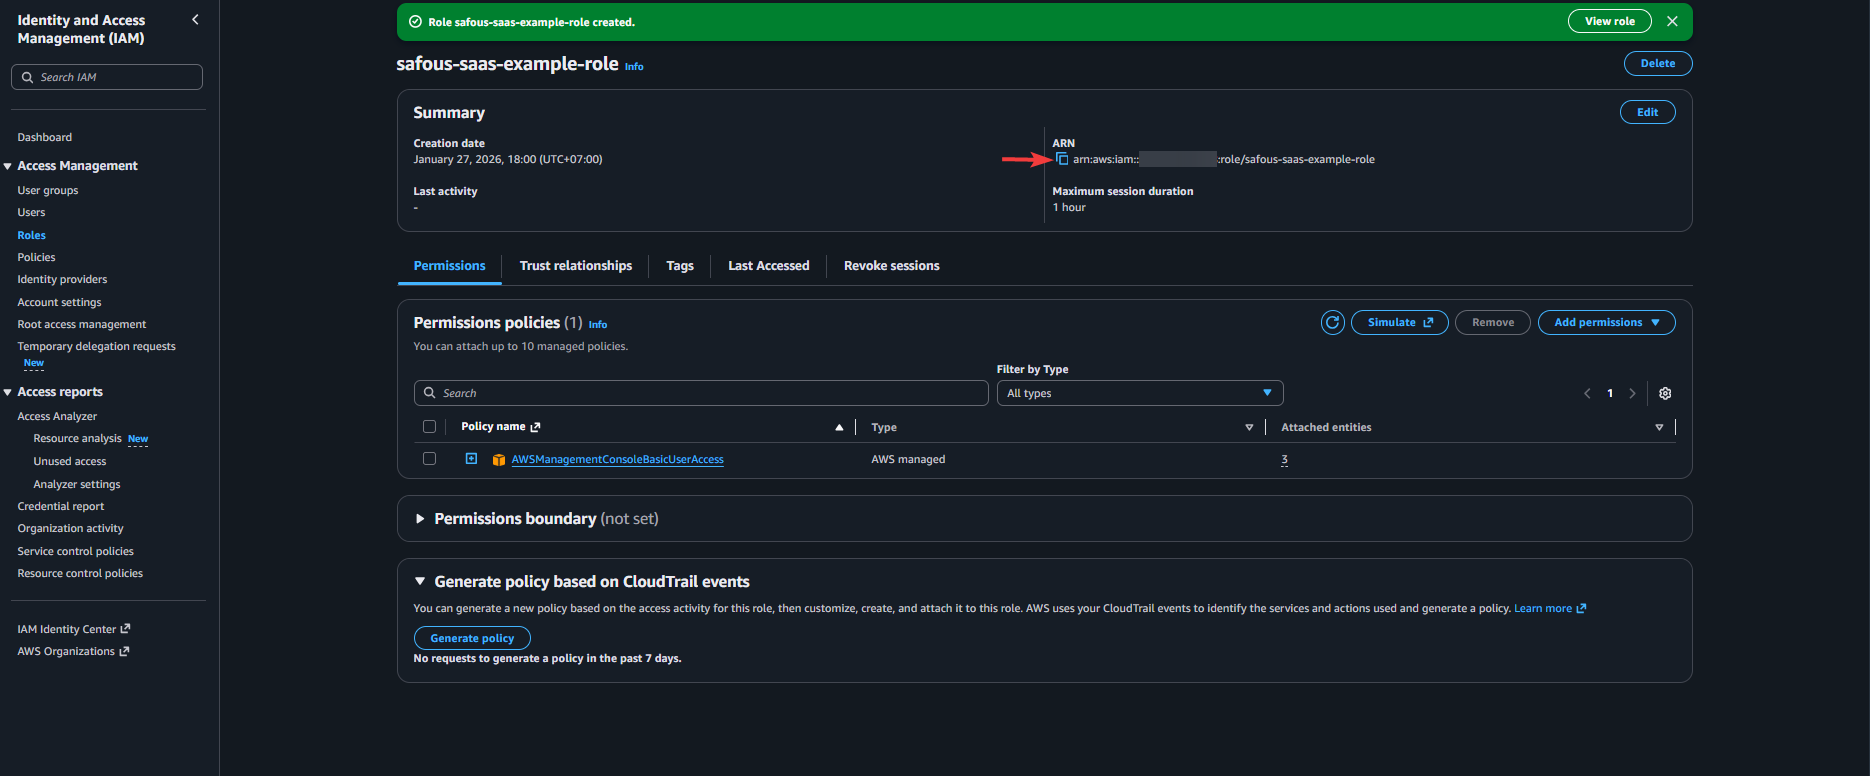
Click Create role
-
Copy or take note of ARN of the role
Configure SAML Profile
-
Back on the Admin portal, go to Settings > ZTA > Policies > SAML Profiles
-
Click New Profile button
-
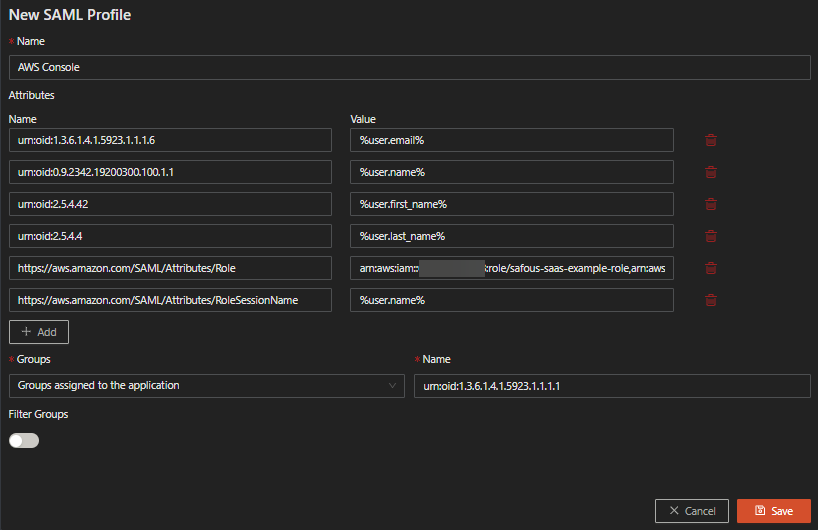
Fill out the details as below:
-
Name: Give a suitable name for the SAML profile
-
Attributes: Click the Add button twice to add two custom attributes with Name and Value pair as below:
-
Name: https://aws.amazon.com/SAML/Attributes/Role
Value: A pair of the copied IAM role ARN and Identity Provider ARN separated with comma (e.g. arn:aws:iam::xyz:role/safous-saas-example-role,arn:aws:iam::xyz:saml-provider/Safous)
-
Name: https://aws.amazon.com/SAML/Attributes/RoleSessionName
Value: This is the display name of the user who assumed the role. It is recommended to set the value to either user's mail (%user.email%) or username (%user.name%)
-
-
Groups: Select "Groups assigned to this application"
-
-
Click Save
Correcting SaaS configuration
-
Still in admin portal, go back to Settings > ZTA > Applications > Applications > SaaS.
-
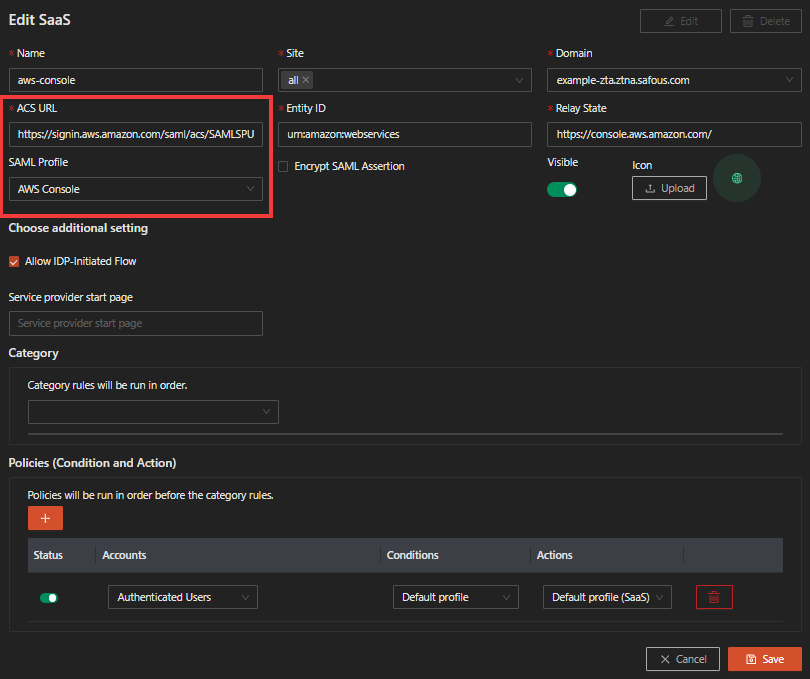
Click the Edit button on the SaaS application you created before
-
Replace the ACS URL with the URL you copied
-
Select the SAML profile you just created for the SAML Assertion content
-
Click Save
Verify SSO works
-
Go to the user portal
-
Click on the SaaS app
-
Verify now you can access the AWS management console by assuming IAM role you have created
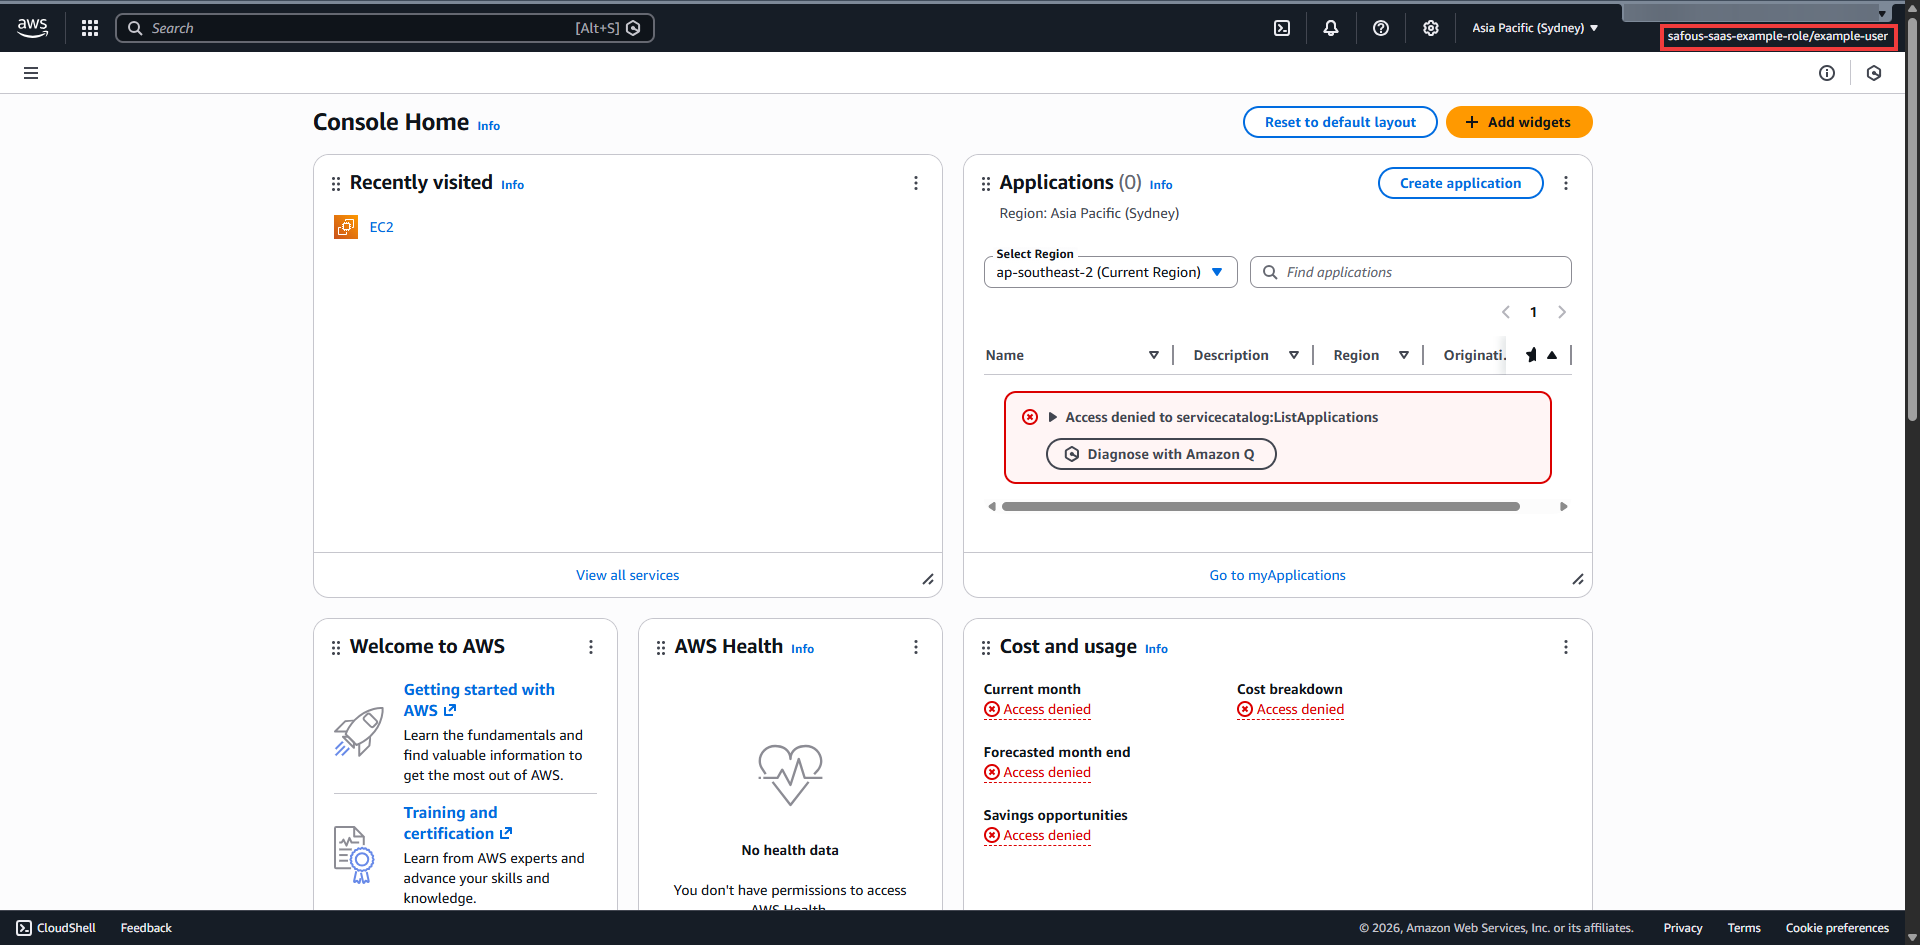
-
In case you get access denied on some services, then please adjust the applicable policies for the IAM role to allow access to the respective services.