How to migrate ZTA to PRA
This article provides information to migrate the ZTA (Zero Trust Access) service to the PRA (Privileged Remote Access) service.
For migration
- App Gateway version 6 is required.
- If your environment is using App Gateway 4 or 5, upgrade to version 6 first => How to upgrade App Gateway version 4 or 5 to 6.
- For migration, the following tasks will be performed:
- Migrate to PRA on the Admin Portal.
- Migrate to PRA on the App Gateway's servers.
- After migration,
- Cannot rollback service to ZTA because ZTA service is already discontinued.
- ZTA service will be removed from your tenant after 2 week later.
- ZTA service will be read-only on the Admin Portal.
- Please use PRA's Admin console. It's on the User Portal.
Migrate Procedure
Migrate to PRA on the Admin Portal
- Login to the Admin Portal => Accessing Admin Portal.
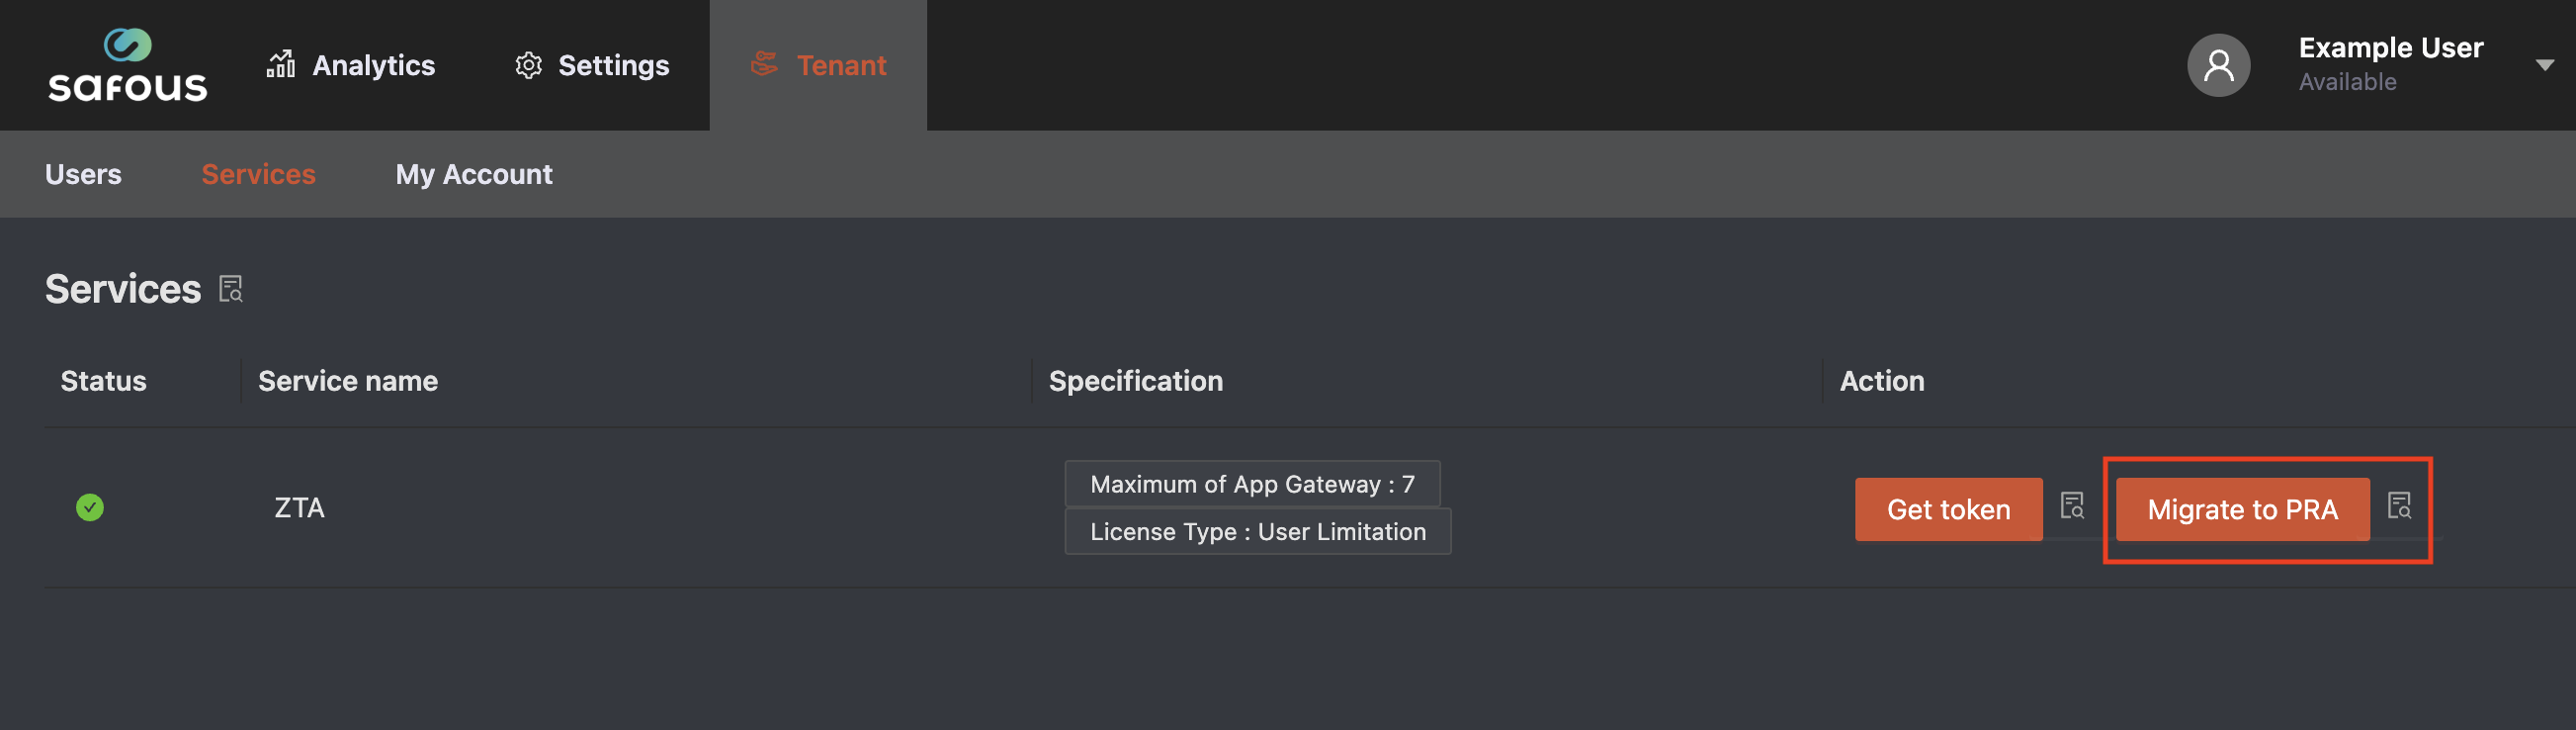
- Go to Tenant / Services.
- Click "Migrate to PRA" button.
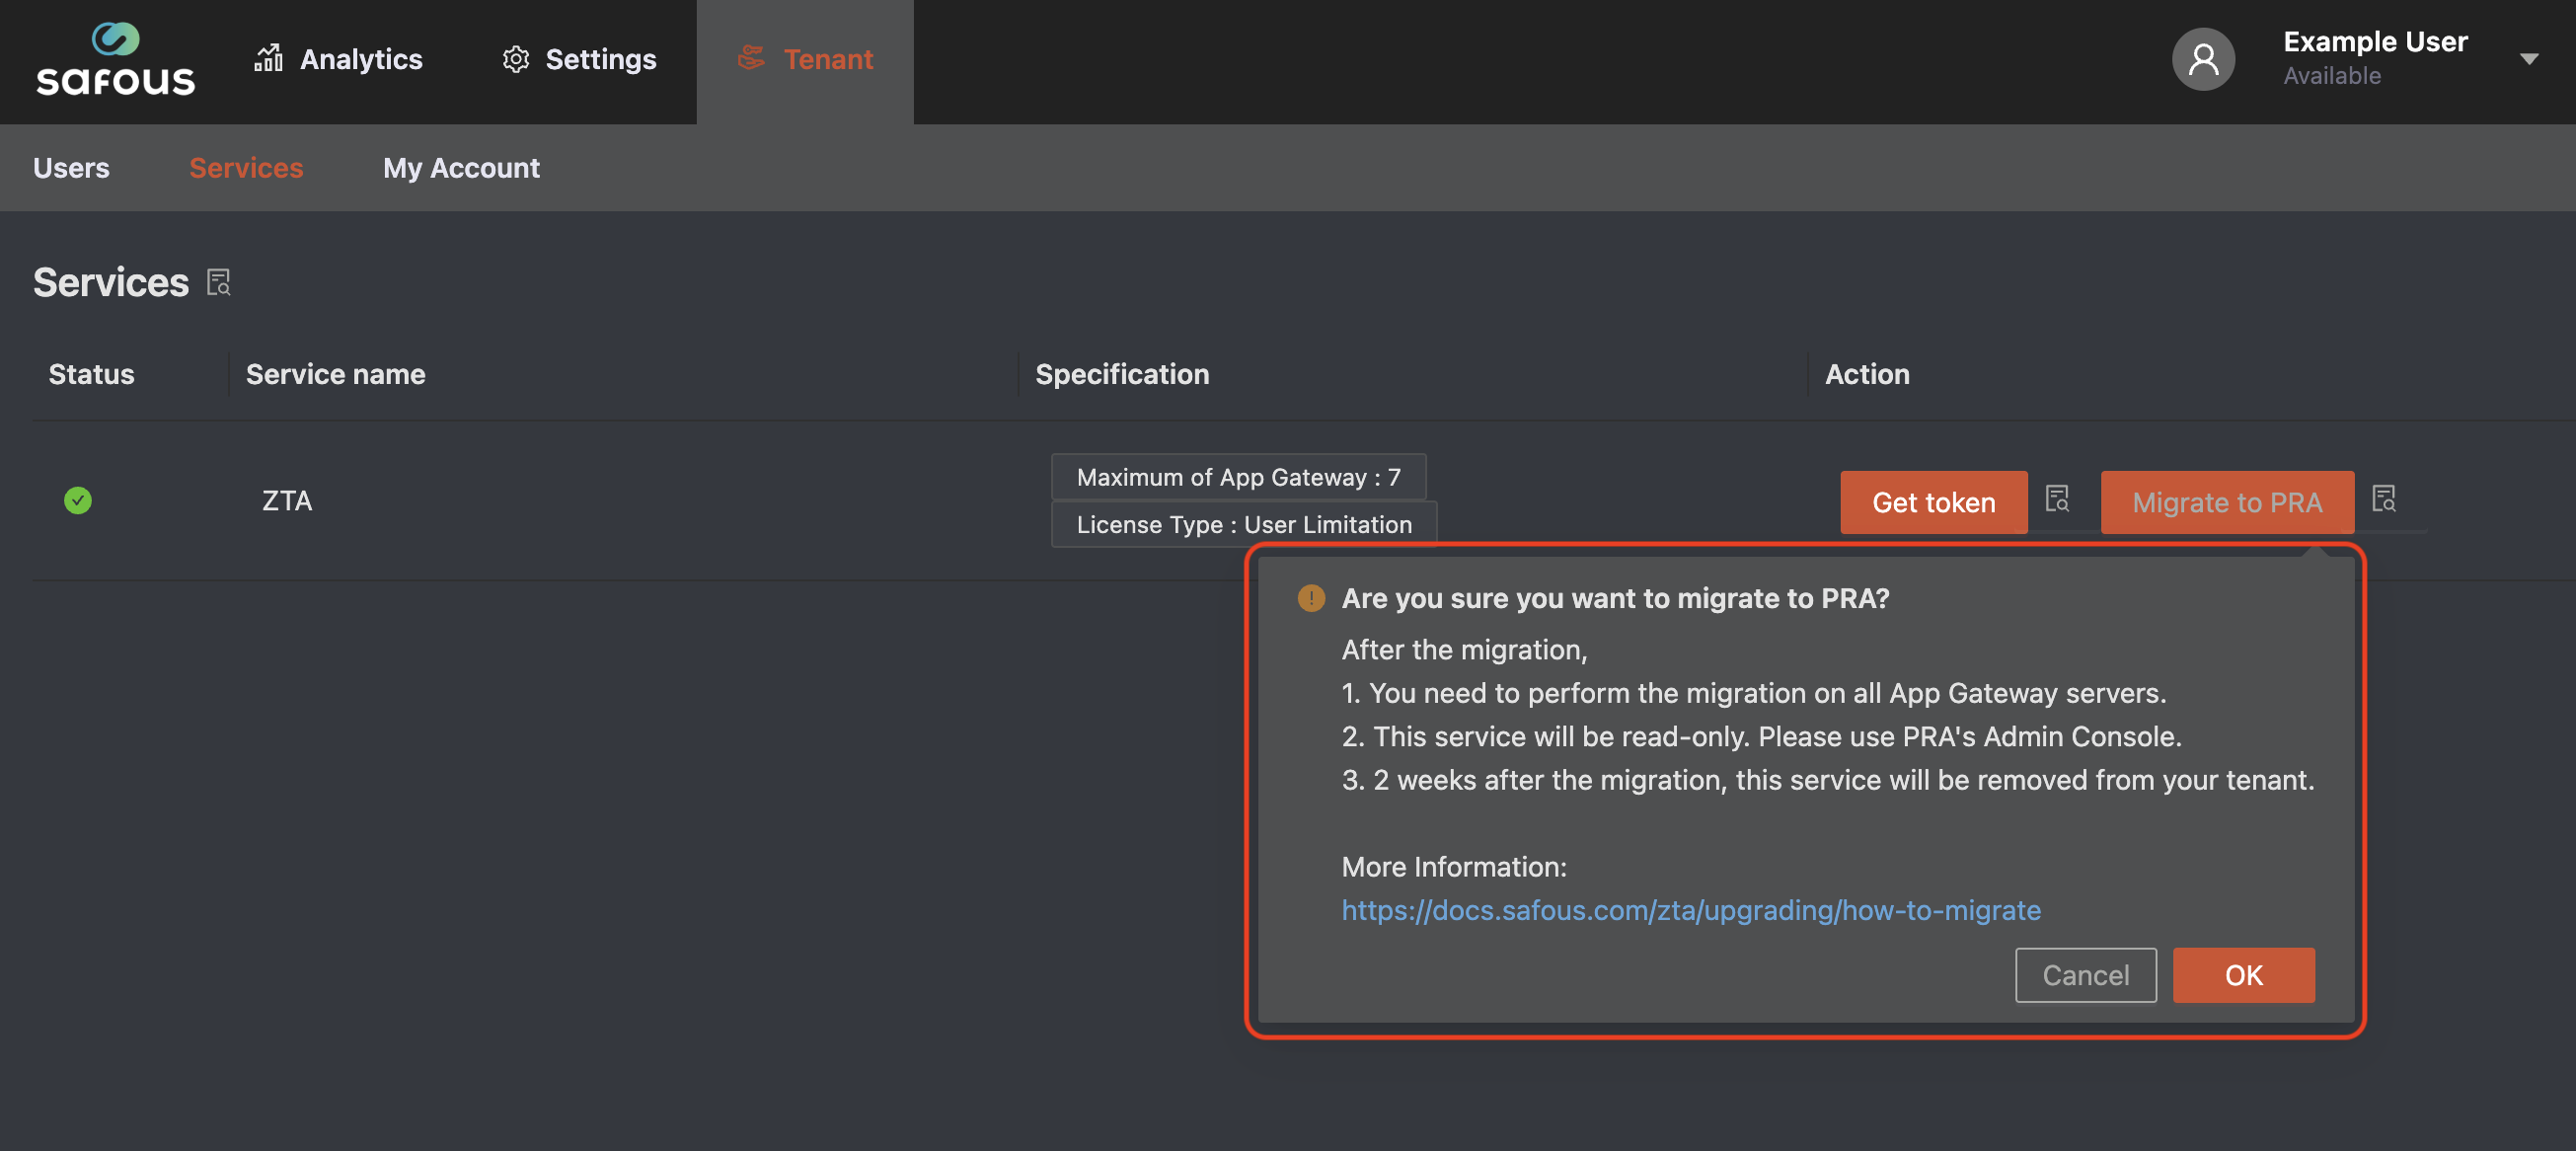
- Displays confirmation. Click "OK" button if you want to migrate to PRA.
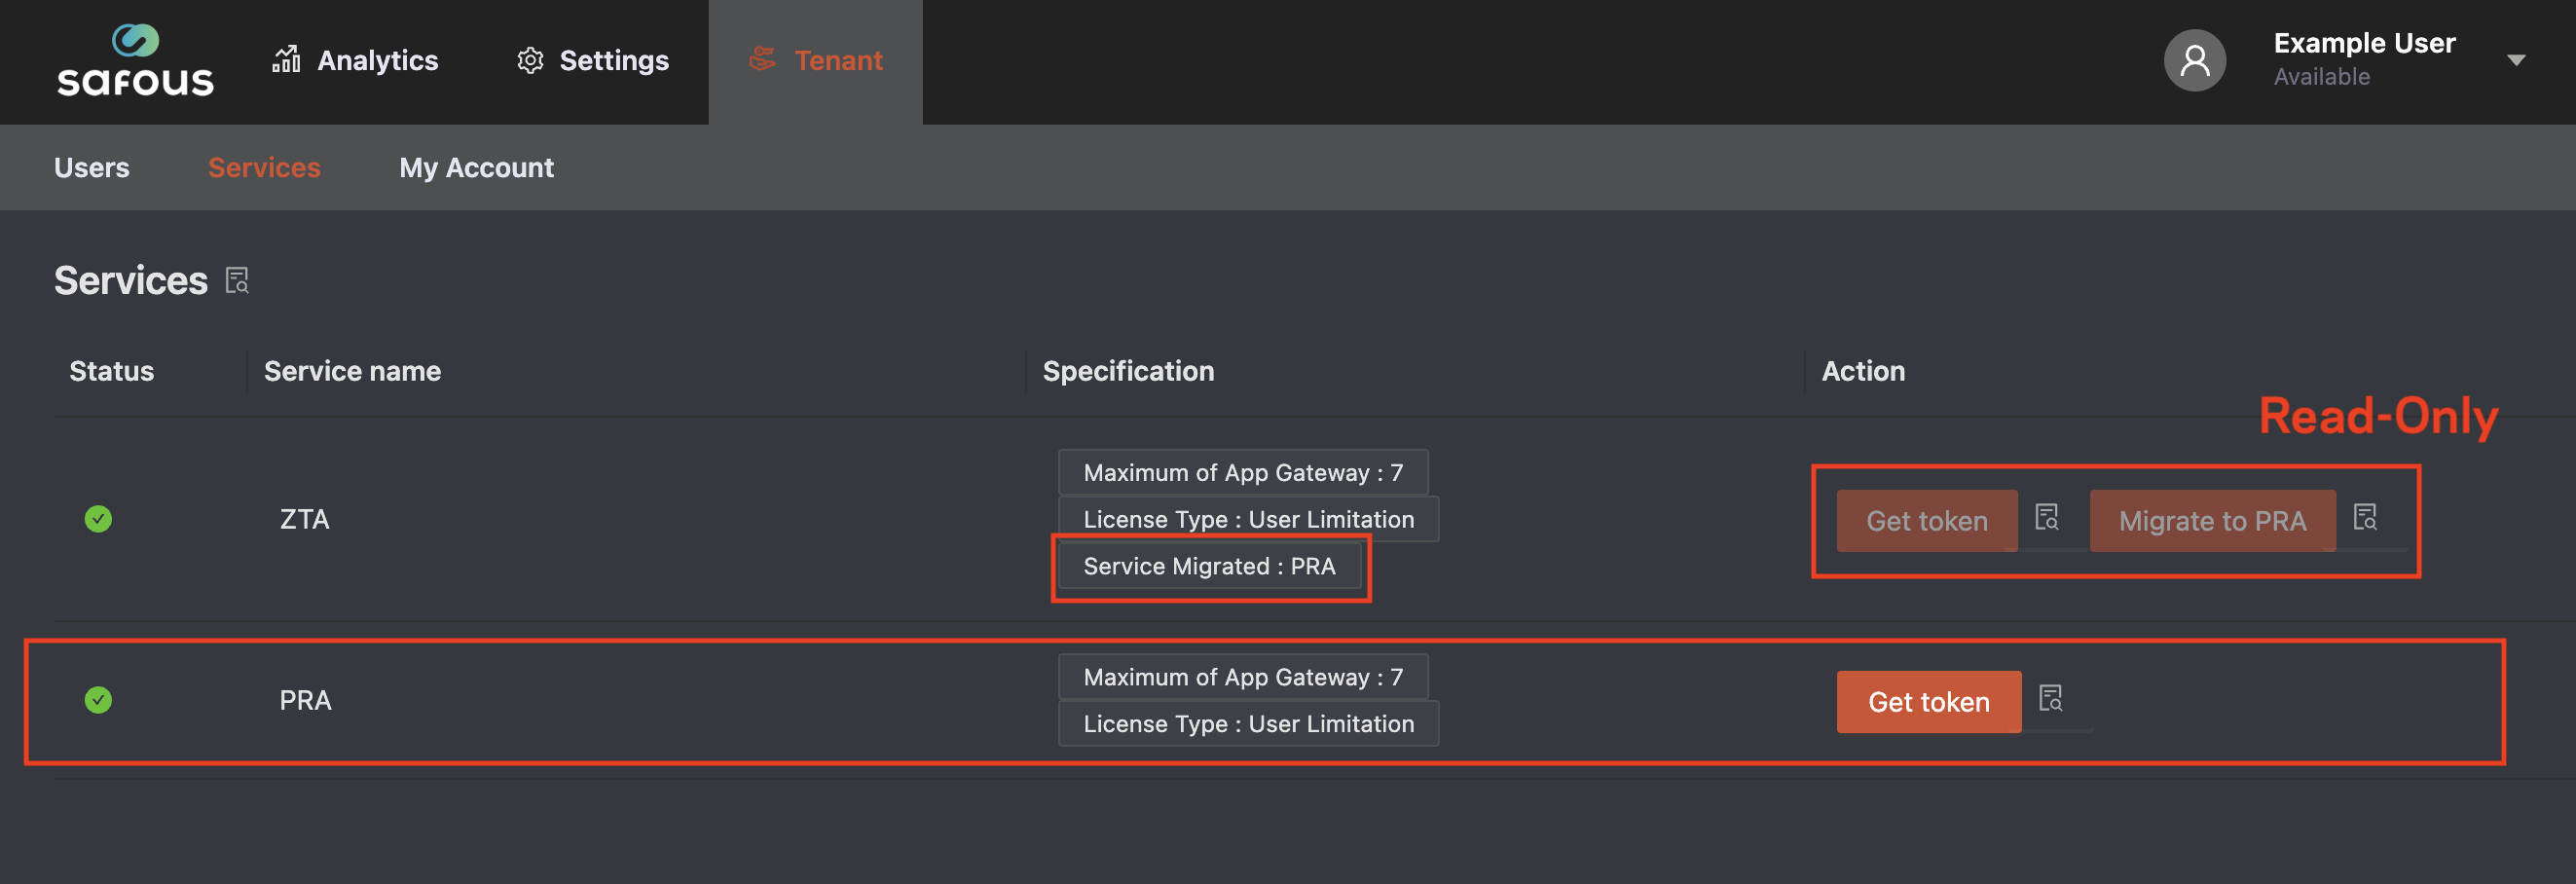
- Once the migrate to PRA is complete, PRA service is displayed and ZTA service is displayed "Migrated service: PRA" and it's Read-only.
Migrate to PRA on the App Gateway's servers
All App Gateways need to perform the following procedure.
- Login to an App Gateway's server
- Start Safous CLI Menu
sudo safous - The following is Safous CLI Menu. Perform "[6] Migrate to PRA".
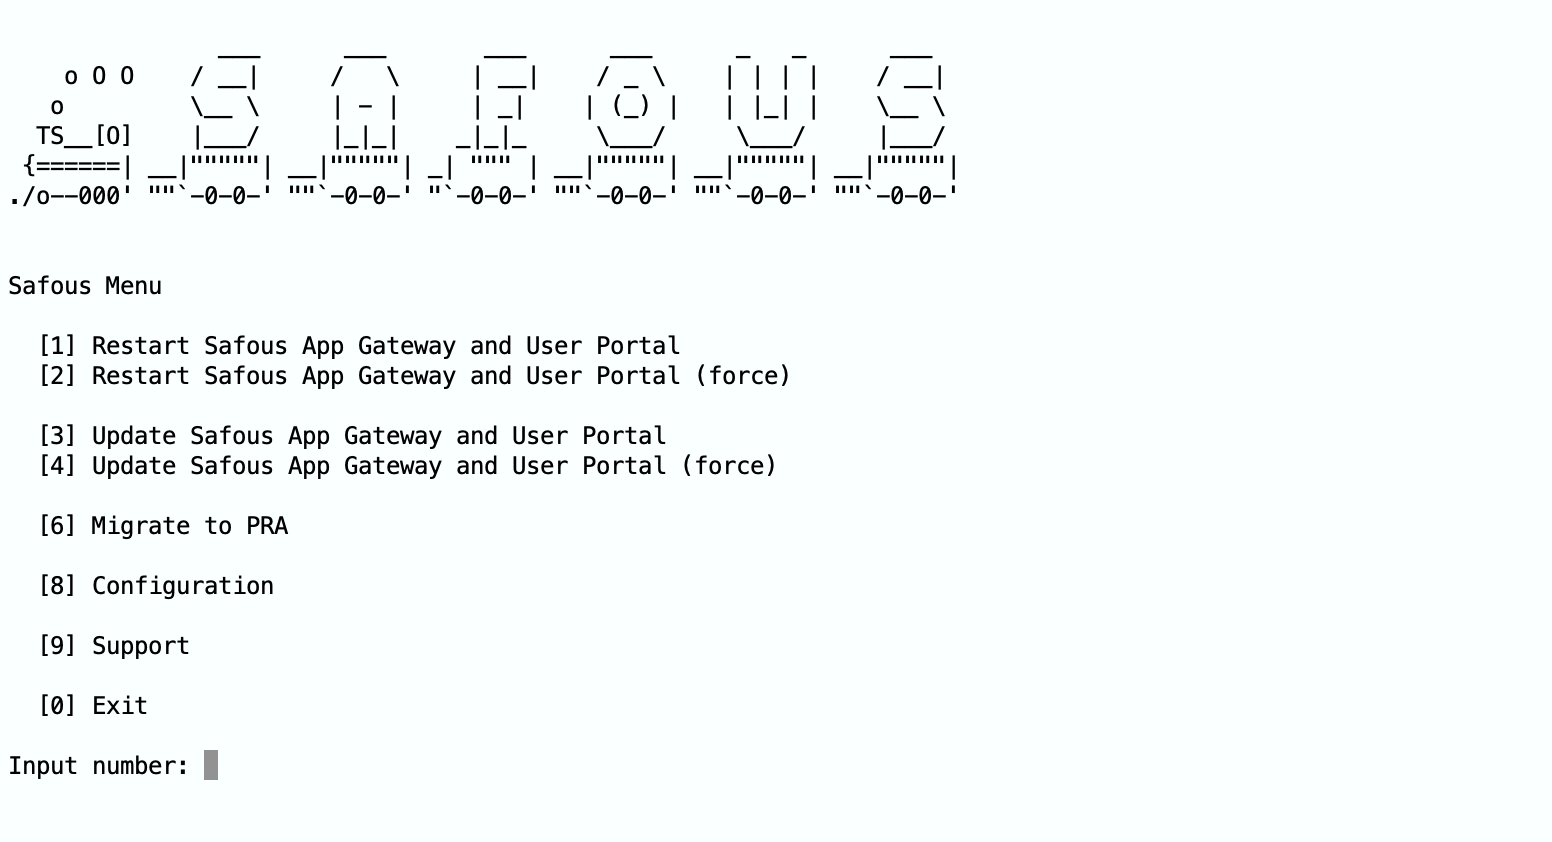
Input "6" and enter key. - Safous CLI Menu displays confirmation as the following

Input "Y" and enter key. - Once the migrate to PRA is complete, Safous CLI Menu will display the following.

Input enter key. - Backed to Main Menu. Input "0" and finish Safous CLI Menu.
PRA Admin Console
How to access to PRA Admin Console
How to reset the System Admin's password and enrollment
If you forget System Admin's password (or MFA's secret), please do the following.
- Login to the Admin Portal => Accessing Admin Portal.
- Go to Settings / PRA / Configurations / System Admins.
- Click [ + ] button of admin user.
- Click "Reset Password" button if you want to reset password.
- Click "Reset Enrollment" button if you want to reset enrollment.