Adding and Importing Assets
Adding Assets
To add a new Asset:
-
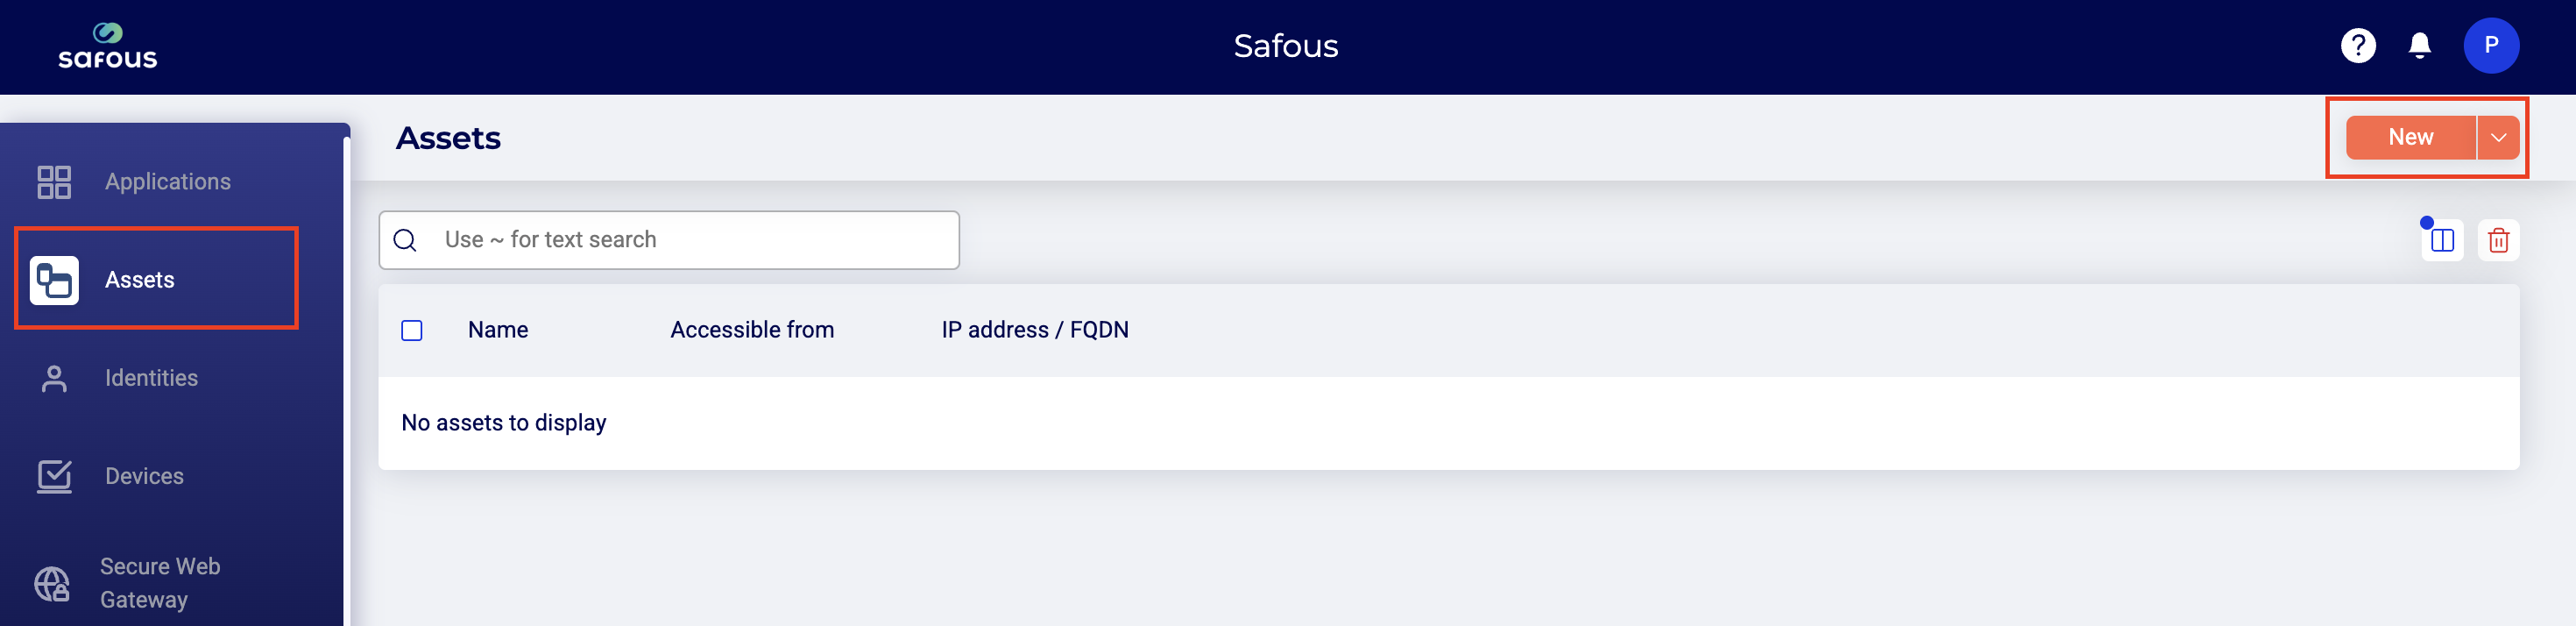
Select Asset and then click New.
-
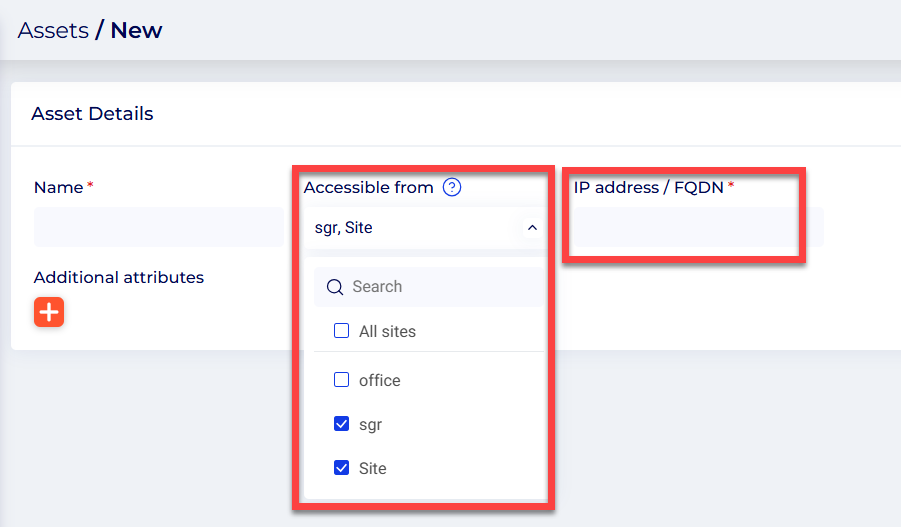
Select one or more sites from which this Asset may be accessed and enter an IP address or domain name (FQDN).
-
Click Save.
Importing Assets
In addition to the ability to add Assets one at a time, the admin console also supports import of a CSV file with Asset details.
To import Assets:
-
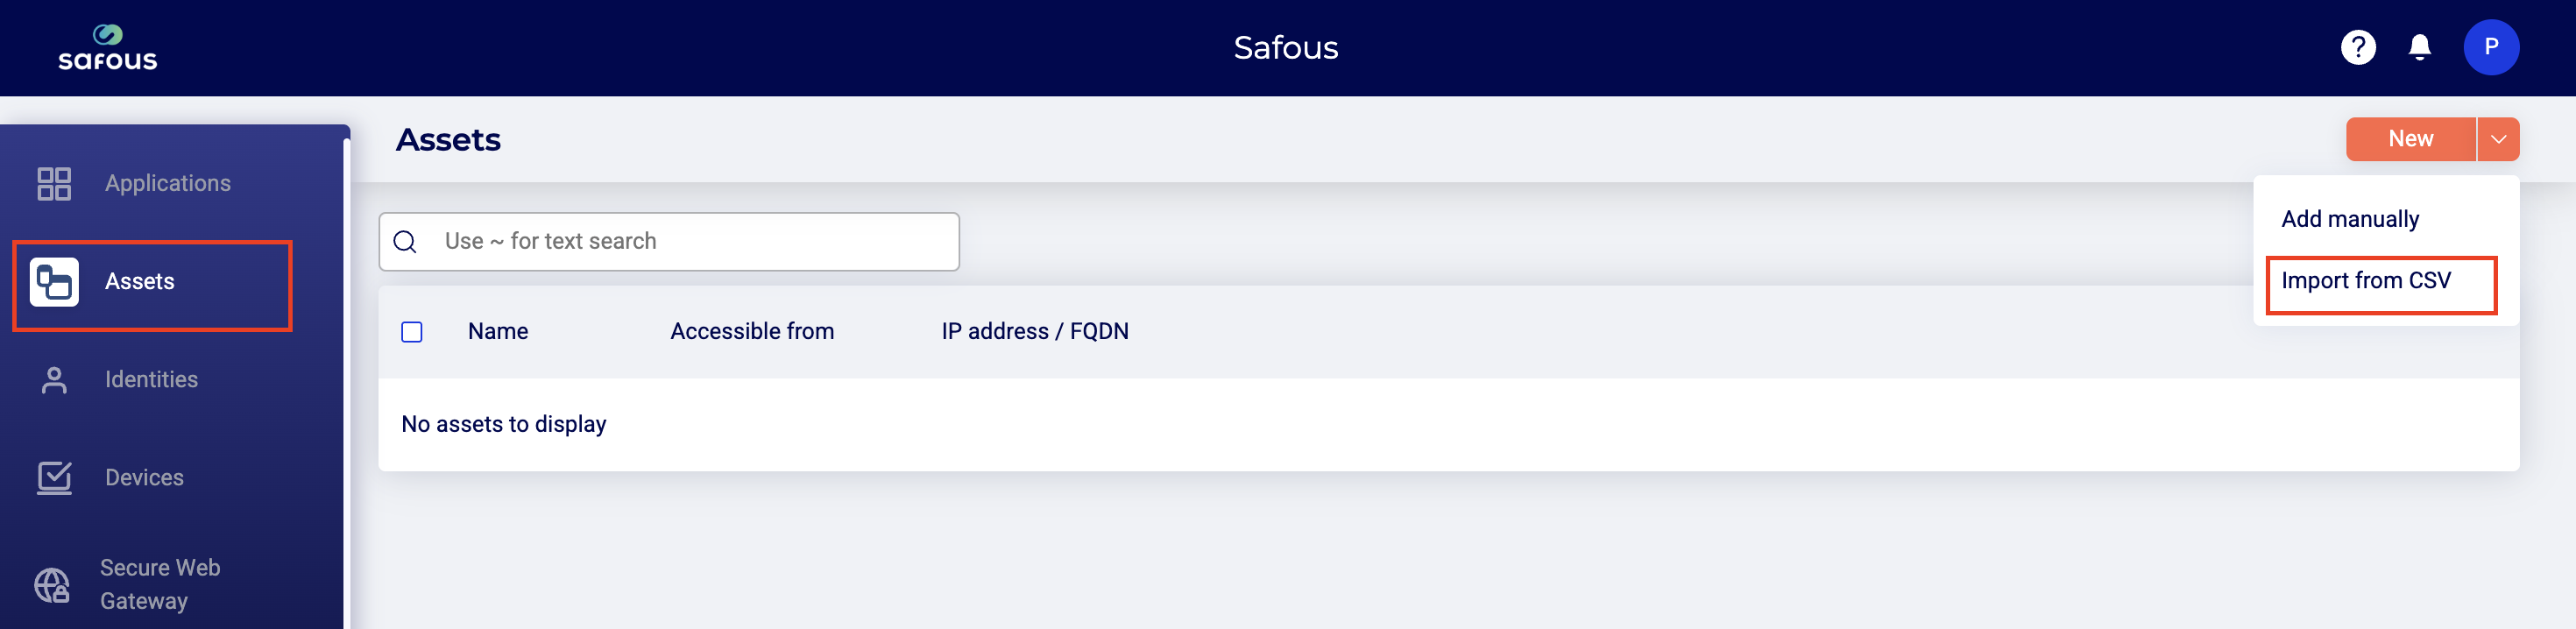
From Assets, select New and then Import from CSV.
-
Browse to select a CSV file and then click Open.
-
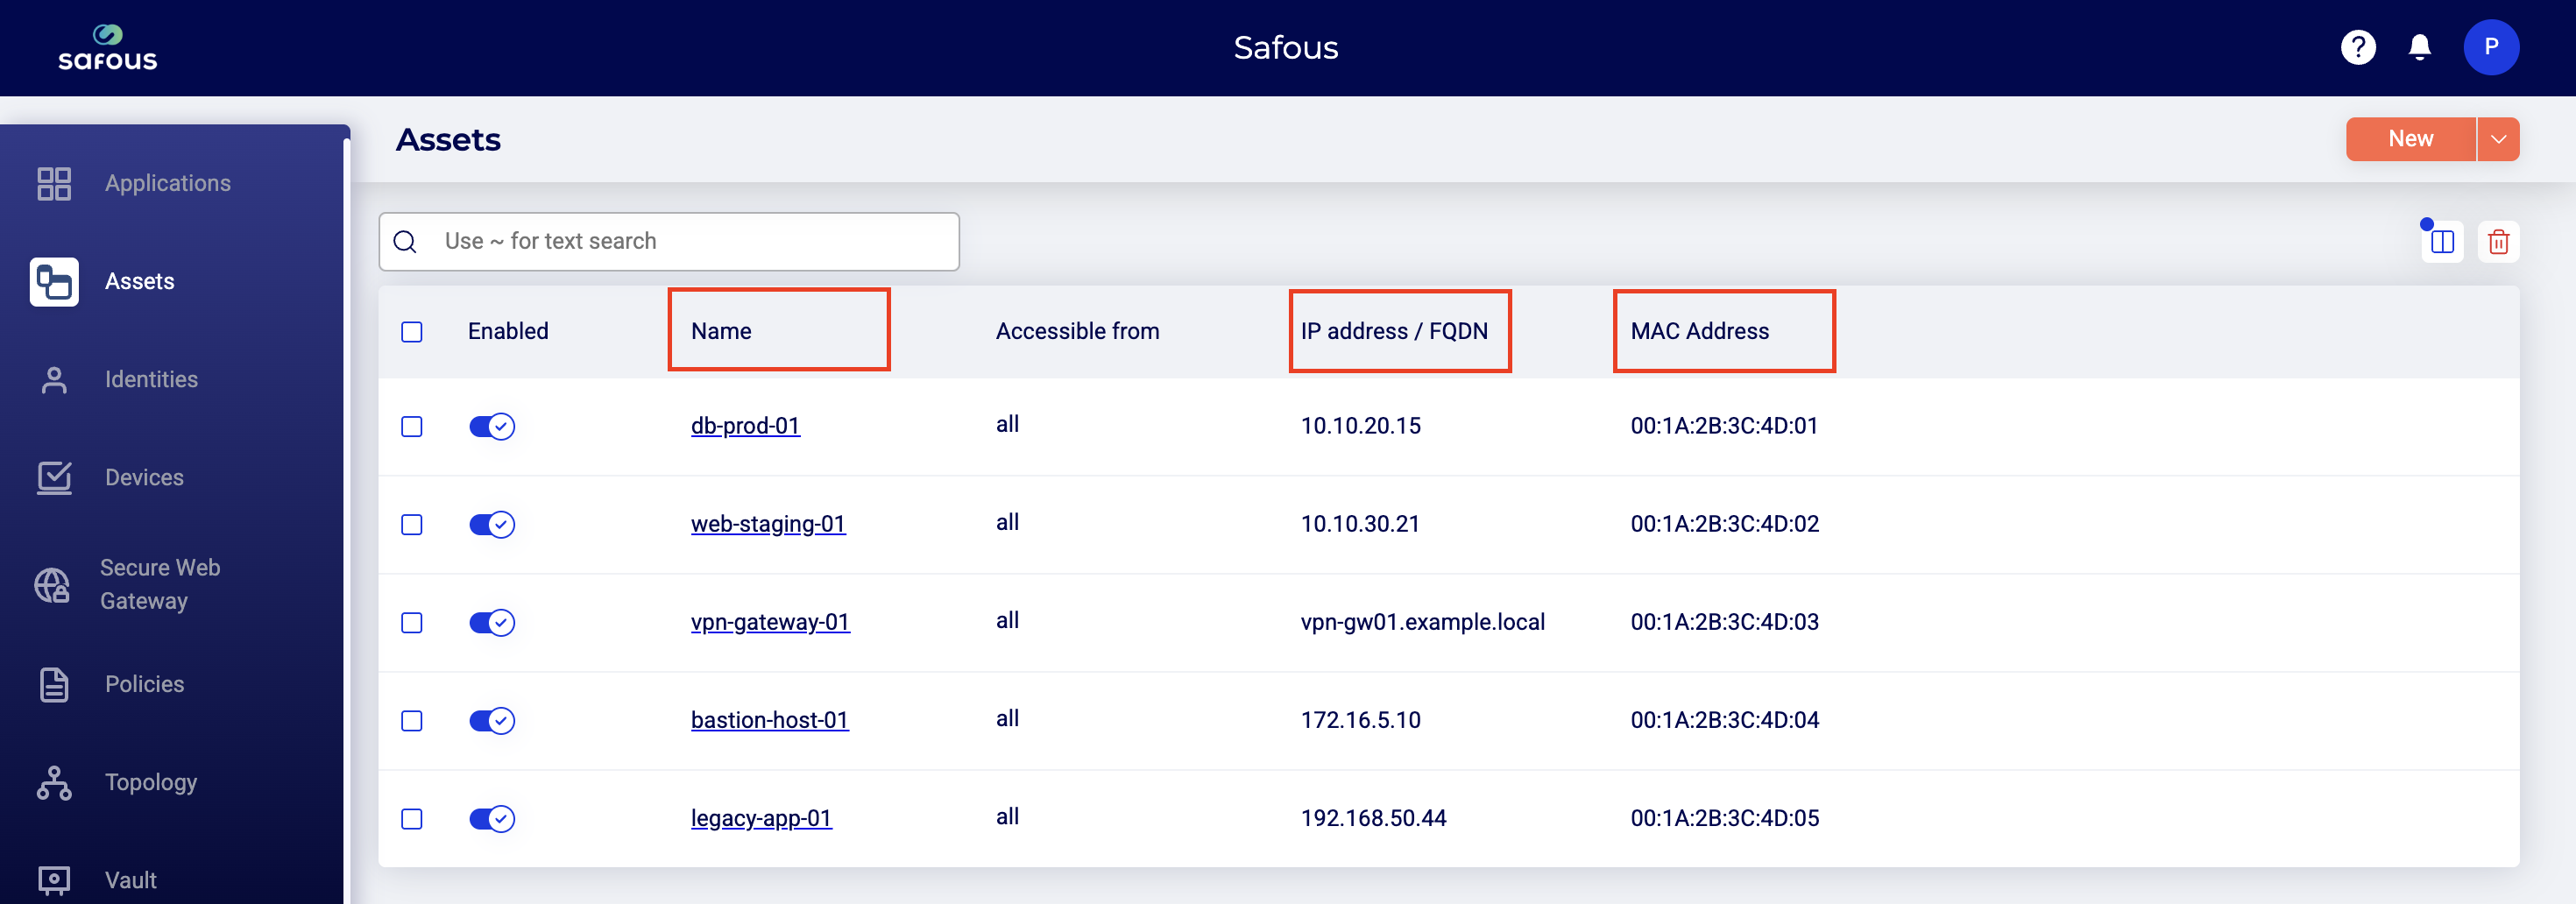
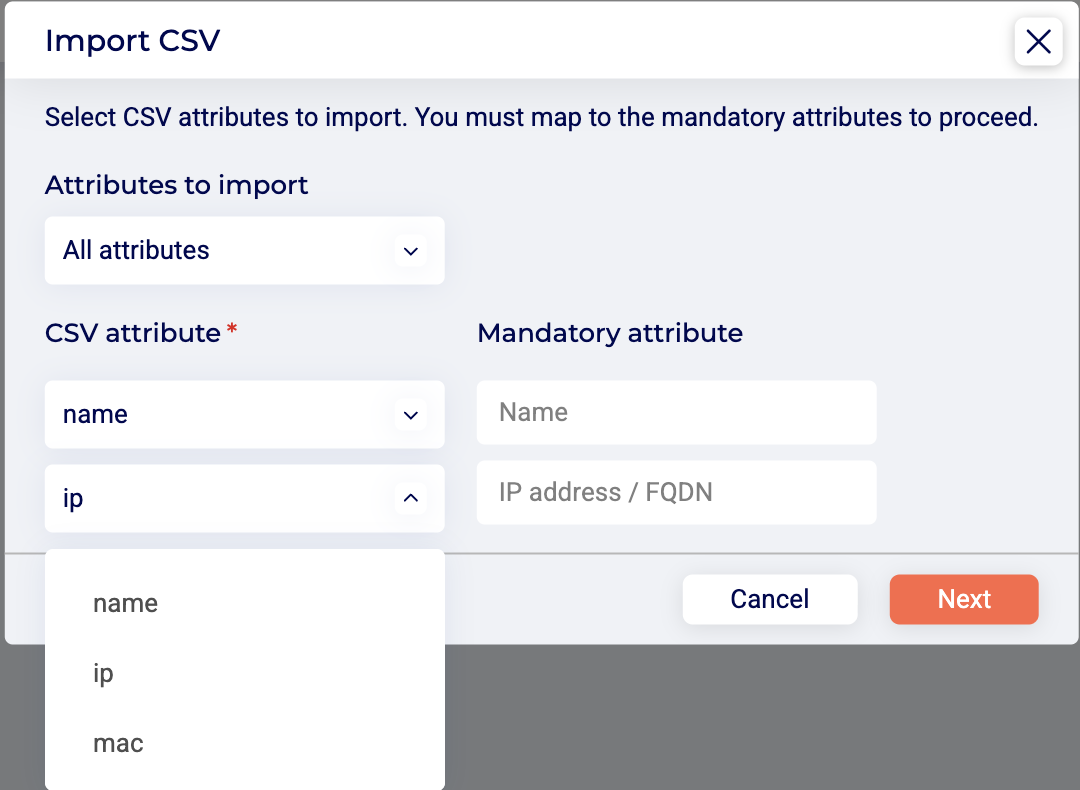
Map CSV columns for Asset Name and IP Address. In the example below, the CSV attribute for Name is "name" and the CSV attribute for IP Address is "ip".
 note
noteYour CSV file may contain entries for new Assets, as well as Assets (or Applications) that you have already defined in the system. To help the system determine if an Asset in the CSV file already exists, it is helpful to define identifier keys (in addition to Name and IP).
-
You have the option of mapping additional keys. This is useful to ensure that each Asset listed in the file is accurately identified. In the example below, the CSV attribute is mapped to the MAC address attribute.
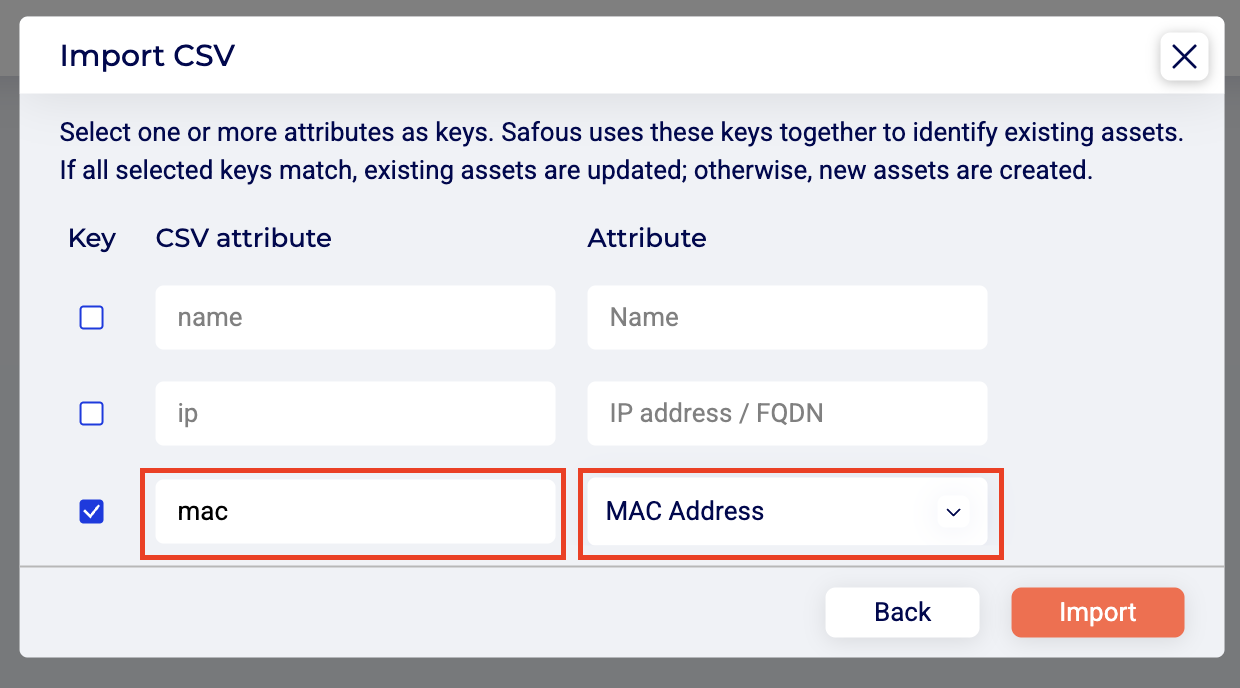
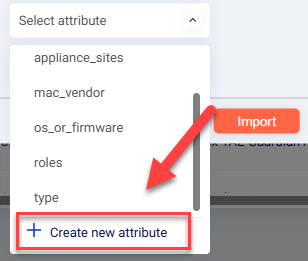
If necessary, you can create new attributes for this purpose.
-
Click Import.
-
The Import process takes a few minutes. When it is complete, you will see the imported Assets, and their attributes listed on the Assets page.